Time45 min active + overnight rise + 1–1½ hr proofing + 25–27 min baking
Makes12 rolls
Recipe notesRead before cooking
Tastefully Planned,
Joyfully Cooked.

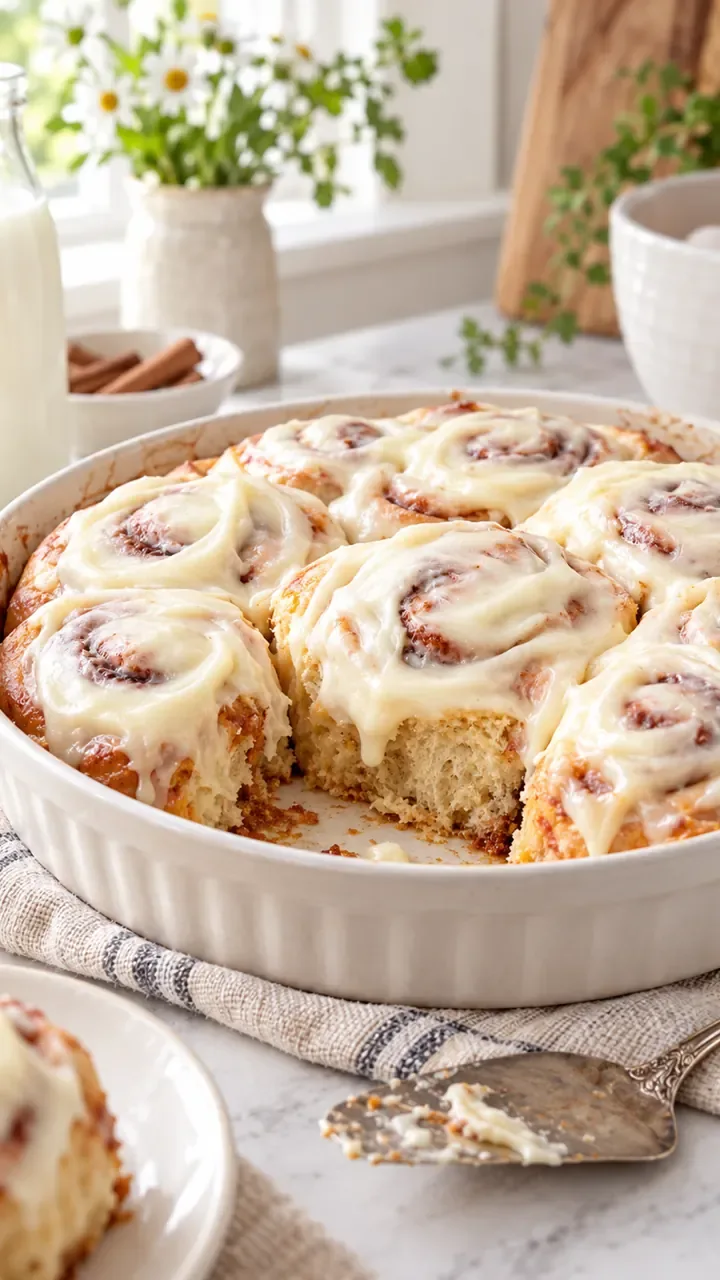
Make overnight sourdough cinnamon rolls with an active starter and enriched dough. Allow a patient rise, then finish with cream cheese frosting.

Let the dough have a say
Cinnamon rolls ask for a different kind of planning than a quick breakfast. Most of the work doesn't happen while you're holding the bowl; it happens while the starter lifts an enriched dough and the shaped rolls become puffy. The cinnamon swirl and cream cheese frosting are the inviting finish, but the rise deserves just as much attention. A clock helps organize the day, while the dough tells you whether it is ready for the next stage.
I like approaching a pan of twelve rolls as a project with a clear beginning and end. Read through the overnight rise, second proof and baking time before starting, and make sure the morning has room for the dough to move at its own pace. The reward isn't a promise that sourdough will follow a perfect schedule. It's understanding the stages well enough to make thoughtful decisions instead of trying to rush an under-risen dough into the oven.
Step 1: Start with an active starter
This recipe calls for active, freshly fed sourdough starter, not a spoonful of neglected discard taken straight from a jar because both have the same name. Look for a starter that has risen well and is bubbly after feeding. It needs to do the lifting in a dough that includes butter, milk, eggs and honey. If the starter hasn't shown useful activity before mixing, a precise overnight timetable can't make up for that weak beginning.
Starter consistency also affects how the dough feels. A looser starter contributes a different amount of moisture than a stiff one, which is why the method asks you to rest the shaggy dough before deciding whether it needs extra flour. Don't treat the flour quantity as an invitation to keep adding until the dough feels dry. The first mix isn't the final texture, and a short pause gives the flour time to take up the liquid already in the bowl.
Arrange the ingredients by their jobs
Milk, honey, eggs and cooled melted butter join the starter in the dough, with salt and flour bringing it together. Keep the melted butter cool enough that it is no longer hot before mixing, as the card directs. The filling uses softened butter instead, and the frosting uses softened butter and room-temperature cream cheese. Those are different states for different jobs; a little organization keeps you from melting the butter intended for the swirl.
Measure the filling and frosting ingredients separately from the dough ingredients if that helps you see the whole project. Brown sugar belongs in the swirl, while honey sweetens the dough and powdered sugar goes into the frosting. Ordinary bowls will do; organize the ingredients so you can clearly see which belong to each stage. All-purpose flour is one listed choice. Replacing half with bread flour is an alternative if it fits your pantry, so check which option you plan to use before measuring.
Step 2: Give the shaggy dough its rest
When the flour first goes in, expect a shaggy dough rather than a silky ball. Mix enough to bring the ingredients together, then use the fifteen-minute rest in the method. Dry-looking spots and stickiness can change during that pause as the flour hydrates. Scraping the bowl neatly at this stage is useful; aggressively kneading immediately because the dough doesn't yet look polished ignores the purpose of the rest.
Afterward, assess with clean hands and a little patience. The dough should become more cohesive as you knead, not simply disappear under repeated handfuls of flour. If it is especially sticky, use the method's guidance about starter consistency and make any flour decision cautiously. An enriched dough can be soft without being a failure. The rolls need enough structure to hold a swirl, but excess flour can move them away from the soft texture the recipe is built to provide.
Step 3: Knead for elasticity, then observe
The kneading time in the card gives you a useful working window, with elasticity as the goal. The dough should become smoother and more able to stretch rather than tearing immediately at every movement. Work on a stable surface and use a scraper if it helps you gather the dough without adding unnecessary flour. Butter and eggs make the dough feel different from a lean loaf, so don't expect it to behave exactly like a plain bread dough.
Place it in the lightly greased bowl and cover it for the first rise. Notice its starting height so nearly doubled has a visual meaning later. A bowl with enough room makes expansion easier to judge than a container already full to the rim. The rough overnight timing is a planning estimate, and room temperature and starter activity can change it. Moving on only because twelve hours have passed misses the expansion cue supplied in the recipe.
Step 4: Plan an overnight rise with flexibility
Choose a starting time that leaves room for the next morning's shaping and proofing, but don't build an inflexible breakfast deadline around an estimate. A cooler room can slow the rise, and an active dough can move differently from the last one you remember. Follow the nearly doubled cue rather than inventing a new proofing method or putting the bowl in a very hot spot to force the schedule. This dough needs observation more than a countdown alone.
Keep the dough covered so its surface doesn't dry while you wait. A dry skin is harder to roll into a smooth rectangle and can make the surface feel less forgiving. Use the waiting stage for the easy preparation that remains: locate the pan, clear the rolling area and check the filling butter's texture. There is no benefit in mixing extra filling before you know the dough is ready; having the measured ingredients and a workable surface is enough.
Step 5: Shape a rectangle with an even thickness
The specified rectangle gives a guide for both the size of the rolls and the distribution of the filling. Roll gently, checking the corners and center rather than stretching only the edges into a thin sheet. A roughly even thickness matters more than ruler-perfect corners. Very thin areas can tear or leave one part of the swirl much smaller than another, while a thick ridge makes uneven slices even when the log is divided carefully.
Spread the softened filling butter so it covers the surface without dragging or tearing the dough. It should be soft enough to move, not melted into a puddle. Scatter the cinnamon, brown sugar and pinch of salt evenly, taking care with the edges. The salt is a small ingredient but helps the filling taste fuller. Making a second batch of filling because one area looks sparse is less useful than distributing the measured mixture thoughtfully across the rectangle.
Step 6: Roll and divide with a gentle hand
Roll the filled dough into a log with enough structure to hold its shape, avoiding a loose hollow center or an overly tight squeeze that pushes filling out. Keep the log reasonably even along its length so the twelve portions have similar amounts of dough. Marking the divisions before cutting can help you see whether the center portions are getting too large. The end pieces may look a little different, which is ordinary in a hand-shaped roll.
Use a sharp cutting tool and avoid sawing until the log is flattened. Arrange the pieces in the greased nine-by-thirteen-inch pan as directed, with their cut sides showing the swirl. They still have a second rise ahead, so don't judge the finished size from this moment. Handle each piece gently enough to preserve its shape. A tidy swirl is pleasant, but forcing it back into a perfect circle can do more damage than leaving a slightly uneven one alone.
Step 7: Let the shaped rolls become puffy
The second proof is not a formality between slicing and baking. The rolls should become puffy, with the card's time range serving as a guide. Look for expansion in the shaped pieces rather than expecting them to remain compact and then somehow catch up entirely in the oven. An under-risen roll can look neatly shaped and still need more waiting. Give this stage space in the plan so the oven isn't being asked to solve a proofing problem.
Heat the oven to the stated temperature as the rolls approach readiness, and use the center rack for baking. That position gives a useful starting point for even heat in a home oven. Avoid opening the door repeatedly to check color, since frequent interruptions make the baking environment less steady. The top should become golden, and the center needs its own check; the outer edge of a pan often looks ready before the middle tells the full story.
Step 8: Bake the center, then make a smooth finish
The baking window and approximate center temperature in the card work together. A golden surface is inviting, but it shouldn't be the only cue for a pan of enriched rolls. Check the middle carefully near the stated baking time and look for the specified doneness rather than assuming the first browned corner means every roll is ready. Use a thermometer thoughtfully so you're checking dough instead of only the sugary filling between layers.
Beat the cream cheese, softened butter, powdered sugar, vanilla and salt into a smooth frosting. Starting with the ingredients at the textures given in the card makes that easier than trying to beat cold lumps into submission. Spread it over the warm rolls as directed. Warmth helps the frosting settle into the surface, while a smooth mixture lets you distribute the measured amount evenly. The roll, cinnamon swirl and tangy frosting should all remain part of the bite.
Serve twelve rolls with a clear plan
The recipe makes twelve rolls, which is useful to remember before beginning a large baking project for a small household. Decide who will enjoy them and how the pan fits into breakfast or another occasion without inventing a need to eat all twelve at once. A smaller first portion alongside fruit or the rest of breakfast can make sense depending on appetites. The recipe doesn't need extra toppings just because a pan of rolls looks celebratory.
Because the frosting contains cream cheese, put frosted leftovers into a covered container and refrigerate them promptly after serving. Follow safe storage guidance for the ingredients and use leftovers soon. Warm an individual portion gently if desired, expecting the frosting to soften. For freezing, wrap individual portions appropriately and expect some change in the frosting and roll texture after thawing. Thoughtful portions make the time and ingredients easier to enjoy fully.
I check the dough before I check the schedule. A cool room can make the first rise slow, and the shaped rolls need to look puffy before baking. Keep the butter for the swirl soft enough to spread, divide the log evenly, and have the frosting ready while the rolls are in the oven.
Joy.Make overnight sourdough cinnamon rolls with an active starter and enriched dough. Allow a patient rise, then finish with cream cheese frosting.
Tap each ingredient as it goes into your basket or bowl.
Follow the steps in order to make this recipe.
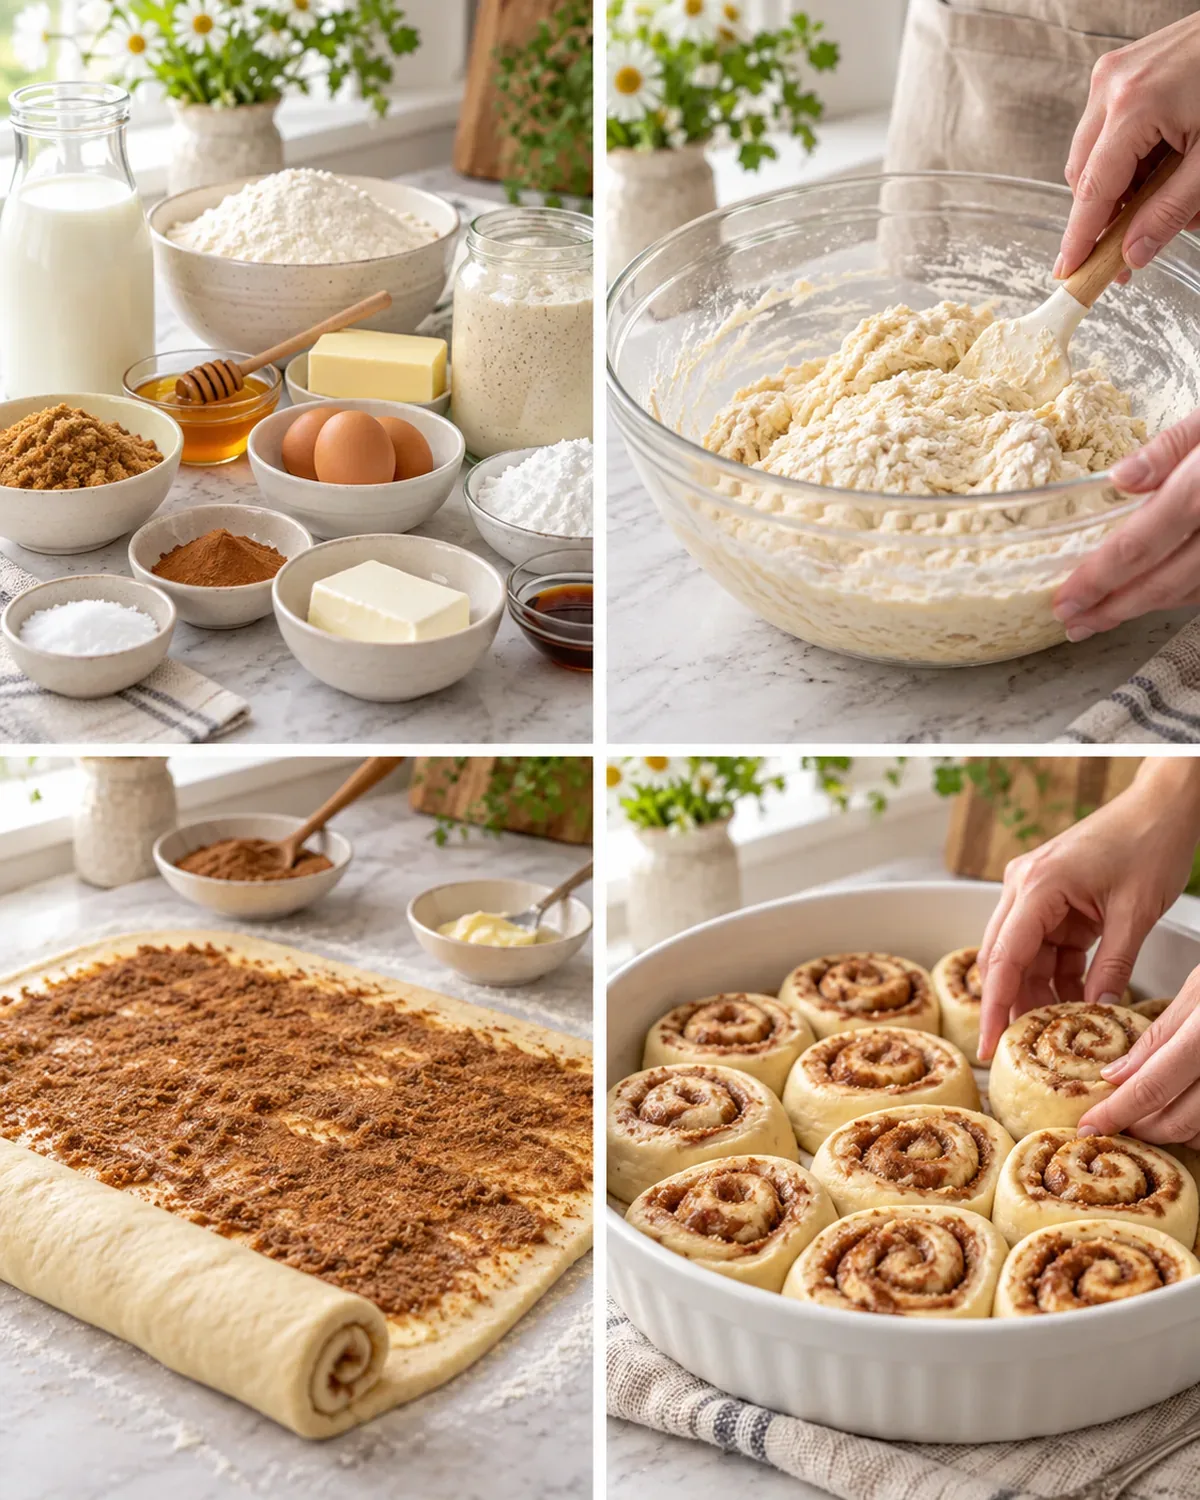
Use freshly fed starter that has risen well and is bubbly. Whisk it with the milk, honey, eggs, salt and melted butter that has cooled until no longer hot. Work in the flour until a shaggy dough forms. Starter consistency affects the dough, so let it rest before deciding whether it needs extra flour.
Rest for 15 minutes, then knead about 7–8 minutes until elastic. Place in a lightly greased bowl and cover. Let rise until nearly doubled, roughly 12 hours overnight. Room temperature and starter activity change the timing: a cooler room can take longer, so judge the expansion rather than moving on at the twelve-hour mark alone.
Roll the dough into a 12 × 16-inch rectangle. Spread with softened butter and scatter over the cinnamon, brown sugar and salt. Roll up, slice into 12 and arrange in a greased 9 × 13-inch pan.
Let the shaped rolls become puffy, about 1–1½ hours. Heat the oven to 375°F.
Bake on the center rack for about 25–27 minutes, until golden and about 200°F in the middle. Beat the frosting ingredients until smooth and spread over the warm rolls.
A little sizzle. A lot of very good dinner.

Fresh from the garden, ready for the table.
Consider this your farmers-market haul, in pasta form.
Make overnight sourdough cinnamon rolls with an active starter and enriched dough. Allow a patient rise, then finish with cream cheese frosting.
Joy’s kitchen note · I check the dough before I check the schedule. A cool room can make the first rise slow, and the shaped rolls need to look puffy before baking. Keep the butter for the swirl soft enough to spread, divide the log evenly, and have the frosting ready while the rolls are in the oven.