Time20 min prep + 20 min batch cooking + 2–24 hr marinating
Makes4–6 servings
Recipe notesRead before cooking
Tastefully Planned,
Joyfully Cooked.

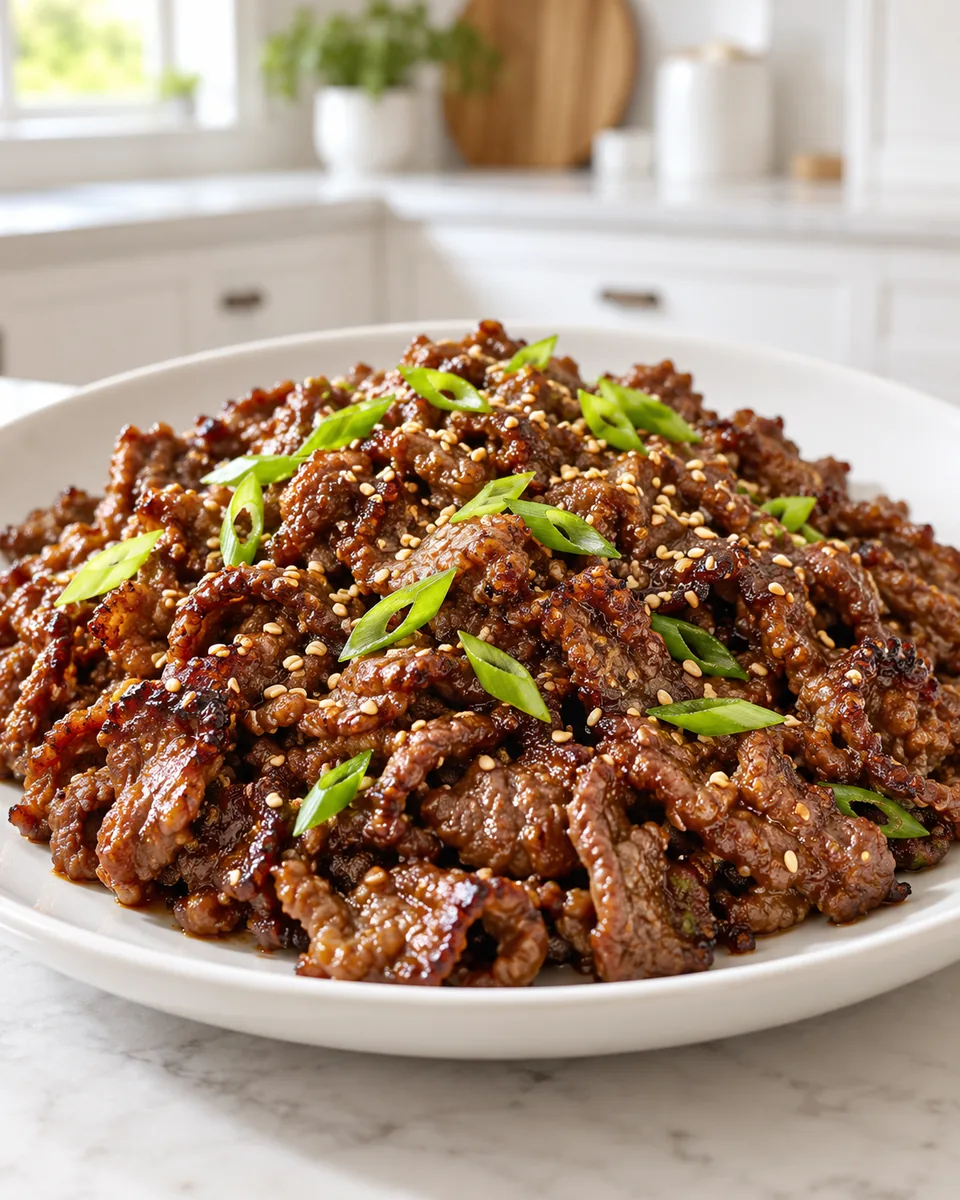
Marinate thin-sliced beef with pear for a savory-sweet bulgogi bowl. Cook in batches for browned edges and serve with rice and fresh sides.

A familiar flavor with a practical plan
Bulgogi is a familiar connection to my Seoul upbringing, and I like how naturally it can sit beside rice and a few fresh sides. Thin beef, a pear-based marinade and a hot skillet make a meal with clear contrasts: savory meat, sweet browned edges, crisp vegetables nearby. This version includes gochujang in the marinade, so there is a little warmth along with the soy, ginger and garlic.
The important planning decision comes well before the skillet. Allow the full two-to-twenty-four-hour marinating window, then leave enough cooking time to brown the beef in uncrowded batches. Neither job is especially complicated, but both deserve room in the day. When food costs make a beef purchase something to think through, I want to give it the care it deserves. A little room in the pan helps those thin slices develop their browned edges.
Step 1: Slice the beef thinly and evenly
Ribeye and sirloin are the choices in the card. They have different amounts of fat and different prices, so choose with both your budget and the meal in mind. The most important shared detail is the thin cut, about an eighth of an inch. Very uneven pieces make cooking less predictable: one is ready while another still needs time. If buying pre-sliced beef, look closely at the thickness through the package and choose pieces that match the thin cut described here.
If slicing a whole piece yourself, work with a sharp knife and a stable board, keeping raw meat separate from ready-to-eat ingredients. Notice the direction of the grain so the slices are pleasant to bite. Don't turn thin slicing into fine shredding; the pieces still need enough shape to lay against the skillet. A reasonable investment in knife work lets the short searing stage do its job without asking tender pieces to wait for much thicker ones.
Pear brings more than sweetness
Grated Asian pear or Bosc pear forms the fruit portion of the marinade. Each has its own texture and sweetness, so the finished marinade can vary a little with the fruit. Grate it finely enough that it spreads among the beef slices rather than sitting as a few large pieces in the bowl. The recipe already includes brown sugar, which means a sweeter pear isn't a cue to add extra sugar before you've even cooked the meat.
Pear is part of this marinade's character, along with soy sauce, garlic, ginger, sesame oil and gochujang. Keeping the fruit choice within the card avoids turning the marinating behavior into a guess with a much more aggressive substitute. You don't need a different fruit simply because it happens to be nearby. If there is pear left after measuring, plan to eat it fresh or use it in another meal while it is still appealing, rather than grating the whole fruit automatically.
Step 2: Mix the marinade before the meat goes in
Stir the marinade ingredients thoroughly first, breaking up the gochujang so the paste doesn't remain in one concentrated spot. Finely minced garlic and grated ginger help the flavor spread through the bowl. Sesame oil contributes aroma, while soy sauce supplies much of the salt. A well-mixed marinade makes coating the thin slices easier and reduces the temptation to keep handling raw beef because one area still looks unseasoned.
Use a clean bowl or food-safe container that can be covered in the refrigerator. Separate loosely folded slices so the marinade can reach them, but don't knead the beef into a dense bundle. Wash hands and utensils after handling it. If you want to taste the marinade's balance, do that before it touches raw meat and use a clean spoon. Once the beef is in, the liquid has a different handling requirement and isn't a ready-to-serve sauce.
Step 3: Let the refrigerator do the waiting
The card gives a minimum and maximum marinating period, which is helpful for planning around dinner rather than trying to guess a last-minute shortcut. Cover the beef and keep it refrigerated throughout that time. A long countertop rest isn't a substitute for marination under refrigeration. Arrange the container where it won't drip onto other foods, and take it out for the cooking stage when the skillet and clean equipment are ready.
Use the waiting time for the parts of the meal that don't benefit from a rushed finish. Rice can have its own schedule, lettuce can be washed and dried, and fresh sides can be prepared with clean tools away from raw meat. This turns the marinade from an inconvenient pause into a chance to organize the meal. Keep the two-to-twenty-four-hour range in view rather than assuming an extra day always improves a thin cut of beef.
Step 4: Drain for browning, not dryness
Just before searing, drain the excess marinade as the method directs and keep that extra liquid separate. The beef should remain seasoned, but a stream of liquid entering the skillet lowers the heat and makes a simmer more likely. Lifting the slices out in manageable portions helps you see how much is heading toward the pan. You aren't trying to wash off the marinade or squeeze the meat dry; you're removing the loose excess.
Set out a clean plate for cooked beef before starting. The plate or tools used for the raw slices should not become the resting place for a finished batch. Keep the reserved marinade in its own container and decide whether you will use it at all. There is no need to add it back simply because it exists. If you do serve it, follow the card's full-boil instruction in a separate saucepan before it becomes part of the meal.
Step 5: Give each batch a hot surface
Heat a little of the high-heat oil in a large skillet over medium-high and lay the beef in a single layer. Leave enough space that you can turn pieces without uncovering a second hidden layer. Thin beef cooks quickly, and its pear-and-sugar coating can brown readily. That makes attention useful: you want cooked meat and browned edges, not a dark coating around pieces that were piled too deeply to sear properly.
The approximate per-side time in the card is a guide for the specified thin slices. Watch the pieces and cook them through, adjusting for their thickness and your pan. When one batch is finished, transfer it with clean utensils and let the skillet recover before the next batch. A small amount of patience between batches usually serves the texture better than adding the next cold pile while the pan is still full of liquid from the first.
Understand steam versus sear
A crowded skillet can make plenty of noise while the beef is still cooking mostly in its own released liquid. Look at the surface instead of relying on the sound alone. If liquid is pooling and the pieces are gray with little contact against the pan, smaller batches are the useful correction. Turning the heat to maximum beneath a deep pile can burn the bottom coating without giving the upper slices their browned edges.
A large pan is helpful, but it doesn't remove the need to portion the meat. Keep the remaining raw beef refrigerated while you work through a longer sequence if needed. Avoid repeatedly pressing the slices hard against the surface; contact matters, but squeezing them doesn't create more room. The best result comes from a clear layer, a hot pan and a short, attentive cook. Once a batch is done, it doesn't need to remain in the skillet for the sake of matching the next one.
Step 6: Finish with a lighter hand
Green onions and toasted sesame seeds bring fresh and nutty notes after the beef is cooked. Slice the scallions thinly enough to scatter easily, and have them ready before the last batch comes off the heat. Red pepper flakes are to taste, giving people another chance to choose a stronger finish. Since gochujang is already in the marinade, a restrained final sprinkle may be enough even for someone who likes a little heat.
Taste the cooked beef before adding any optional sauce. Soy, sugar and fruit concentrate on the surface during cooking, so the beef may already have plenty of flavor. Reserved marinade that touched raw beef must come to a full boil before serving, as the method says. Don't drizzle it straight from the marinating bowl over the garnish. Keeping that step separate protects both the clean finish and the sensible handling of the meal.
Build the plate around more than the beef
Rice and lettuce wraps are the serving ideas in the card, and either gives the beef a useful setting. With rice, add fresh or simply prepared vegetables so the plate has crunch and variety alongside the savory slices. With lettuce, keep the leaves dry enough to hold and use a modest amount of filling. A lettuce leaf isn't stronger because the beef tastes good; it still needs room to fold without dropping everything.
The four-to-six-serving yield depends on appetites and what else is being served. I think of bulgogi as a main that can share the table, not a reason to fill every plate almost entirely with meat. That approach also makes a thoughtful beef purchase go where it is most enjoyable. People can take a smaller first portion, try it with the sides they prefer and come back for more, while the fresh accompaniments remain a real part of the meal.
Store for a meal you have in mind
Refrigerate cooked leftovers promptly in clean, covered containers and keep rice, lettuce and fresh sides separate. Use clean utensils for portioning, and plan to use the beef soon with ordinary safe leftover handling. Thin cooked slices can dry out if reheated repeatedly, so warm only what you expect to eat. Heat the portion until hot throughout rather than cycling the whole container in and out of the refrigerator for several meals.
For lunch, pack fresh crisp components separately from the beef, and keep perishable foods chilled until eating or reheating. Lettuce that sits under warm saucy meat won't keep the same texture. A clear lunch plan is part of economical cooking for me: enough beef for a good serving, room for rice and vegetables, and a container that will actually be eaten. The familiar flavor matters, and so does making it fit the ordinary day that comes after dinner.
Bulgogi connects my Seoul background with the family lunches I pack in America. Leave room for rice and fresh sides, not only the beef. For browned edges, cook in batches so the skillet doesn't get crowded and steamy. Remember that the 2–24 hour marinade is extra time. I like a main dish that leaves both of my children room to build a plate their own way.
Joy.Marinate thin-sliced beef with pear for a savory-sweet bulgogi bowl. Cook in batches for browned edges and serve with rice and fresh sides.
Tap each ingredient as it goes into your basket or bowl.
Follow the steps in order to make this recipe.
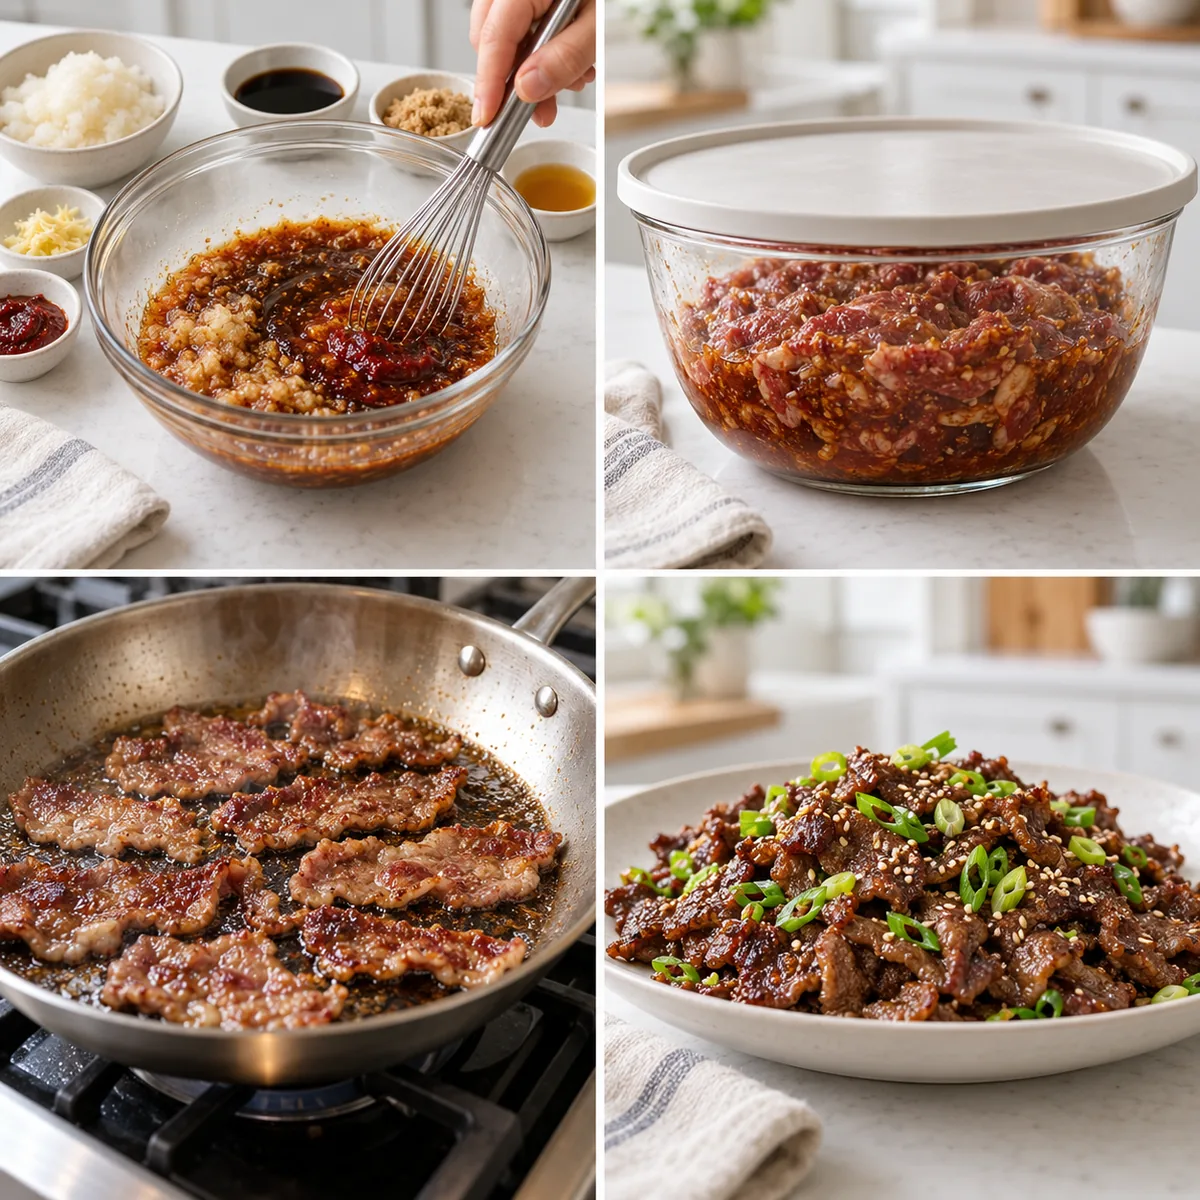
Stir grated pear, soy sauce, sugar, sesame oil, garlic, ginger and gochujang together.
Add thinly sliced beef, cover and refrigerate at least 2 hours or up to 24 hours. Drain excess marinade just before searing; keep the extra marinade separate.
Heat a little high-heat oil in a large skillet over medium-high. Lay the beef in a single layer and sear in batches, around 2 minutes per side, until cooked and browned at the edges.
If using the reserved marinade, bring it to a full boil in a saucepan before serving. Scatter over scallions and toasted sesame, then serve with rice or lettuce wraps.

Fresh from the garden, ready for the table.

Consider this your farmers-market haul, in pasta form.

Your favorite little pita pocket, with a glow-up.
Marinate thin-sliced beef with pear for a savory-sweet bulgogi bowl. Cook in batches for browned edges and serve with rice and fresh sides.
Joy’s kitchen note · Bulgogi connects my Seoul background with the family lunches I pack in America. Leave room for rice and fresh sides, not only the beef. For browned edges, cook in batches so the skillet doesn't get crowded and steamy. Remember that the 2–24 hour marinade is extra time. I like a main dish that leaves both of my children room to build a plate their own way.