Time30 min prep + 50 min baking + cooling and 3 hr chilling
Makes24 bars
CategoryDessert
Tastefully Planned,
Joyfully Cooked.

Tart lemon filling over a buttery shortbread base, with fresh zest for aroma and a make-ahead chill for neat slices.

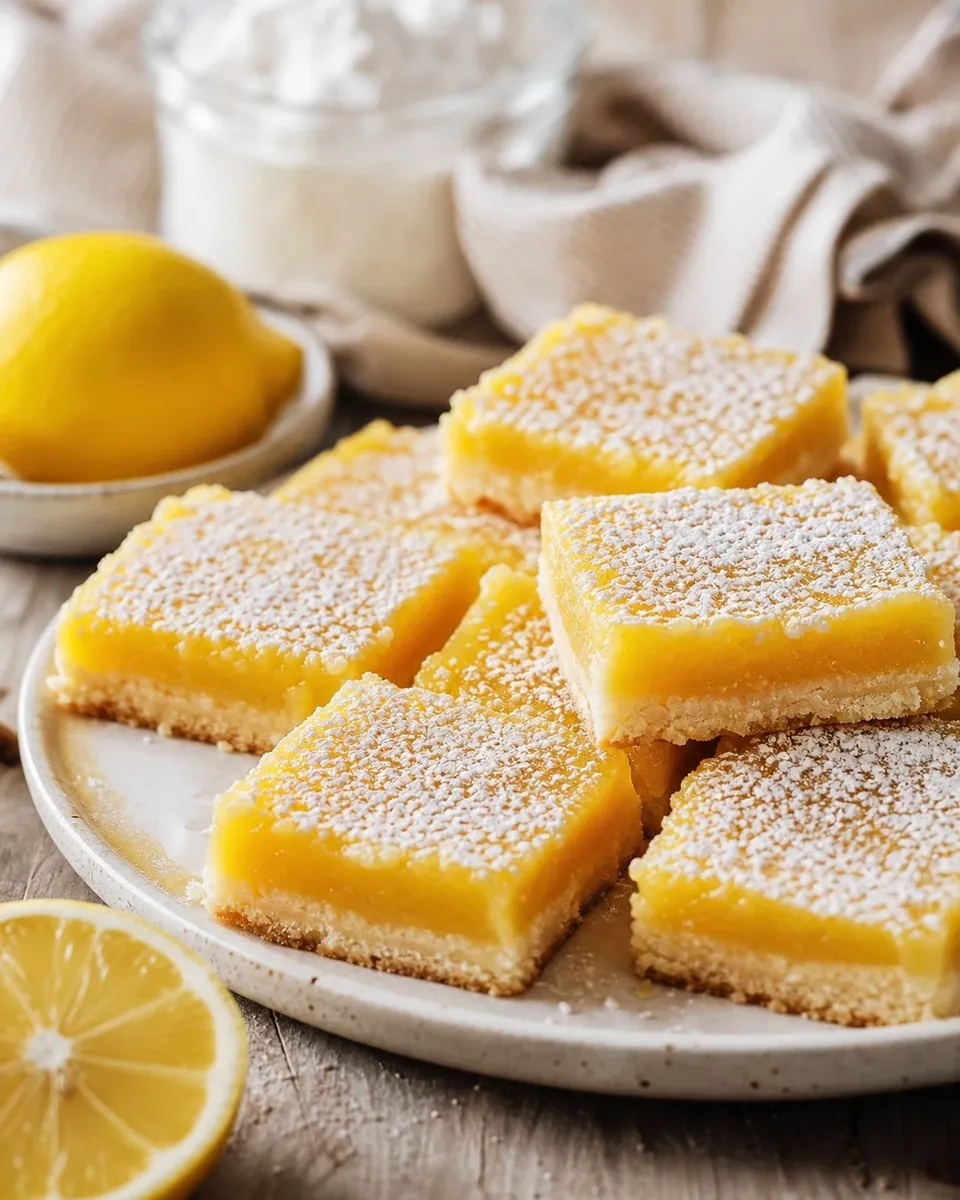
A bright dessert that earns its cooling time
Lemon bars look simple on the plate, but they rely on two very different textures working together: a firm buttery base and a smooth, gently set filling. The fresh lemon flavor is enough of a finish that elaborate decoration is unnecessary. I would plan the bars several hours ahead or the day before serving, because a warm pan cannot give the same clean slices as a fully chilled one. A small square delivers plenty of sweetness and acidity, making it a useful dessert after a richer meal. The preparation is manageable when the crust, filling and cooling stages are treated as separate, unhurried tasks.
Step 1: Measure the flour without packing the cup
Too much flour can make the shortbread base dry and hard to press evenly. Spoon flour into the measuring cup and level it, or use an accurate weight where provided. The rice flour option gives a slightly different crispness, but if it is not already in the pantry, the same measured amount of all-purpose flour is the listed practical alternative. Keep the crust flour separate from the smaller amount used in the lemon filling so nothing ends up in the wrong bowl. Softened butter should be pliable, not melted, allowing the mixture to come together without leaving a greasy layer at the bottom of the pan.
Step 2: Press an even shortbread crust
Line the pan with parchment that extends above two sides, giving you handles for lifting later. Press the dough across the bottom in a uniform layer, paying attention to corners where it can become too thick. A flat-bottomed cup helps smooth the surface without working the dough repeatedly. A small raised edge gives the filling a little border, while fork pricks reduce large bubbles as the crust bakes. Chill the prepared pan while the oven heats. Use that chilling time to clear the counter and measure the filling, so the eggs and juice will be ready when the crust finishes its first bake.
Step 3: Bake the base before adding the lemon
The crust needs its own baking stage so it can support the wet filling. Look for light gold across the surface and slightly darker edges, rather than leaving it completely pale. Glass and ceramic pans hold heat differently from thin metal ones, so use the visual cues along with the time range. Let the crust cool only briefly before filling; it should remain warm. A long pause can allow the base to shrink from the pan sides. The idea is not to rush a hot pan dangerously, but to have the filling measured and ready during the crust bake so the stages meet comfortably.
Step 4: Zest first and squeeze second
A whole lemon is easier to zest than an emptied half. Wash and dry the fruit, grate only the colored peel and avoid the white pith underneath. Rub that fine zest into the filling sugar with your fingertips until the sugar smells fragrant. This distributes the oils and reduces little clumps of zest in the finished custard. Squeeze and measure the juice separately rather than assuming every lemon provides the same amount; size and juiciness vary. Strain out seeds before the juice goes into the bowl. Extra lemon halves can be planned for a dressing or drink instead of buying another bottle of flavoring for the bars.
Step 5: Mix gently so the surface stays smooth
The filling needs the eggs to be evenly combined, but it does not need the volume of a sponge cake. Whisk gently rather than beating until frothy. Mixing the small amount of flour with the sugar first helps prevent dry lumps when the liquid is added. Scrape the bottom of the bowl, where sugar can settle, and pour the mixture onto the warm crust carefully. If a layer of foam forms, let it settle briefly or skim excess before baking. A few small surface bubbles are not a failure, but avoiding unnecessary air gives a smoother-looking top and makes the final set easier to judge.
Step 6: Bake until the filling has a slight wobble
As the filling nears its bake time, gently nudge the pan with an oven mitt. The edges should be set, and the center should move slightly as a single soft mass rather than ripple like juice. Check frequently near the end because a thin egg filling can move from soft to overbaked quickly. A thermometer can confirm 160°F in the filling without relying only on appearance. Do not keep baking solely to remove every bit of movement; the bars continue to firm as they cool and chill. A badly overbaked top can crack or feel rubbery, while an underbaked liquid center will not cut cleanly.
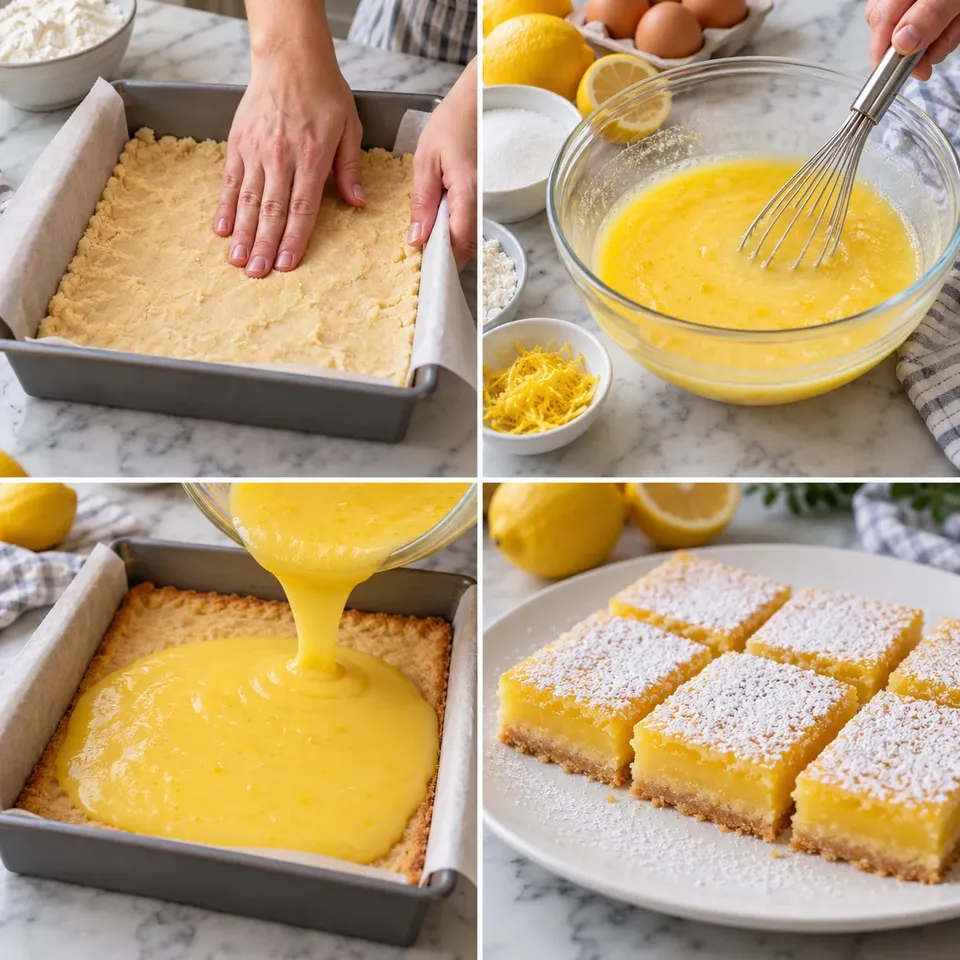
Choose the pan before mixing the dough
A 9-by-13-inch pan gives the intended layer thickness. A smaller pan makes both crust and filling deeper and changes how long they need to bake, while a larger one makes thin bars that can dry quickly. Glass and ceramic hold heat, so place the pan on a stable rack and avoid abrupt temperature changes that the manufacturer warns against. Leave enough parchment overhang to grip later without having long loose edges touch the oven elements. It helps to plan where the hot pan will cool before starting. A safe clear rack space is especially useful when a broad dish full of liquid filling needs to be moved gently.
Use a warm crust, not a cold gap between stages
The shortbread should finish its first bake while the lemon mixture is nearly ready. A brief cooling pause lets the surface settle, but waiting until the pan is completely cold can change how the layers meet and allow the crust to shrink from the edges. Measure and zest while the crust bakes, then gently mix the eggs and juice close to pouring. If you need a long break, take it before baking the crust so you can complete the crust and filling stages together when you return. That sequence gives you time to measure calmly and handle the hot pan carefully while bringing the two layers together at the right point.
Step 7: Chill fully and cut clean bars
Even a correctly baked filling can smear if it is cut before the center is thoroughly chilled. Give the pan its refrigerator time, then use a large sharp knife with a clean blade. Mark a light grid first if even portions matter, cutting straight down rather than sawing back and forth through the custard. Wipe the knife between cuts and dry it after cleaning. If lifting the whole slab, support the parchment from underneath with a board or a second pair of clean hands. The handles help, but the filling is heavy enough that unsupported parchment can tear and break an otherwise neat pan of bars.
Powdered sugar is a serving finish
A dusting of powdered sugar gives a pale surface, but lemon filling contains enough moisture to dissolve it during storage. Add it near serving time rather than assuming a thick early coating will remain white overnight. The bars are complete without it, and leaving it off makes the lemon color and slight surface texture visible. Keep the finished squares refrigerated in a shallow container, with parchment between layers if needed. For a shared plate, bring out a small number and replenish from the cold container. That protects an egg-based dessert and keeps the cut sides looking cleaner than a large warm tray left out for a long gathering.
The refrigerator gives the final structure
Let the pan cool on a rack for about an hour, then refrigerate until thoroughly cold. This keeps the eggs and butter in a firm, sliceable state and gives the lemon flavor time to settle. Run a knife around any unlined edge before lifting, and support the base because parchment handles alone may not hold a heavy pan of bars. For neat squares, wipe the knife after each cut rather than dragging filling into the next row. Store the cut bars covered in the refrigerator and use within three to four days. Add powdered sugar only when serving, as moisture from the filling can dissolve it during storage.
Rub zest into the sugar before mixing the filling. The crust should still be warm when filled, and the finished bars need a full chill before clean slicing.
Joy.Tart lemon filling over a buttery shortbread base, with fresh zest for aroma and a make-ahead chill for neat slices.
Tap each ingredient as it goes into your basket or bowl.
Follow the steps in order to make this recipe.
Combine softened butter, 1/3 cup sugar, 2 cups all-purpose flour, rice flour, salt and optional teaspoon of zest just until the dough comes together. If not using rice flour, replace it with the same 1/4 cup all-purpose flour.
Line a 9-by-13-inch glass or ceramic pan with parchment overhang. Press the dough evenly over the bottom with a slight raised edge. Prick with a fork and chill for 20 minutes. Heat oven to 325°F.
Bake the cold crust for 25–30 minutes, until golden at the edges. Let it cool on a rack 10–20 minutes while preparing filling.
Rub 2 tablespoons zest into 1 1/2 cups sugar. Whisk in 4 tablespoons flour. In another bowl, gently whisk the eggs, then mix in lemon juice and the sugar mixture without beating in lots of air.
Pour onto the still-warm crust and bake 18–20 minutes, checking frequently near the end. The filling should be set at the edges with a slight center wobble, not liquid waves; egg filling should reach 160°F.
Cool on a rack for about 1 hour, then refrigerate at least 2–3 hours until cold and firm. Loosen the edges and lift carefully with the parchment, supporting the base. Cut into 24 bars with a sharp knife wiped clean between cuts. Add optional powdered sugar just before serving.
Tart lemon filling over a buttery shortbread base, with fresh zest for aroma and a make-ahead chill for neat slices.
Joy’s kitchen note · Rub zest into the sugar before mixing the filling. The crust should still be warm when filled, and the finished bars need a full chill before clean slicing.