Time1 hr active + 1½ hr rising + 30 min second rise + 30 min baking + 2 hr cooling
Makes10–12 servings
CategoryDessert
Tastefully Planned,
Joyfully Cooked.

Bake apple pie in a chewy yeast pretzel crust with a salted finish. Prepare the apple filling ahead and leave time for the dough to rise.

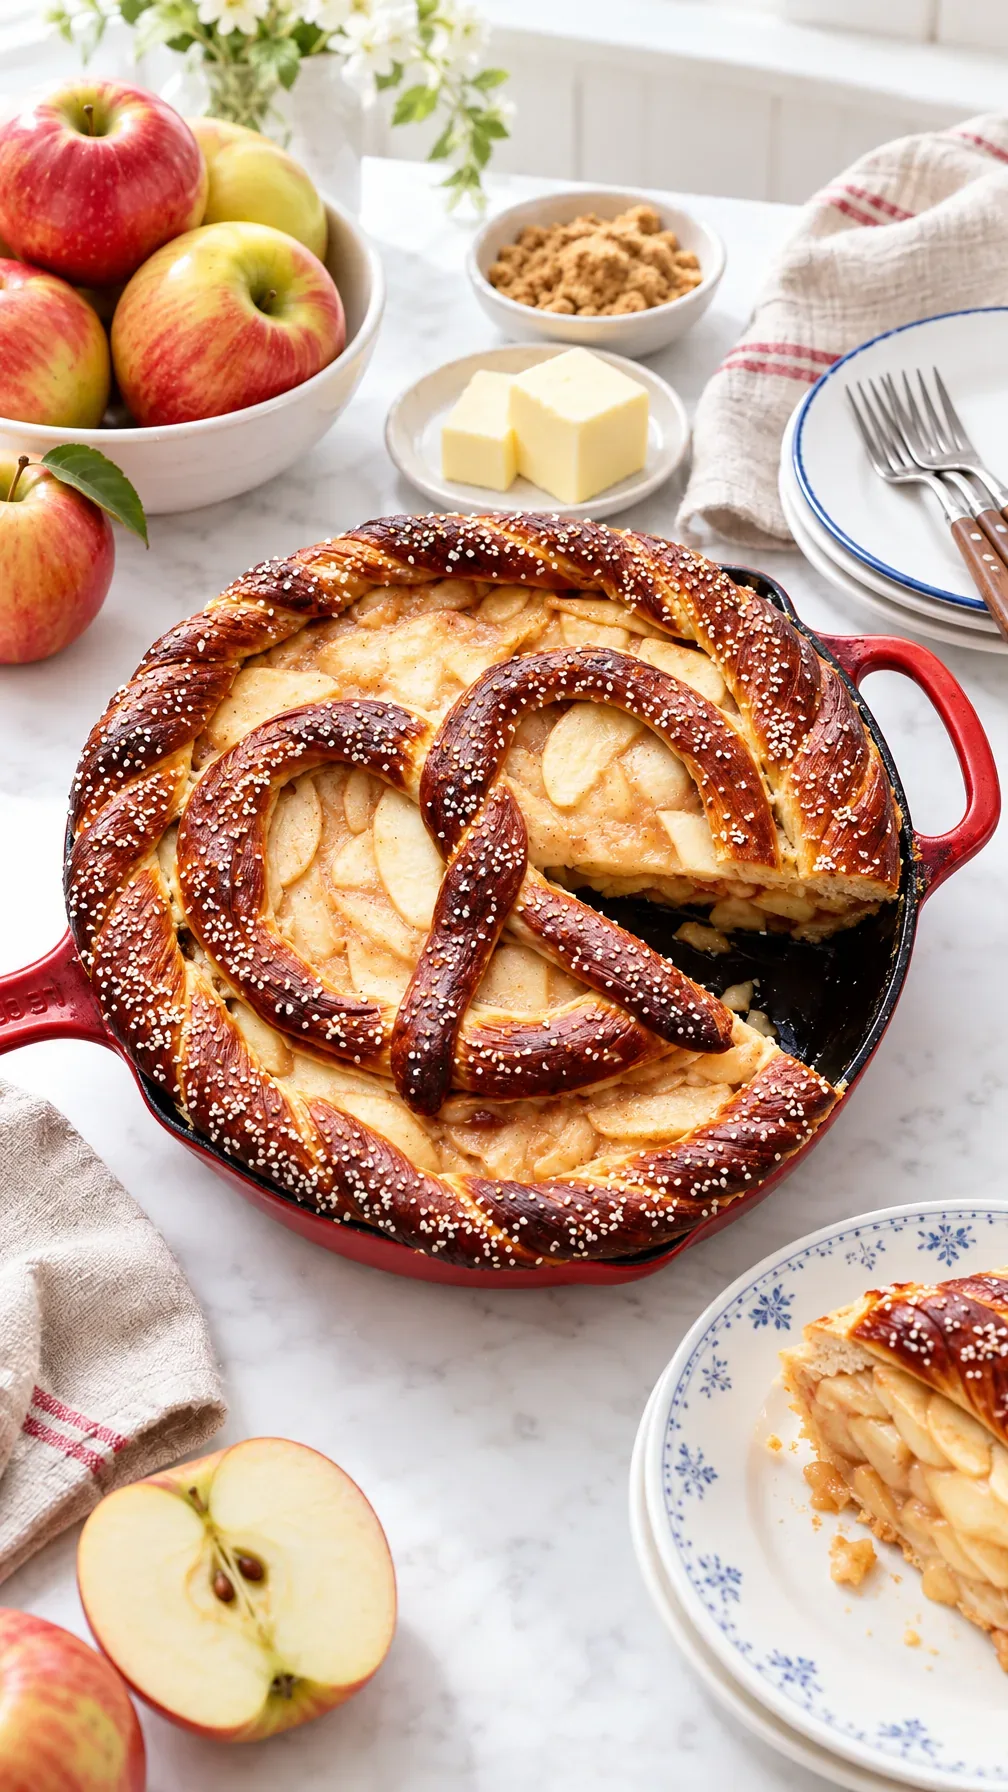
Apple pie with a chewy edge
This pie brings together cinnamon apples and a yeast-raised pretzel crust, so it asks for a different plan than a flaky pastry pie. The edge has chew, the shaped top has a salty finish, and the apples are cooked before they go into the skillet. I like the way those parts stay distinct. A little salt against fruit makes the sweetness more interesting without requiring a second sauce or a complicated topping.
Give this project a generous window in the day. The dough rises, the apples cool, the base gets its own brief bake, and the assembled pie cools completely before slicing. Some work can overlap, but the waits still matter. I prefer deciding on those pauses at the beginning instead of discovering that a beautiful golden top has finished while the filling is still too warm to hold a slice.
Choose apples for the full filling
Honeycrisp, Braeburn, and Golden Delicious are the listed choices, alone or together. A mixture can give a broader apple flavor, but one suitable variety is enough if that makes more sense at the store. Buy for the stated weight as well as the approximate count; nine small apples aren't the same quantity as nine large ones. Set aside the full stated amount of apples before you begin so the pie has the generous filling this recipe is built around.
Peel, core, and cut the apples into even quarter-inch wedges. Consistent size helps the slices soften together instead of leaving a few firm chunks among pieces already breaking down. Trim only what needs removing, and set up a bowl or clear space for the prepared wedges before starting. When a recipe uses several pounds of fruit, an orderly cutting station makes the work easier than stopping after every apple to find somewhere to put it.
Let the dough ingredients keep their roles
Bread flour gives the crust its chewy structure, while the beer brings its own flavor to the dough. The listed pilsner-style beer suits the recipe's direction; a strongly flavored dark or bitter beer would make a different crust. Brown sugar accompanies the yeast in warm water, and the softened butter joins later. Keep the dough's measured salt separate from the finishing salt so the outside doesn't receive an accidental double dose.
Measure the initial flour carefully, then use the small adjustments in the method only if the dough needs them. A stiff dough can resist shaping, while a very wet one becomes awkward to fit into a skillet and form into ropes. I like purchasing bread flour with another bread project in mind rather than treating the rest of the bag as something this pie must somehow use. The extra belongs to another day, not automatically to this dough.
Step 1: Mix the dough and let it rise
The yeast mixture should show foam during its brief activation. Once the dough is mixed and kneaded, it should become elastic enough for both a rolled base and long ropes. Small flour or water corrections help you reach that texture, but give each addition time to incorporate before judging again. A large last-minute handful can change the balance more than you intended.
Move the dough to the buttered bowl, cover, and let it visibly double. The stated rising time is useful for planning, while the actual expansion tells you when it is ready. If using the refrigerated make-ahead option, allow the dough the room-temperature and rising time described in the method. Cold dough doesn't become fully risen simply because the clock has reached the same hour as a warmer batch.
Decide early about the optional pretzel treatment
The baked-baking-soda treatment is optional, and it has its own preparation time. If you want to use it, include the oven stage and cooling before assembly begins. Follow the specified handling precautions and use the stainless-steel vessel listed for dissolving it. This is a place to follow the method precisely rather than choosing another metal pot because it is already on the stove.
Cool the solution before brushing it onto dough. A thin, controlled coat on the exposed crust is the point; flooding the skillet or adding the solution to the apple filling doesn't help. If you skip this option, continue with the egg wash and the rest of the method. The crust still needs proper kneading, rising, and baking. The treatment changes the surface character; it doesn't replace any of those stages.
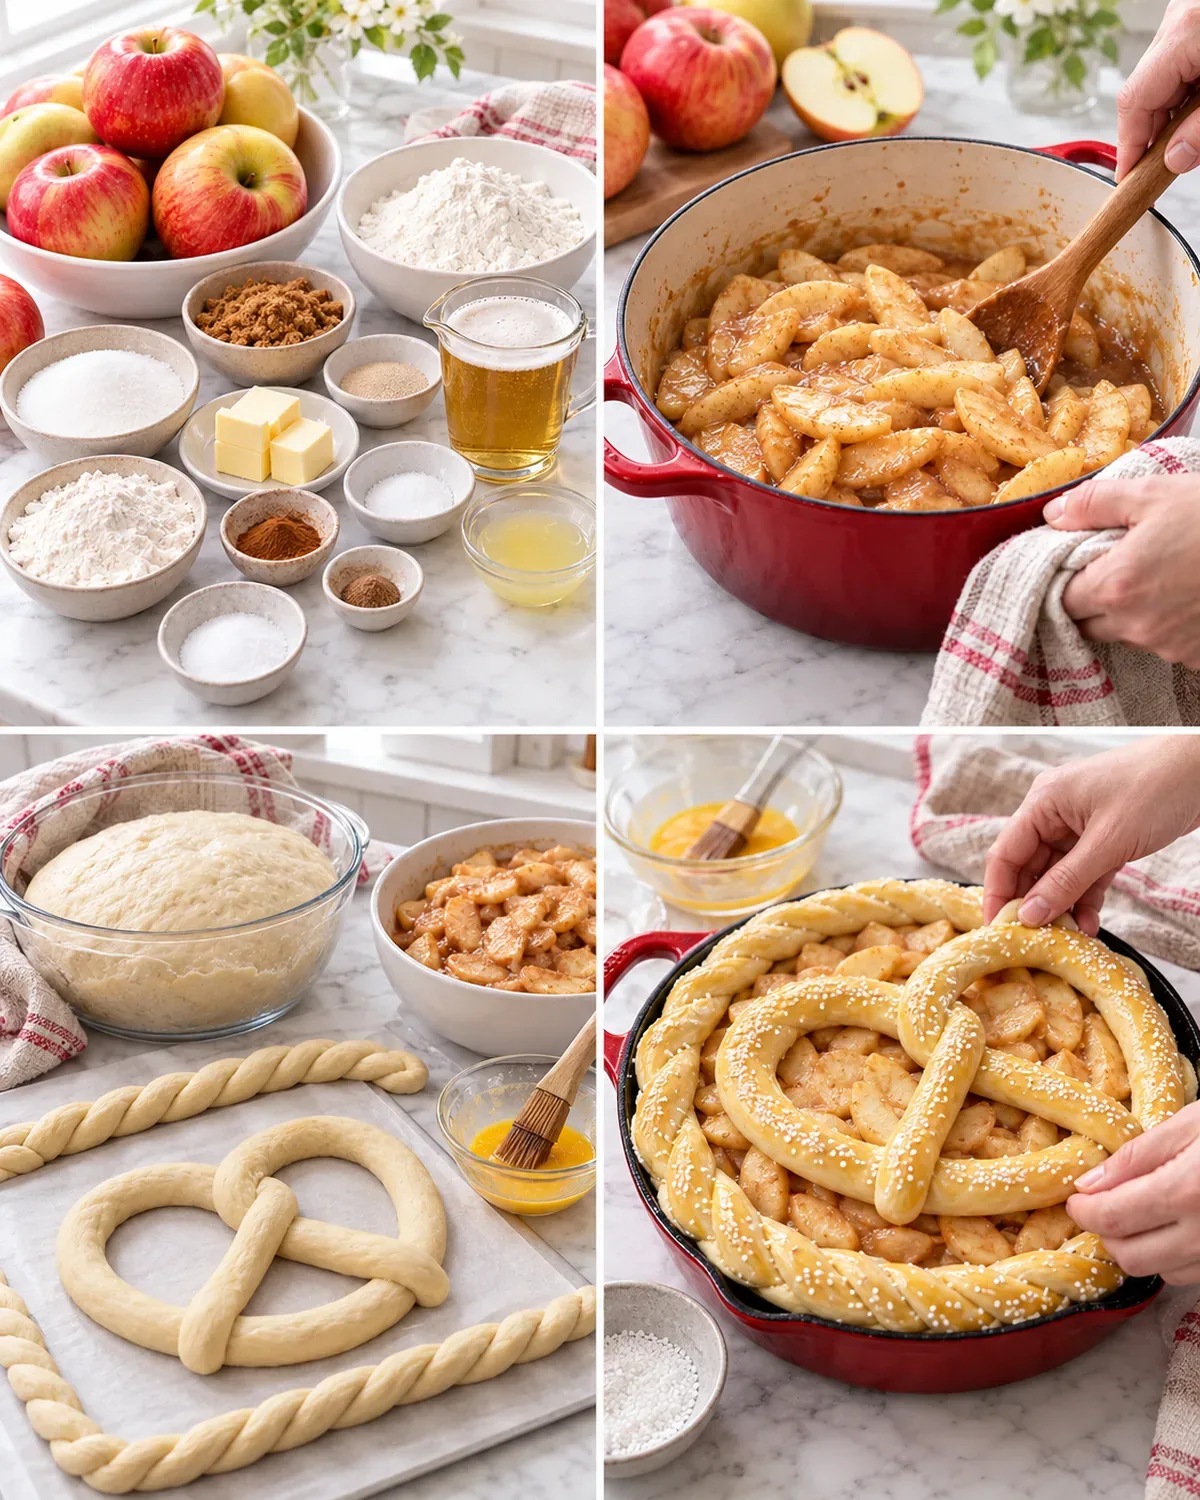
Step 2: Cook the filling until the fruit and juices agree
The apples cook with sugar, flour, lemon juice, cinnamon, nutmeg, salt, and the water in the method. Cinnamon is deliberately prominent in this version, so measure it before deciding to add more. Stir through the bottom of the pot as the mixture thickens. Flour needs to be distributed through the apples and liquid rather than remaining in dry pockets that will be difficult to correct once the filling cools.
Look for the progression described: softened apples with a little bite, followed by further gentle cooking until very tender. The finished mixture should coat the fruit instead of leaving a large pool of thin liquid. Cool it to room temperature before filling the dough. This is a useful make-ahead task within the stated refrigerator window, and it removes a major wait from the assembly day if you plan the return to room temperature as well.
Step 3: Divide the dough for three different shapes
Weighing the two halves helps reserve enough dough for the rim and decorative pretzel, rather than discovering that the base used nearly everything. Keep the unused half covered while rolling the first into the circle for the buttered ten-inch cast-iron skillet. Fit it evenly, with the slight overhang described. Guide the dough instead of pulling hard against a section that keeps shrinking.
The second half becomes one pretzel shape and a two-rope twisted rim. Keep pieces covered as you work so the surface stays pliable. If a rope resists lengthening, give it a brief pause before continuing from the center outward. The lengths in the method help the pieces fit the skillet, but the most useful check is whether the shapes can meet the rim without being stretched so thin that they lose their substance.
Step 4: Give the base a separate head start
The shaped dough gets its second rise before the base goes into the oven. Look for the stated increase rather than doubling it again; the goal is some expansion while retaining a useful crust shape. Prick the base, brush as directed, and protect only the outer rim with foil. The center needs the oven's heat so it can begin drying before it holds the cooked fruit.
After the partial bake, the base should be light golden and dry-looking, not merely warm. Let it cool for the minimum interval before assembly. This stage matters because the fruit is already cooked while the dough still needs to become bread. A fully browned top later on cannot tell you whether a base that missed its head start has baked properly underneath a heavy layer of apples.
Step 5: Assemble with support and check the underside
Attach the twisted rim with egg wash, add the cooled apples, then place the pretzel shape over the filling. Stretch only enough to bring the ends to the rim without thinning them dramatically. Brush the exposed dough in the order given and sprinkle the finishing salt with some restraint. The apples already contain salt, and the dough does too; the surface needs an accent rather than a crust of seasoning.
Watch both the top and the underside during the final bake. If the pretzel has colored before the bottom is ready, the loose foil cover and short extra checks in the method let you continue more carefully. The cast-iron skillet is hot and heavy, so set a heatproof landing space before lifting it. A firm golden top is satisfying, but the whole pie needs attention before it is ready to cool.
Step 6: Cool completely and plan the remaining slices
Allow the full two-hour cooling period before cutting, even though the warm apple aroma makes it tempting to start sooner. The filling needs time to settle, and the yeast crust is easier to cut when it isn't very hot. Use a sharp knife and support each slice as it comes from the skillet. Expect the texture of bread around tender cooked apples when you cut into the cooled pie.
For remaining pie, cover and refrigerate it once cooled, keeping the salty top from pressing against the covering if possible. Reheat a portion gently if you want it warm, understanding that stored fruit softens bread over time. The better advance plan is often the separate dough and filling options in the method, leaving final assembly for the day of serving. Ten to twelve portions are generous, so decide who and what meal the pie is for before baking it.
This is the sort of baking idea I want to give its own time, away from the school-lunch rush. Include the rising and full cooling time in your plan before deciding when dessert will be ready. A little vanilla ice cream gives the salty crust and spiced apples a creamy contrast. I like a modest slice that leaves the unusual pretzel-and-apple combination in the spotlight.
Joy.Bake apple pie in a chewy yeast pretzel crust with a salted finish. Prepare the apple filling ahead and leave time for the dough to rise.
Tap each ingredient as it goes into your basket or bowl.
Follow the steps in order to make this recipe.
Butter a large bowl. In a mixer bowl, combine ½ cup warm water (100–115°F), yeast and brown sugar. Let stand 5–7 minutes until foamy.
Stir in bread flour, beer, sea salt and 2 tablespoons softened butter. Mix with a dough hook on medium-low until a ball forms, about 2 minutes, then knead 5–7 minutes until elastic. Add flour 1 tablespoon at a time if sticky, or warm water 1 teaspoon at a time if dry. Alternatively, knead by hand.
Place in the buttered bowl, cover and let rise in a warm place until doubled, about 1½ hours.
For the optional pretzel treatment, heat oven to 275°F. Spread baking soda on a foil-lined small tray and bake for 65 minutes. Let cool. Handle carefully and avoid eye or prolonged skin contact.
In a small stainless-steel pot (not aluminum, copper or nonstick), combine the baked baking soda and 1 cup water. Bring to a simmer, stirring to dissolve; cool.
Peel, core and cut apples into 1/4-inch wedges. Combine with sugar, all-purpose flour, lemon juice, 1 1/2 teaspoons cinnamon, nutmeg, kosher salt and 1/4 cup water in a large pot. Cook over medium heat, stirring, for 15–20 minutes until softened with a little bite. Reduce to medium-low and simmer another 10 minutes until very tender. Cool to room temperature.
Heat oven to 450°F and butter a 10-inch cast-iron skillet. Punch down dough and divide into equal halves by weight. Return one half to the covered bowl while shaping the other.
Roll one half to a 13-inch circle and fit into the skillet, extending slightly over the edge. Gently stretch any shrinking sections to an even rim. Cover and let rise until about 50% larger, 20–30 minutes.
Divide the second half into three pieces, keeping unused pieces covered. Roll one into a 36-inch rope and form an approximately 11-inch pretzel: make a U, cross and twist the ends twice, then fold them down onto the curve. Place on a parchment-lined tray. Roll each remaining piece to a 30-inch rope and twist together for the rim. Cover and let rise about 50%, 20–30 minutes.
Prick the skillet dough with a fork. Brush with the optional soda solution. Beat egg yolk with 1 tablespoon water and brush over the base. Shield only the outer rim with foil. Bake 12–15 minutes until light golden and dry; cool at least 5 minutes.
Brush the outer rim with egg wash and attach the twisted rope. Add cooled apples. Place the pretzel shape over the filling, gently stretching its ends to meet the rim. Brush exposed rim and pretzel with optional soda solution, then egg wash. Sprinkle with pretzel salt.
Bake 12–15 minutes until the pretzel top is golden and firm. If the underside needs longer, cover the top loosely with foil and continue, checking every 2 minutes. Cool completely for at least 2 hours before slicing.
Make ahead: refrigerate dough up to 1 day, then bring to room temperature and let rise until doubled, about 1½ hours. Refrigerate apple filling up to 2 days and bring to room temperature before baking. Keep optional soda solution in a covered container at room temperature up to 3 days.
Bake apple pie in a chewy yeast pretzel crust with a salted finish. Prepare the apple filling ahead and leave time for the dough to rise.
Joy’s kitchen note · This is the sort of baking idea I want to give its own time, away from the school-lunch rush. Include the rising and full cooling time in your plan before deciding when dessert will be ready. A little vanilla ice cream gives the salty crust and spiced apples a creamy contrast. I like a modest slice that leaves the unusual pretzel-and-apple combination in the spotlight.