Time35 min prep + 20 min frying + 1½–2 hr rising
Makes12 small pastries
CategoryDessert
Tastefully Planned,
Joyfully Cooked.

Make pumpkin cream cheese doughnuts with soft yeast dough, cinnamon sugar and a cool pumpkin filling. Includes rising, frying and filling steps.

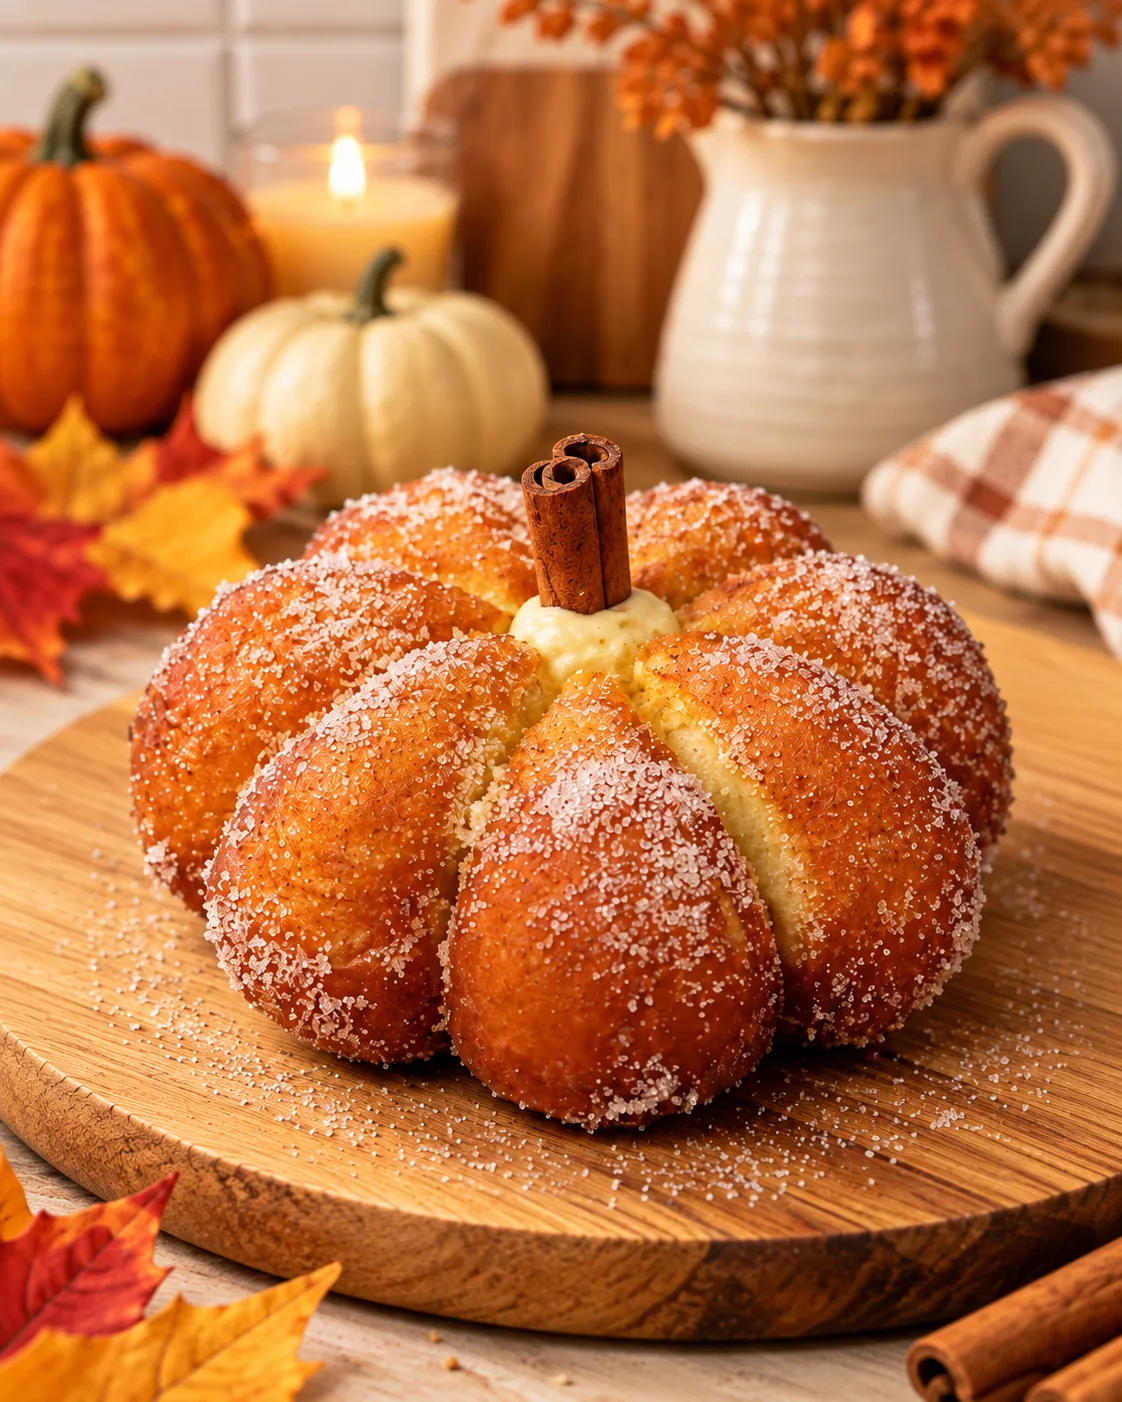
Pumpkin lives inside these doughnuts
The pumpkin flavor in these small pastries comes from the cream filling, not the yeast dough. That distinction makes the first bite interesting: cinnamon sugar on the outside, soft dough underneath and a spiced pumpkin-cream-cheese center. I like that each part has a separate job. The dough doesn't need to carry every fall flavor, and the filling doesn't need to be so sweet that the cream cheese disappears.
This is a hands-on project with two rises and a frying stage, so give it a little space in the day. The listed preparation and frying times sit alongside the rising time rather than replacing it. Twelve small pastries are enough to make portioning useful without requiring a bakery-size operation. Read the shaping and decorating choices before starting, too. Round doughnuts are a complete option here; the twine is optional if you want the pumpkin ridges as well as the pumpkin filling.
Step 1: Let the yeast show you it is ready
Active dry yeast begins in milk warmed to 105–110°F, with a pinch taken from the measured sugar. The five- to ten-minute wait for foam is a chance to confirm that the mixture is active before you add the rest of the dough ingredients. Use a thermometer for the milk instead of guessing from steam or how warm the saucepan feels. Liquid that is much too hot is a poor starting point for the rise you are depending on.
Measure the sugar before taking out that pinch, so the total amount remains the recipe's amount. If there is no sign of activity, check the yeast and milk temperature before adding the mixture to the flour. An active yeast mixture is what gives this dough the rise it needs before frying. Checking that small bowl first helps you protect the flour, egg and butter from going into a dough that may fail to rise.
Step 2: A soft dough needs patient kneading
The dough brings flour, sugar and salt together with the milk mixture, egg and vanilla before the softened butter is worked in. Adding the butter at that point lets it become part of a developing dough instead of leaving obvious greasy patches. The eight to ten minutes of kneading is real work, whether done carefully by hand or with suitable equipment. You are looking for a smooth dough that feels slightly tacky, rather than a dry ball that never clings at all.
It is tempting to add flour every time the dough touches your fingers, but too much can make the finished pastry heavy. Use only a little if needed, and give the dough time to come together before deciding it is unmanageable. Softened butter should blend more readily than cold pieces. Keep a scraper nearby if you are kneading by hand, so you can gather the dough without repeatedly burying the counter in flour. The texture should become more organized as you work, not simply more powdery.
Step 3: Let the dough complete its first rise
A lightly greased bowl and a cover protect the dough while it rises. The stated sixty to ninety minutes is a guide to doubling, with the temperature of your room affecting the pace. A warm place should be comfortable for the dough, not a hot surface that begins cooking it. Give the bowl enough room for expansion so the cover doesn't press into the rising top.
Use this pause to make the filling and clear space for shaping. Beating softened cream cheese with pumpkin puree, powdered sugar, vanilla, cinnamon, pumpkin pie spice and salt should give a smooth mixture. Plain pumpkin puree is the intended ingredient; sweetened pie filling would alter the flavor and balance. Refrigerate the filling until needed. It doesn't belong beside the warm rising dough for the whole afternoon, and preparing it now means the fryer stage won't compete with a last-minute search for the mixer or piping bag.
Step 4: Divide before choosing the decorative shape
Twelve equal pieces help the pastries rise and fry at a similar pace. Shape each into a smooth ball so there aren't large open seams where it enters the oil. If one is much larger than the others, its center may still be doughy when the smaller ones look done. Portioning deliberately at this stage is easier than trying to manage several cooking schedules in one small pot.
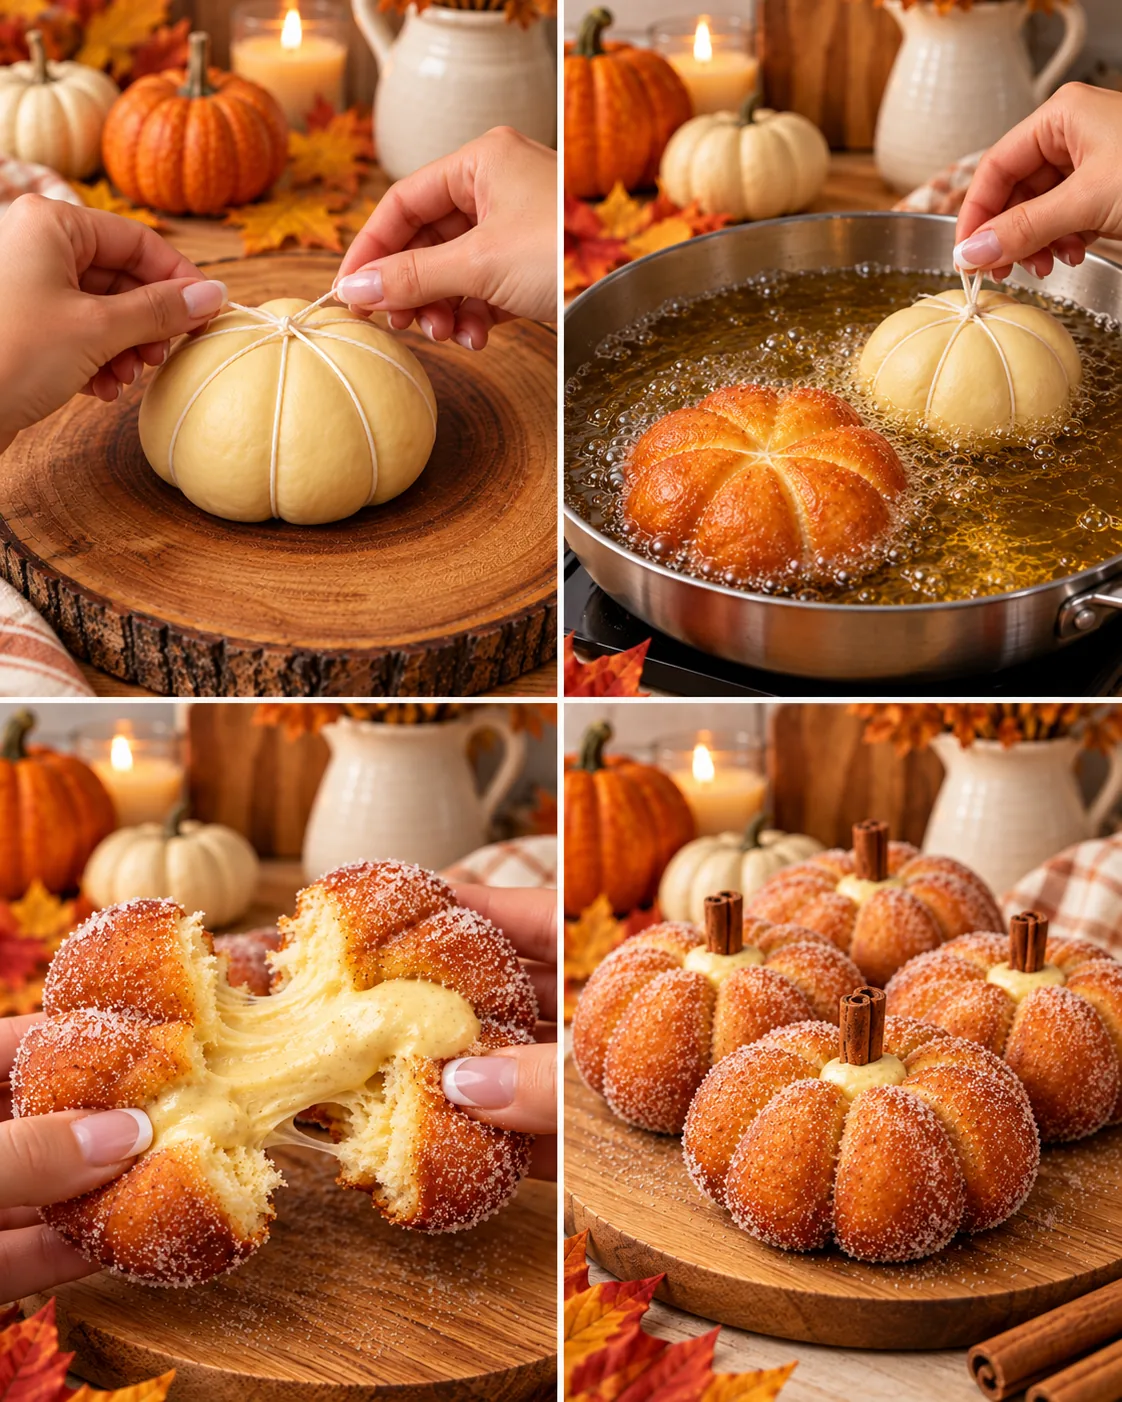
For the pumpkin shape, use only plain, uncoated, food-safe cotton cooking twine suitable for frying. Decorative string or twine with an unknown coating is not the same tool. The loops need to be loose enough to allow the dough to expand; you are suggesting ridges rather than binding a package tightly. If you would rather skip that preparation and the later removal, keep the pastries round. The filling and cinnamon coating provide the same flavor without requiring the optional shape.
Step 5: Let the shaped dough rise again
After shaping, the covered pastries proof for about twenty to thirty minutes, until puffy. That second rise comes after handling and dividing, so it isn't made unnecessary by a good first rise. Watch the change in the pieces rather than assuming that every kitchen needs the same number of minutes. Tight, dense-looking balls aren't at the same stage as pieces that have visibly softened and expanded.
While they proof, set up the frying area with a rack for draining, a thermometer and the tools you will use to turn and lift the pastries. Keep water and the chilled filling away from the hot-oil workspace. A clear path between pot and rack is more useful than a complicated arrangement of plates. The dough is easier to treat calmly when you aren't reaching across the stove for equipment after the first batch is already cooking. Prepare the cinnamon sugar as well, so the coating is ready when the warm pastries need it.
Step 6: Control the oil and the batch size
The recipe uses two to three inches of vegetable or canola oil in a heavy pot, with the pot no more than half full. That leaves room for the oil to rise when pastries enter. Heat to 350°F and check the temperature as you work. Oil that is too cool or too hot changes how the dough cooks, so a steady reading is more helpful than judging only from how vigorously the surface bubbles.
Fry only a few pieces at a time. Crowding makes turning awkward and can pull the oil temperature down, then create a rush of browning when the heat catches up. The two to three minutes per side is a guide that must be considered alongside size and color. Keep your attention on the pot rather than starting another task across the kitchen. A small batch gives you time to turn each piece gently and lift it without crushing the shape or sending oil over the rim.
Step 7: Check that the centers are cooked
An evenly golden exterior is the desired appearance, but it doesn't prove the dough inside is cooked. Check the first pastry as the recipe directs. If the center is wet or doughy while the outside is already dark, lower the heat slightly and extend the cooking so the inside has time to finish. Use that first piece as information for the rest of the batch instead of repeating the same conditions twelve times.
Drain on a rack so the pastries are supported without sitting in a pool of oil. Before coating or filling, carefully cut off and remove every piece of twine from shaped pastries. Account for the loops, checking the ridges where a strand might be less visible. The string has finished its job and must not remain as part of the decoration. This is one reason the plain round version is a useful choice: it removes a handling step while leaving the main cooking process unchanged.
Step 8: Coat while warm and fill once cool
Cinnamon sugar clings well while the pastry is still warm, so roll it at that stage after the twine is removed. Filling is different. Let the doughnuts cool before making the small opening and piping in the pumpkin cream. A hot center would soften the filling, making it harder to keep a neat pocket and changing the contrast between bread and cream. The two stages need different temperatures even though they happen close together in the method.
Plan the filling across all twelve pastries, giving each a reasonably even share as you work through the batch. Cinnamon-stick pieces can serve as decorative stems, but remove them before eating and make that clear when serving. Keep filled pastries refrigerated and serve the same day for the best texture, as the recipe directs. I would plan this batch for people ready to enjoy it soon after the work is done. A thoughtful count of twelve makes the effort more purposeful and lets the finished pastries be shared while their soft dough and cool filling still feel distinct.
I'm just as happy making these as plain rounds. The important contrast is soft dough around a cool pumpkin center. Keep the filling chilled, check the first fried doughnut inside, and let the batch cool before piping. The pumpkin ridges are a finishing choice; they don't need to decide whether you make the recipe.
Joy.Make pumpkin cream cheese doughnuts with soft yeast dough, cinnamon sugar and a cool pumpkin filling. Includes rising, frying and filling steps.
Tap each ingredient as it goes into your basket or bowl.
Follow the steps in order to make this recipe.
Warm milk to 105–110°F. Stir in yeast and a pinch of the measured sugar; wait 5–10 minutes for foam. Mix flour, remaining sugar and salt. Add milk mixture, egg and vanilla; knead, then work in softened butter. Knead 8–10 minutes until smooth and slightly tacky, adding only a little flour if needed.
Cover in a lightly greased bowl and let rise in a warm place until doubled, about 60–90 minutes. Make the filling by beating cream cheese, pumpkin puree, powdered sugar, vanilla, cinnamon, pumpkin pie spice and salt until smooth. Refrigerate until needed.
Divide dough into 12 equal pieces and shape into smooth balls. For pumpkin ridges, loosely loop plain, food-safe, uncoated cotton cooking twine around each ball; leave room for expansion. Cover and proof 20–30 minutes until puffy. Plain round doughnuts are an easier option.
Heat 2–3 inches of oil in a heavy pot to 350°F; keep the pot no more than half full. Fry a few pastries at a time, about 2–3 minutes per side, adjusting for size, until evenly golden. Check a first pastry: the center must be fully cooked, with no wet dough. If browning too fast, lower heat slightly and extend cooking. Drain on a rack.
Carefully cut off and remove every piece of twine. Mix coating sugar and cinnamon; roll warm pastries in it. Let cool, then make a small opening and pipe pumpkin cream into each pastry. Use cinnamon-stick pieces as decorative stems and remove them before eating. Keep filled pastries refrigerated and serve the same day for best texture.
Make pumpkin cream cheese doughnuts with soft yeast dough, cinnamon sugar and a cool pumpkin filling. Includes rising, frying and filling steps.
Joy’s kitchen note · I'm just as happy making these as plain rounds. The important contrast is soft dough around a cool pumpkin center. Keep the filling chilled, check the first fried doughnut inside, and let the batch cool before piping. The pumpkin ridges are a finishing choice; they don't need to decide whether you make the recipe.