Time25 min prep + at least 6 hr freezing
Makes12 slices
CategoryDessert
Tastefully Planned,
Joyfully Cooked.

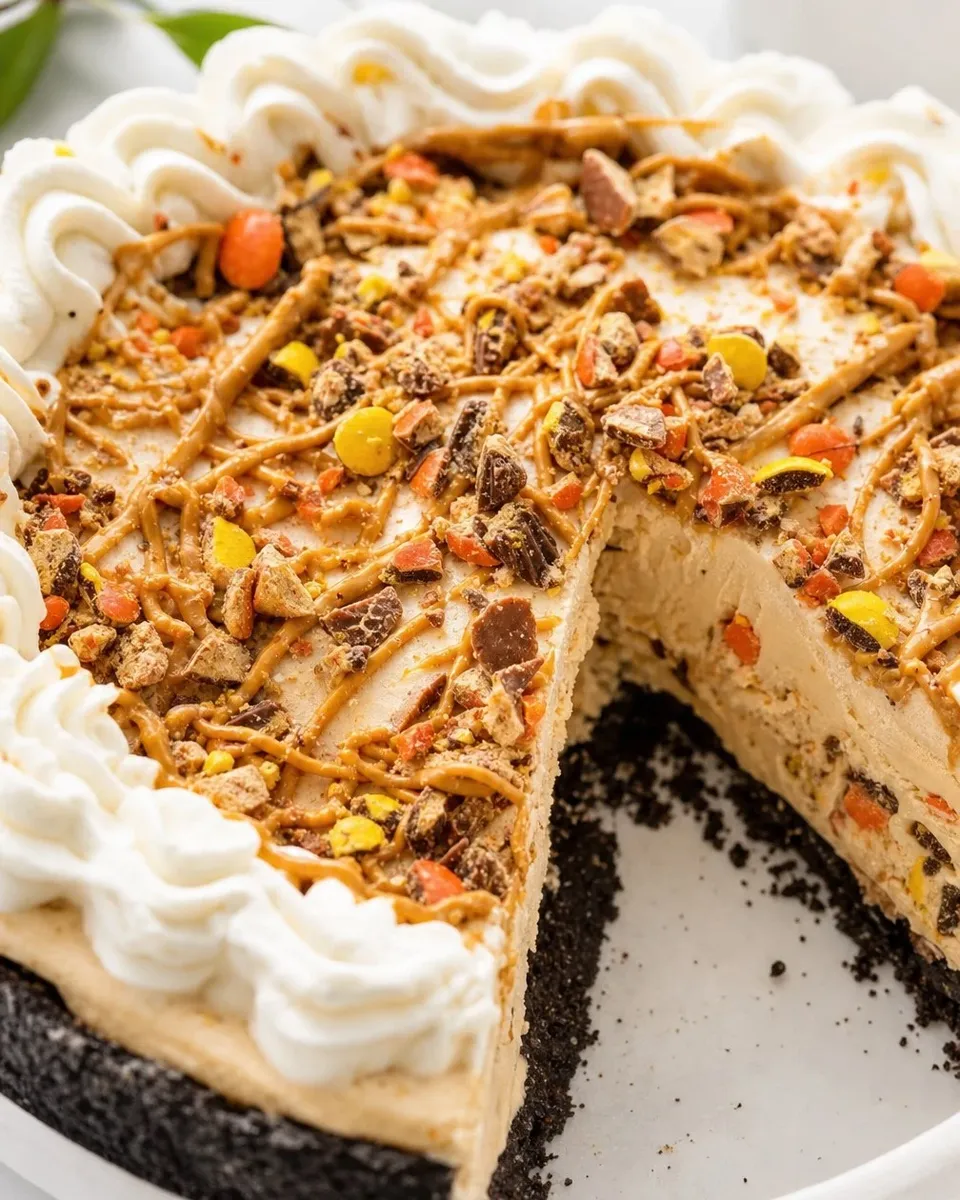
A no-bake cookie crust filled with peanut butter ice cream and whipped cream, finished with peanut butter ribbons and a little candy crunch.

A freezer dessert that lets you work ahead
A no-bake pie is useful when the oven is busy or the kitchen already feels warm. Here a chocolate sandwich-cookie crust surrounds a filling of peanut butter ice cream folded with whipped cream. The result is rich and cold, with enough structure to cut into small slices after a proper freezer rest. I would plan it the day before serving rather than expect a quick last-minute dessert. Most of the work happens in one short session, but six hours of freezing is part of the recipe. That pause is what turns a soft bowl of filling into a pie that can leave the pan neatly.
Step 1: Crush the cookies with their filling
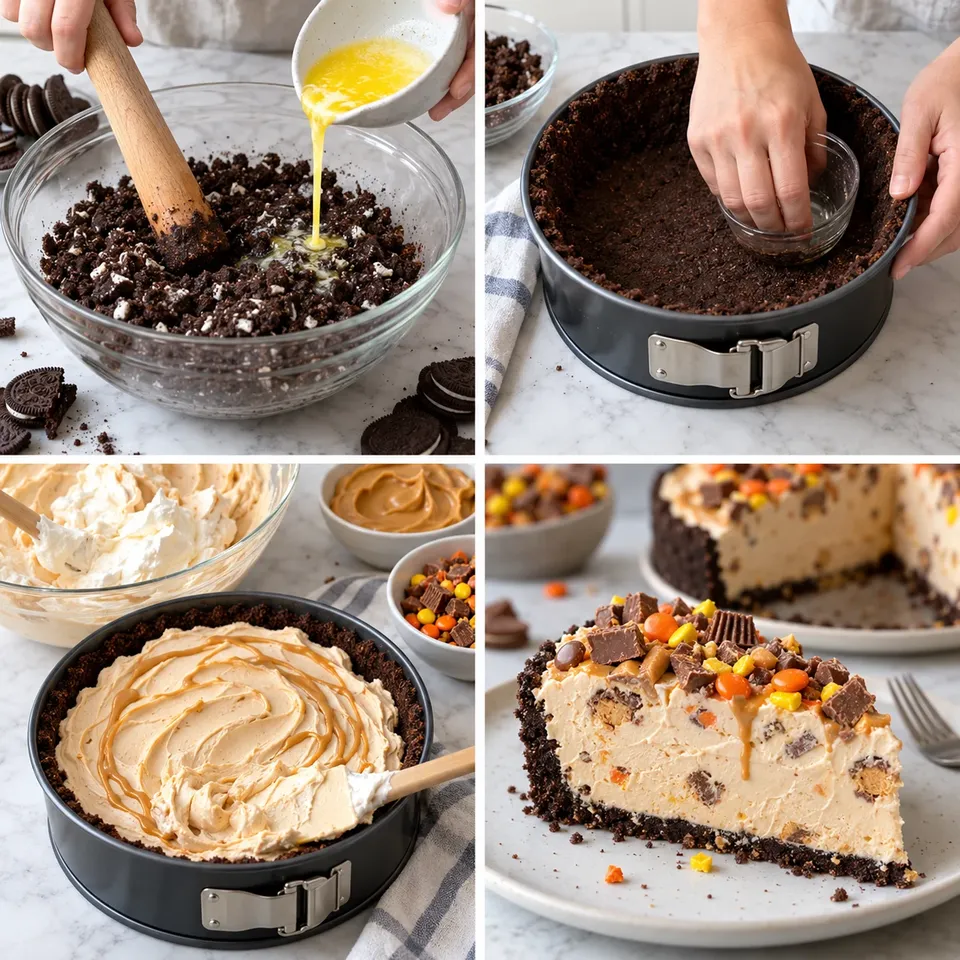
Regular chocolate sandwich cookies give the crust its intended balance of crumb and fat; the extra filling in double-filled cookies changes that balance. Crush the cookies with their cream centers included. Aim for fine, even crumbs that will press together firmly and support the sides of the crust. Mix in melted butter thoroughly, checking the bottom of the bowl for dry pockets. A food processor is convenient, but a sealed food bag and rolling pin can do the crushing if you take time to break down the pieces evenly. Less equipment can be just as practical when the texture target is clear.
A deep pan gives the filling somewhere to go
The specified springform pan needs enough height for the whipped filling, not just the shallow depth of a standard pie plate. Press the crust across the base and up the sides with steady medium pressure. A flat-bottomed measuring cup helps make it even, but avoid packing so hard that the frozen crust becomes difficult to cut. Check the curve where the base meets the side; this is where loose crumbs often hide. Put the pan on a tray if it is easier to carry. Clear a flat freezer shelf before filling it so you are not trying to rearrange frozen packages with a soft pie in your hands.
Step 2: Prepare the cream and ice cream
The cream should be cold so it whips into a stable foam. Stop whipping as soon as the peaks stand up and the cream still looks smooth. The ice cream, meanwhile, needs a brief softening so it can blend without forcing out all that air. It should be scoopable and thick, never a puddle. Fold it into the cream in stages with broad turns of a spatula, scraping the bottom of the bowl. Those gentle folds help preserve the air you whipped into the cream. If a hot room makes the mixture runny, give it a short pause in the freezer to firm up before continuing gently.
Step 3: Add the peanut butter ribbons
Warm the measured peanut butter just enough to make it fluid, then let it cool if it feels hot. A hot drizzle can melt a channel through the ice cream. Spread half the filling, add a thin ribbon, then repeat, rather than trying to swirl the whole bowl into one uniform mixture. The ribbons give small distinct pockets of peanut flavor in each slice. Crushed candy on top supplies crunch, so a modest amount is enough. Extra peanut butter and whipped cream are optional finishing ideas, not requirements for a complete pie. Its filling and cookie crust already provide plenty of richness and sweetness.
Step 4: Freeze until firm
Cover the pie carefully and let it freeze for at least six hours; overnight is a calmer plan if you are serving it to guests. Keep the pan level and avoid repeatedly taking it out to check. When ready, a short rest at room temperature softens the edges enough for a knife without turning the middle into a melting filling. Warm a sharp knife in hot water, wipe it dry and cut, cleaning it between slices. The dry blade matters because excess water can leave icy tracks on the pie. Release the springform ring gently and support each slice from below with a proper server.
Let the dessert fit the rest of the meal
Peanut butter ice cream, cream and a buttered cookie crust make this an indulgent dessert, so smaller slices are a sensible starting point. Fresh fruit alongside it brings a different temperature and texture without needing another topping. If peanut butter ice cream is not available, a different flavor would create a variation rather than the same recipe; check the freezer before buying extra ingredients. Candy coating, cookies and dairy products can include several allergens, and peanuts are central here. When sharing, keep the pie clearly labeled instead of relying on its color or toppings to tell people what is inside.
If the crust crumbles at the edge
Large cookie pieces or an uneven butter coating can leave weak spots in a no-bake crust. Before adding filling, press any loose area with the back of a spoon and check that the crumbs feel evenly damp. The side wall should connect smoothly with the base rather than stand as a thin separate ring. A small crack after freezing can be supported with a server when slicing; it does not require rebuilding the entire pie. For the next batch, crush the cookies more finely and take an extra minute around the corners. An even compact layer matters more than forcing the sides unusually high or packing them into a hard shell.
Whipped cream should stay soft enough to fold
Stiff peaks means the cream holds an upright shape when the whisk is lifted, not that it has become dry or curdled. Stop and check as soon as the whisk starts leaving distinct trails. If you overshoot slightly and it looks grainy, fold in a small splash of fresh cold cream by hand to relax it. If it has separated into butter and liquid, that is beyond a simple folding correction. Use a clean, chilled bowl if the kitchen is warm. The cream’s purpose is to lighten the ice cream filling, so keeping its air is more useful than making it as thick as possible through extra beating.
Know the difference between softening and melting
Ice cream can be pliable at the edges while still quite firm in the center. Turn it gently in its container to judge the whole amount rather than leaving it on the counter until the outside becomes liquid. Small scoops folded in stages are easier to combine with whipped cream than one hard block. If the filling becomes soupy, it will take longer to freeze and can develop a denser texture. Move it back to the freezer briefly and stir gently as it firms. Do not rely on a fixed counter time, since a warm kitchen and a cold kitchen will soften the same carton at very different speeds.
Protect the pie from freezer odors
A springform ring is not an airtight storage container. Cover the top without pressing onto the filling, then wrap the whole pan well once the surface is firm. Keep it away from open containers of strongly flavored foods, whose odors can reach dairy desserts in a crowded freezer. A tray underneath helps keep it level while moving. If making portions for later, use a close-fitting container with little empty air around the slices, separated by parchment. Label it clearly for peanuts and dairy so no one mistakes a pale frozen slice for a different dessert. Good wrapping protects a useful make-ahead pie from becoming a frosty forgotten pan.
Freeze promptly and portion what you need
Bring out the pie only when the plates and serving knife are ready. Return it to the freezer promptly after cutting rather than leaving the whole pan on a warm table through dessert. Wrap the cut surface well to protect it from freezer odors and ice crystals, and use within five days for the best quality. If you expect only a few servings at a time, cut the firm pie into portions and store them in a covered container with parchment between them. That makes it easier to take one or two slices while the rest stays frozen, which is more useful than repeatedly softening the entire dessert.
Soften the ice cream only enough to fold; a liquid mixture loses air and takes longer to firm. Clear a level freezer space before assembling the pie.
Joy.A no-bake cookie crust filled with peanut butter ice cream and whipped cream, finished with peanut butter ribbons and a little candy crunch.
Tap each ingredient as it goes into your basket or bowl.
Follow the steps in order to make this recipe.
Crush the cookies, filling included, into fine crumbs. Stir with melted butter and press firmly into the bottom and up the sides of an ungreased 9-inch springform pan at least 2 1/2 inches deep.
Beat cold cream until it holds stiff peaks. Stop before it becomes grainy.
Allow the peanut butter ice cream to soften just until scoopable, not melted. Fold it into the whipped cream in several additions until evenly combined.
Spread half the filling in the crust and drizzle with half the melted peanut butter. Repeat with remaining filling and peanut butter. Scatter the crushed candy over the top. Cover and freeze at least 6 hours, preferably overnight.
Let the frozen pie stand about 5 minutes before slicing. Add optional whipped cream or extra peanut butter if desired. Use a sharp knife warmed in hot water and wiped dry between cuts. Return leftovers promptly to the freezer and use within 5 days for best quality.
A no-bake cookie crust filled with peanut butter ice cream and whipped cream, finished with peanut butter ribbons and a little candy crunch.
Joy’s kitchen note · Soften the ice cream only enough to fold; a liquid mixture loses air and takes longer to firm. Clear a level freezer space before assembling the pie.