Time20 min prep + 25–30 min bake + cooling and 2 hr chilling
Makes18 mini cheesecakes
CategoryDessert
Tastefully Planned,
Joyfully Cooked.

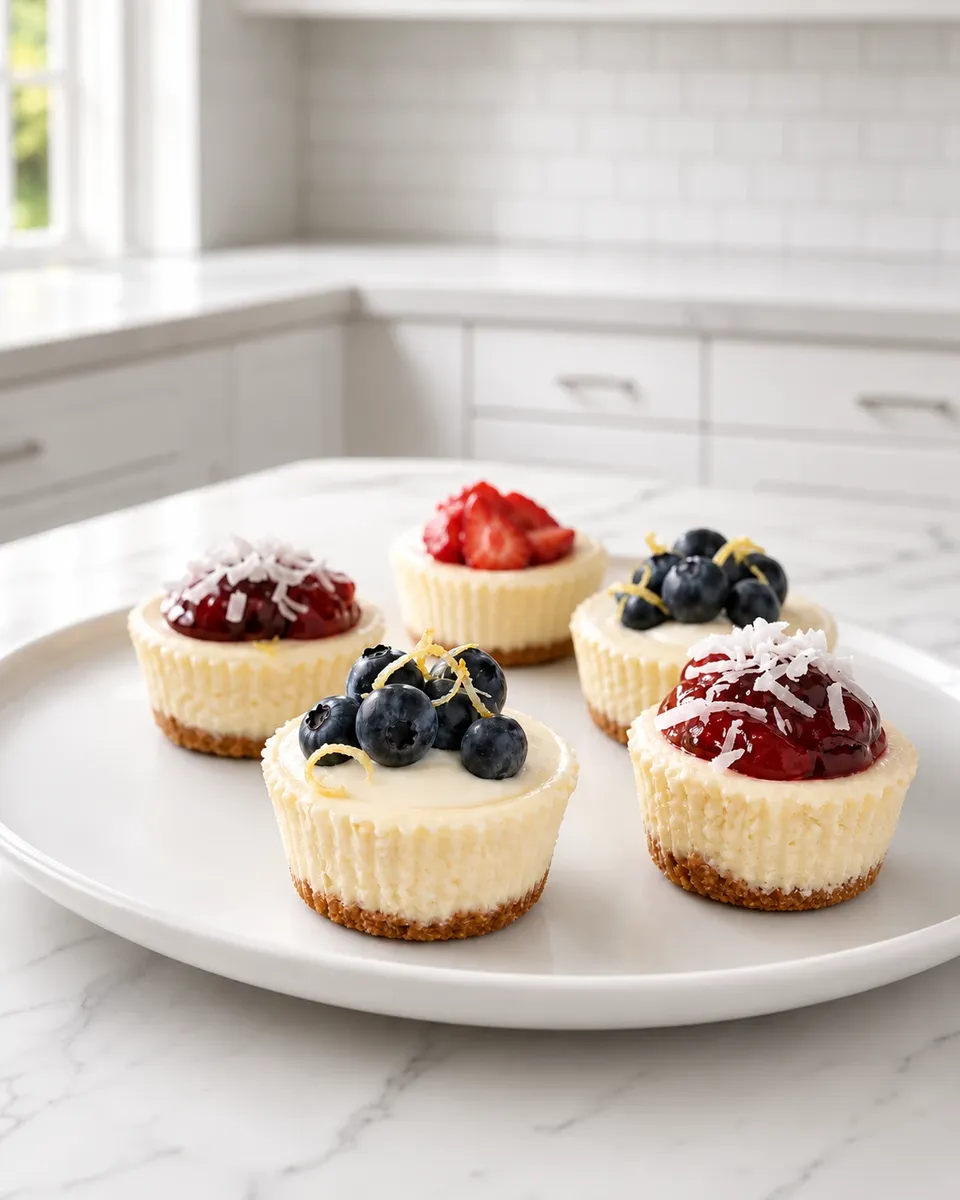
Creamy individual cheesecakes sit on graham cracker crusts and finish with whipped cream, blueberries and a bright touch of lemon zest.

Little portions with a useful plan
Mini cheesecakes make a rich dessert easy to portion without cutting a large cake at the table. Each one has its own crumb base, creamy filling and fresh finish, so a simple arrangement can feel complete. The important planning detail is that small does not mean instant: the batter comes together quickly, but baking, cooling and chilling still need time. Make them earlier in the day or the day before, then add the cream and berries close to serving. That separates the work into a calm baking session and a short finishing step.
Step 1: Start with the correct pan
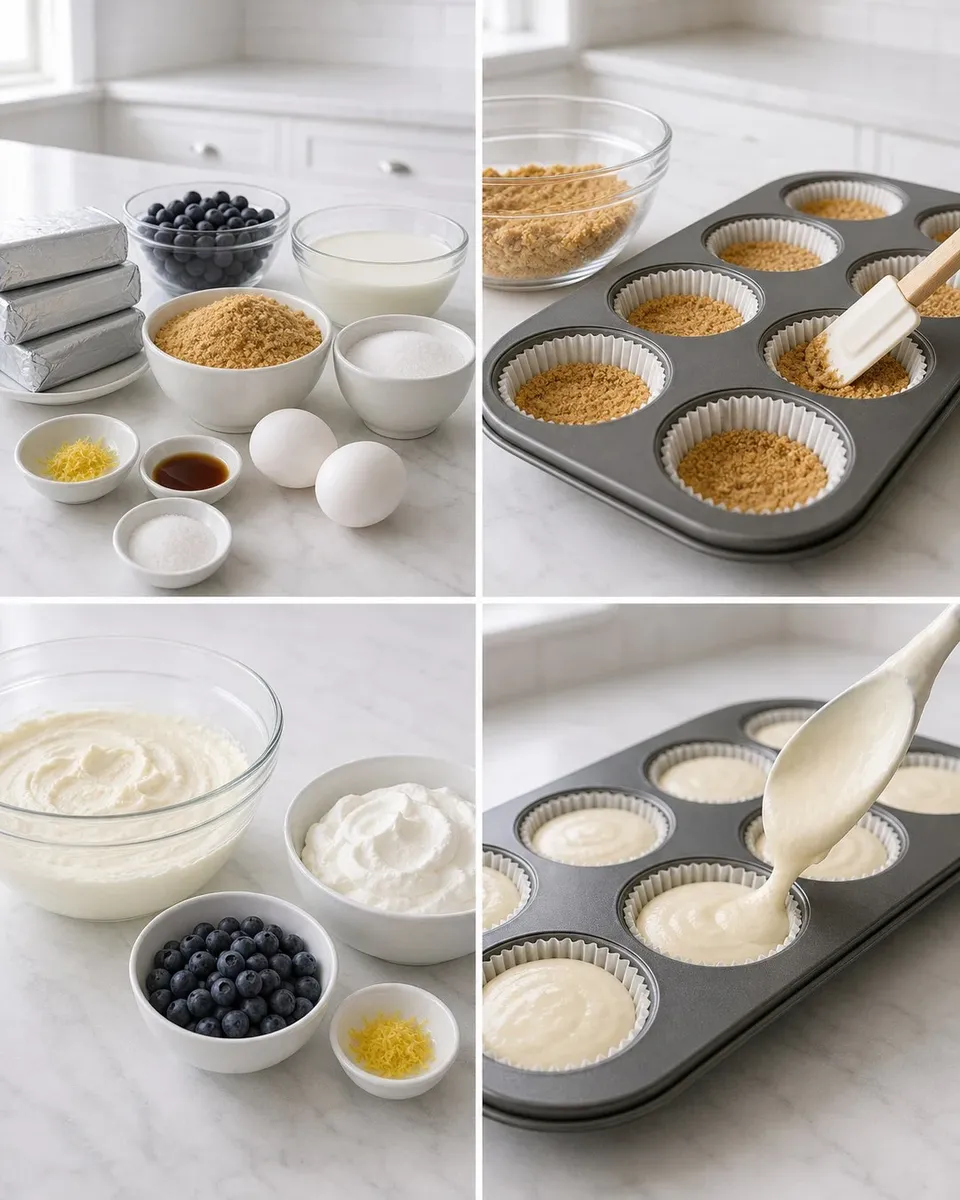
Use standard muffin cups and paper liners so the cheesecakes can be lifted out cleanly. Set out all eighteen liners before mixing the filling; if the pan holds only twelve, prepare a second pan or bake in batches. Smaller cups change both yield and baking time, so do not fill a miniature pan as though it were the same size. A flat-bottomed small glass or spoon helps press an even crust into each liner. The base should be compact enough to hold together, without using so much pressure that it becomes a hard biscuit under the soft filling.
Step 2: Soften the cheese, keep the cream cold
Cream cheese mixes most smoothly when it has softened enough to blend without stubborn lumps. Cut the blocks into smaller pieces to make that step more efficient, and avoid leaving dairy out for a long unattended stretch. Whipping cream needs the opposite treatment: keep it cold until the topping is made. Mixing these two temperature needs up is a common source of frustration. Softened cheese helps the batter stay smooth with less beating, while cold cream traps air more effectively and gives a topping that holds its shape on the finished cheesecake.
Step 3: Measure the two sugars separately
The small amount of sugar mixed into the crumbs belongs to the crust, while the larger amount belongs to the filling. Set them out separately instead of measuring one combined bowl and trying to remember what has already been used. Graham crumbs vary in fineness, so stir the butter through until the mixture is evenly damp and no dry pockets remain. A purchased crumb product is convenient, but plain crackers crushed finely can be practical if they are already in the pantry. Measure the crumbs after crushing so the crust quantity remains consistent.
Step 4: Mix smoothly without whipping the eggs
First blend the cheese, sugar and vanilla until the texture is even, scraping the bottom and sides of the bowl. Add the eggs one at a time and use a low speed just long enough to bring each into the batter. Extra beating after the eggs are added can work more air into the filling than it needs, encouraging puffing and later sinking. A smooth batter matters more than a fluffy one here. If a few cheese lumps remain, pause to scrape and gently blend rather than running the mixer at full speed in the hope that more speed will solve everything.
Step 5: Check the cheesecake centers
The stated baking window is a guide, because pans and ovens differ. Look for set edges and centers that move slightly when the pan is nudged, rather than a wet ripple or a fully rigid top. Do not wait for deep browning; these are creamy cheesecakes, not golden muffins. If the cakes rise dramatically or split, the oven may be too hot or the batter may contain too much air. They can still be served with a simple cream topping, but understanding the cause is more helpful than adding a thick layer of decoration to hide the surface.
Step 6: Cool and chill the cheesecakes
Warm filling is delicate and can break if the liners are peeled away too soon. Let the cheesecakes cool before refrigerating, then give them the full chilling period so the centers firm up. A crowded refrigerator shelf is worth clearing before baking; that small preparation prevents a pan of warm dessert from becoming a last-minute storage problem. Keep the topping separate during the chill. Once cold, the individual portions are much easier to move, and the crust has a better chance of staying attached to the filling when the paper is gently removed.
Use berries for brightness, not excess
Blueberries add a fresh contrast to cream cheese and whipped cream, while lemon zest supplies aroma without extra liquid. Wash the fruit and dry it well so water does not streak the topping. Zest the yellow outer skin and avoid the bitter white pith. A small scatter of berries is enough for each cheesecake; piling them high can make the portions awkward to eat. If another berry is more affordable, use it thoughtfully and cut large pieces small. The purpose is a bright final bite, not a separate fruit salad balanced on each cake.
Make a sensible shopping plan
This recipe uses three cream-cheese blocks. Check their listed size and what is already in the refrigerator before shopping so you have the full amount. Plain blocks give a more predictable batter than flavored spreads. Extra graham crumbs can go into another small crust or a yogurt topping, and leftover blueberries are easy to use at breakfast. Keep the finish simple, using the fruit and zest already included in the recipe. The lemon, berries and cream already give distinct flavors, and a restrained finish keeps both the cost and the sweetness easier to manage.
Store chilled and finish in small batches
Keep the cheesecakes covered in the refrigerator and use within about three to four days. For the freshest appearance, add whipped cream and fruit to the number being served, leaving the rest plain and cold. Carry them in a chilled container if taking them elsewhere, and do not leave the dairy dessert sitting on a warm buffet. Individual portions make it easy to replenish a plate gradually. That approach protects the texture, reduces leftovers with tired toppings, and keeps the dessert looking inviting without requiring a complicated presentation.
Why a mini cheesecake can sink
A slight settling in the center is normal as the filling cools, but a dramatic rise followed by a deep dip can point to too much air in the batter or too much oven heat. Mix eggs on low speed and avoid treating the filling like a sponge-cake batter. Fill the cups evenly so the same baking window suits the whole tray. The cream topping can sit naturally in a shallow center, so a small dip is not a failure that needs a heavy layer of frosting. Focus on a smooth creamy interior and a crust that holds together; those qualities matter far more than a perfectly level top.
Release the liners at the right moment
Cold cheesecake separates from paper more cleanly than warm filling. Peel the liner gently down and away rather than pulling the cake upward by its top. If serving directly in the papers, let guests remove them at the table and keep the portion supported on a small plate. A crumb or two remaining in the liner is normal, while a large loose base may mean the crust was not pressed evenly. Do not compensate by packing future crusts extremely hard. Aim for evenly damp crumbs with moderate pressure, then let chilling provide the structure the filling needs before handling.
Use lemon zest efficiently
Wash the lemon and dry its skin well before grating; dry zest stays light and fluffy. Use a fine grater with light pressure, rotating the fruit often to collect the aromatic colored peel while leaving the white pith behind. Only the zest goes into this recipe, leaving the juice available for a dressing or another planned meal. It can be refrigerated after zesting and used promptly. Add the zest near the time the desserts are served so its fresh fragrance remains noticeable. A measured bright finish is more effective than adding lemon juice to the filling without adjusting the recipe.
Chill the cheesecakes before removing the liners or adding whipped cream. The centers finish setting as they cool; baking until completely firm can make the texture dry.
Joy.Creamy individual cheesecakes sit on graham cracker crusts and finish with whipped cream, blueberries and a bright touch of lemon zest.
Tap each ingredient as it goes into your basket or bowl.
Follow the steps in order to make this recipe.
Heat the oven to 325°F and line 18 standard muffin cups with paper liners. Mix graham crumbs, 2 tablespoons sugar and melted butter; divide among the cups and press into compact bases.
Beat softened cream cheese with 3/4 cup sugar and vanilla until smooth. Add eggs one at a time on low speed, mixing only until incorporated. Scrape the bowl so the filling is even.
Divide filling over the crusts. Bake 25–30 minutes, until the edges are set and the centers retain a slight wobble. Cool in the pan, then refrigerate at least 2 hours until cold and firm.
Whip cold cream until it holds peaks. Spoon or pipe it onto the cold cheesecakes and finish with washed, dried blueberries and lemon zest. Keep refrigerated until serving.
Creamy individual cheesecakes sit on graham cracker crusts and finish with whipped cream, blueberries and a bright touch of lemon zest.
Joy’s kitchen note · Chill the cheesecakes before removing the liners or adding whipped cream. The centers finish setting as they cool; baking until completely firm can make the texture dry.