Time15 min prep + 25 min cooking
Makes4 servings
CategoryDinner
Tastefully Planned,
Joyfully Cooked.

Cook Marry Me Chicken in a skillet with sun-dried tomatoes, Parmesan and cream. Brown the chicken, finish the sauce and check doneness.

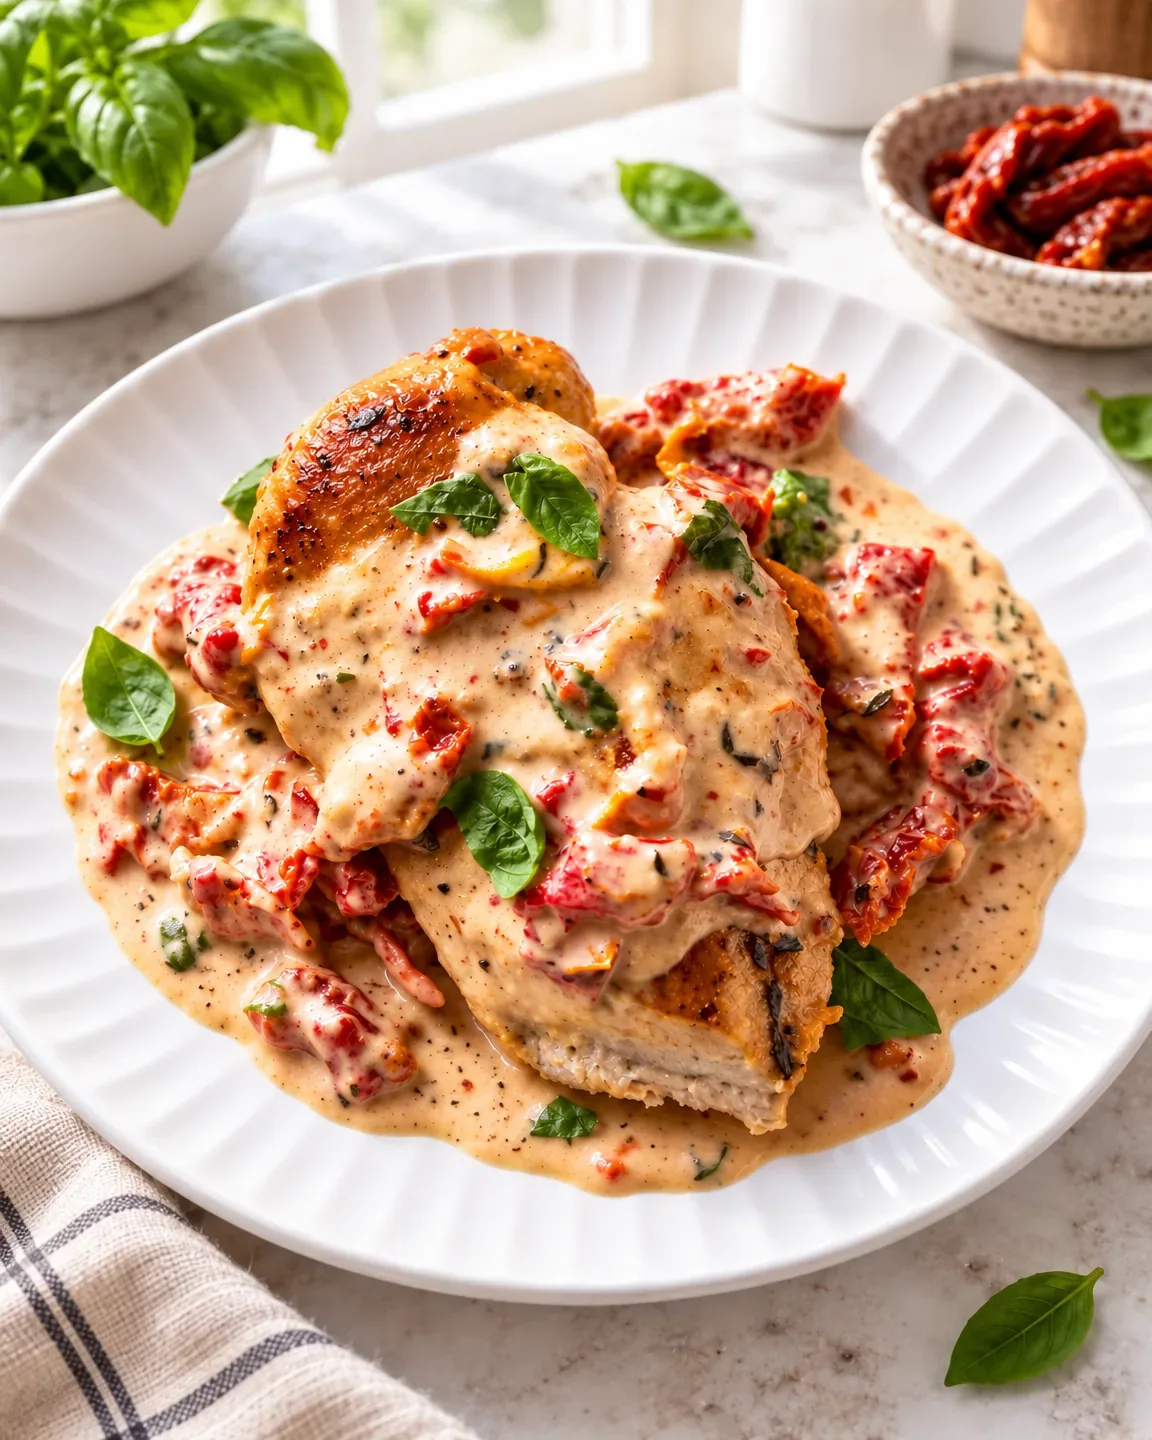
A skillet dinner that earns its sauce
The name is playful, but the practical appeal of this chicken is easy to explain: golden meat, a creamy sauce and little pieces of sun-dried tomato that bring concentrated flavor. Garlic, thyme and Parmesan make the pan feel generous without requiring several separate sauces or a long list of finishing jobs.
I like to plan the rest of the plate simply, with something to catch the sauce and a vegetable that does not need much attention. The chicken still deserves care of its own. Even thickness, a good sear and a thermometer check make a bigger difference than an extra spoonful of cream. Follow the separate stages for searing the chicken and building the sauce. This gives the chicken room to brown before everything comes together in the skillet.
Read the label and use what you buy
Oil-packed sun-dried tomatoes are the version specified here. Drain and chop them into small pieces that spread their flavor through the cream and are comfortable to eat with the chicken. Low-sodium broth gives you more room to balance the finished sauce after the Parmesan has joined it. The cheese is savory and salty in its own right, so choosing a strong broth and adding salt early can narrow that room quickly.
Buy fresh thyme with another use in mind if the bunch is larger than you need, and treat the optional basil as a finish rather than a reason for a second shopping trip. A block of Parmesan can serve several meals when stored properly. For a dinner like this, thoughtful buying means choosing ingredients whose remaining portions already have a place in the kitchen.
Step 1: Prepare even pieces of chicken
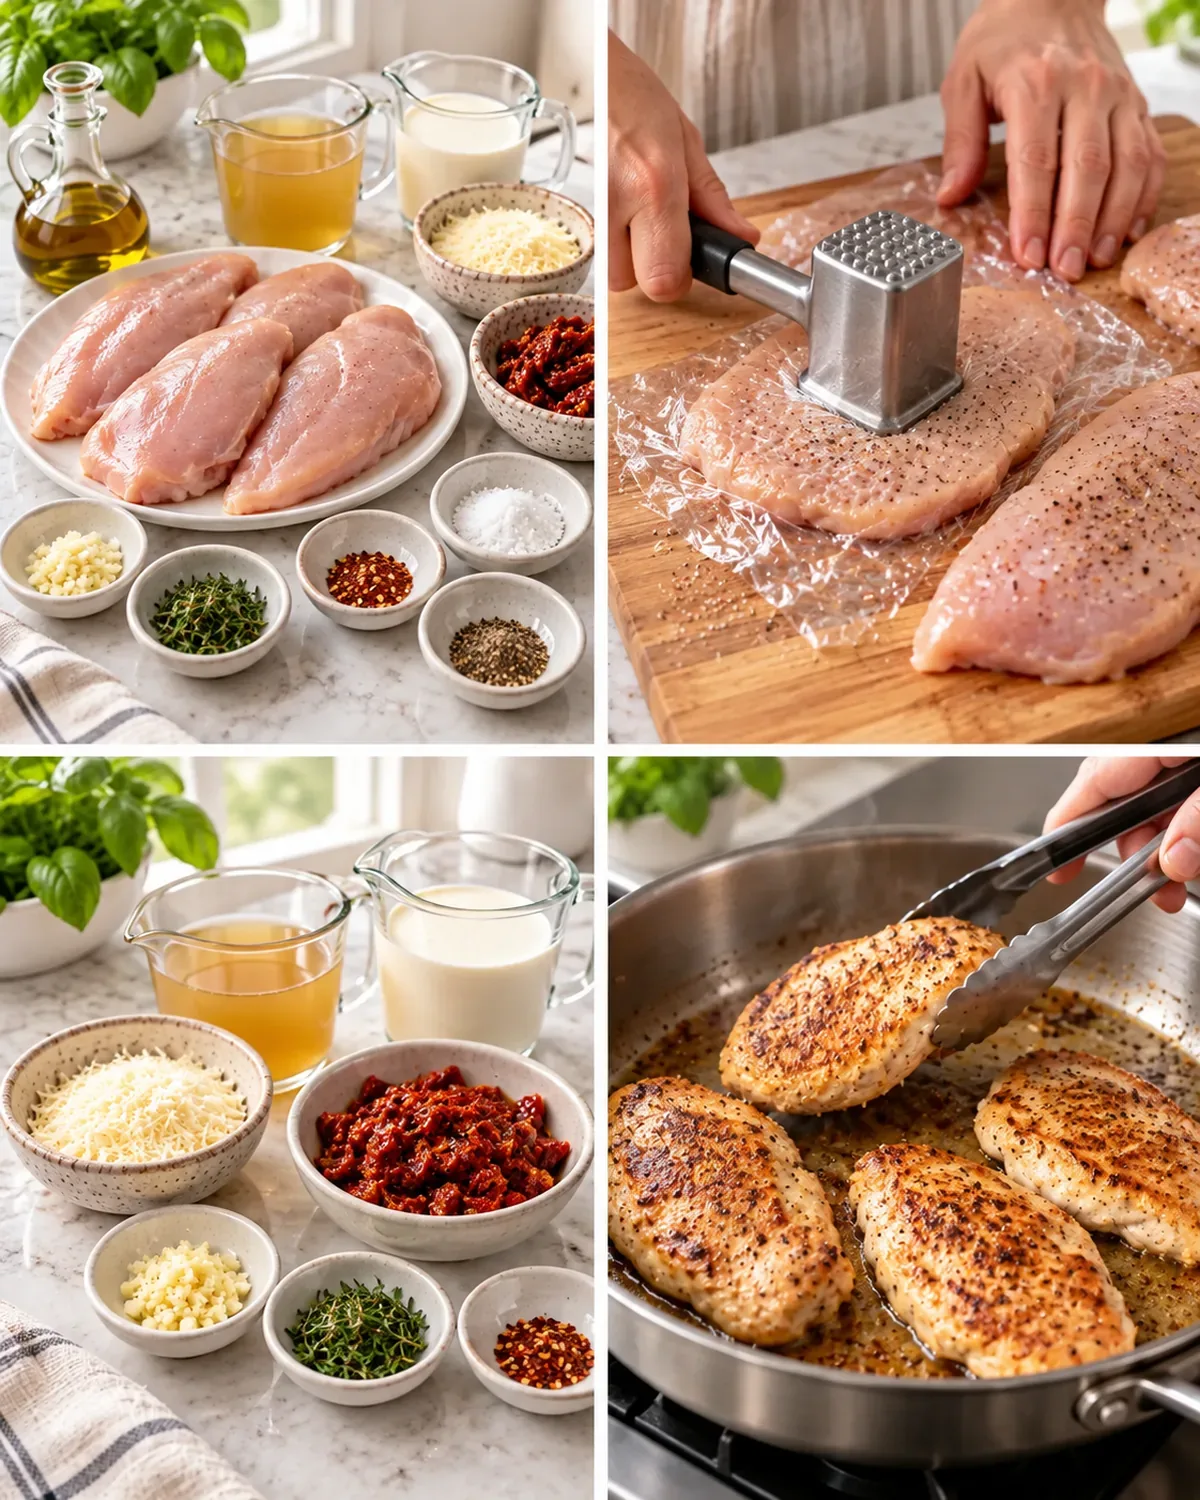
Boneless breasts often have one end much thicker than the other. Pounding the thick ends to the recipe's even thickness helps them cook at a more similar rate, reducing the chance of a dry narrow end while the center is still unfinished. Work on a stable surface and keep the raw chicken contained while you pound it. Pat the surface dry before seasoning, because excess moisture must evaporate before the meat can develop a golden sear.
These are ordinary preparation steps, but they make the cooking window much more useful. The aim is not paper-thin cutlets or four geometrically identical pieces. It is a manageable thickness that lets browning and gentle finishing work together. Keep the raw-chicken board and utensils separate from anything you will use for the finished meal.
Step 2: Let the pan do the browning
A wide skillet gives the chicken room to make contact with the hot surface. If the pieces crowd against one another, work in batches rather than piling them in and hoping the moisture disappears. Place the chicken into the oil carefully and allow it to develop color before turning. Moving it constantly interrupts the contact that makes a sear.
The first stage is not supposed to finish the meat all the way through; it creates flavor and leaves the rest of the cooking to the gentle sauce stage. Transfer the browned pieces to a clean plate, remembering that they are still only partly cooked. The juices that collect there return to the skillet later and cook with the chicken. Keep that plate away from salads, bread and other food that will not be cooked again.
Step 3: Build on golden bits, not burnt ones
The browned residue in the skillet is part of the sauce's flavor. Lowering the heat before adding garlic, thyme and red pepper gives the aromatics a brief, fragrant turn without scorching them. Garlic pieces are much smaller than a chicken breast and can burn quickly in the heat left behind. Watch for their aroma rather than waiting for them to become dark.
Broth then loosens the golden bits so they can become part of the sauce. If there are truly black, bitter patches in the pan, do not confuse them with desirable browning. A careful sear and a controlled heat change prevent that problem more easily than a rich sauce can hide it. Once the broth has done its work, cream and sun-dried tomatoes turn the pan juices into something softer and more rounded.
Step 4: A gentle simmer keeps the sauce manageable
Cream sauce does not need a hard boil to become flavorful. The short initial simmer lets the tomatoes and aromatics meet the liquid before the chicken returns. Look for small, steady bubbles rather than a pan splashing at full heat. As the chicken finishes, the sauce reduces further, so pay attention to its consistency instead of walking away until the clock rings.
If it becomes too thick before the meat is done, the card allows a splash of broth or water to loosen it. Add that thoughtfully, giving the liquid time to blend before deciding it needs more. A sauce should be able to move around the chicken. A dry ring of sauce clinging to the pan is a signal to adjust the heat or moisture, not a sign that extra reduction always means extra flavor.
Step 5: Finish the chicken by its center
The final simmer is a cooking stage for the meat, not merely a warm bath after searing. Turn the pieces as directed and check the thickest part reaches 165°F. Different breasts can finish at different moments even after evening their thickness, so check more than the smallest one. A thermometer tells you what a golden exterior cannot.
The timing window helps organize the meal, but the actual reading determines whether the chicken is ready. Keep the heat gentle while you make that assessment. If one piece is done much earlier, avoid leaving it to cook aggressively just because another is thicker. The sauce can remain loose enough to spoon around each portion, and the recipe's final low-heat cheese stage should begin only once the chicken has reached its proper doneness.
Step 6: Parmesan belongs at the quiet end
Finely grated Parmesan has a better chance to melt evenly than large curls dropped into the pan. Add it in small portions over low heat, stirring as each addition meets the sauce. This is the moment to slow down a little. A vigorous boil and a large pile of cheese can produce a grainier result than the gentle finish the recipe intends. The sauce should become savory and cohesive, not turn into a heavy cheese paste.
Taste after the Parmesan melts before deciding whether it needs more salt. If the consistency needs help, a small splash of the permitted liquid can restore movement. Basil is optional, but its fresh aroma is pleasant against the tomatoes and cream. Add it near serving so it remains a fresh accent rather than another ingredient simmered into the background.
Give the rest of the plate a clear role
Rice, pasta or bread can catch the sauce, and you only need to choose one to make the meal feel complete. A simple green vegetable or crisp salad adds another texture and gives the rich skillet some breathing room. I like deciding on those sides before the chicken reaches the stove, so the cream sauce does not sit waiting while a second complicated recipe begins.
Four breasts make four stated servings, although people may want different amounts of meat and sauce. Slicing the finished chicken for a shared platter can make that easier to accommodate. Keep optional basil and extra spoonfuls of sauce available for those who want them. A dinner with a few choices at the table can still begin in one pan; it does not require several separately cooked versions of the same meal.
Save the sauce as well as the chicken
Refrigerate leftover chicken and sauce promptly in covered containers. Keeping some sauce with the meat helps protect it from drying when reheated, while smaller portions are easier to warm evenly than a full cold skillet. Use gentle heat and stir the sauce as it warms, adding a little broth or water if it has become too thick. The aim is to heat the chicken through while keeping the dairy sauce from boiling fiercely.
Some change in texture after chilling is normal; do not keep reducing the sauce in an effort to make it look exactly as it did the first time. For a later meal, add a freshly prepared vegetable or a simple starch rather than assuming the richness needs another rich side. Planning that use before putting leftovers away makes them feel like useful food, with an easy place in the next day's meals.
Set up a useful skillet workspace
Keep the broth, cream, tomatoes and grated Parmesan ready near the stove, with the cheese set apart for its later stage. The aromatics have only a short moment in the hot pan, so that is not the time to begin opening cartons or searching for the thyme. A plate for the seared chicken should be large enough to hold the pieces and their juices without spilling on the counter.
Once the partly cooked chicken returns to the pan, wash the plate before using it for anything ready to eat. A broad spoon is useful for moving sauce over the meat without scraping away the seared surface. The whole arrangement can stay simple: one pan, one temporary plate and ingredients in their cooking order. That little bit of preparation helps a fairly quick dinner remain calm, especially when a side dish is finishing on another burner and the table still needs setting.
My husband and our children have their own tastes, so I like a chicken dinner with a few choices at the finish. Keep extra basil and sauce beside the pan for anyone who wants more. Let the sauce simmer gently, and add freshly grated Parmesan over low heat after the chicken reaches 165°F. That helps it melt smoothly without turning a comforting dinner into a fussy job.
Joy.Cook Marry Me Chicken in a skillet with sun-dried tomatoes, Parmesan and cream. Brown the chicken, finish the sauce and check doneness.
Tap each ingredient as it goes into your basket or bowl.
Follow the steps in order to make this recipe.
Pat chicken dry. Pound the thick ends to an even thickness of about ¾ inch. Season both sides with salt and black pepper.
Heat olive oil in a wide skillet over medium-high heat. Sear chicken 4–5 minutes per side until golden; work in batches if necessary. Transfer to a clean plate. The chicken will finish cooking in the sauce.
Lower heat to medium-low. Add garlic, thyme and red pepper flakes to the skillet; stir 30–60 seconds without burning the garlic. Add broth and scrape up the golden pan juices. Stir in cream and sun-dried tomatoes; simmer gently for 2–3 minutes.
Return chicken and its juices to the pan. Simmer gently, turning once, about 5–10 minutes depending on thickness, until the thickest part reaches 165°F. Add a splash of broth or water if the sauce gets too thick.
Turn heat to low and stir Parmesan into the sauce in small additions until melted. Taste before adding salt. Spoon sauce over the chicken, garnish with basil if using, and serve with rice, pasta or bread.
Cook Marry Me Chicken in a skillet with sun-dried tomatoes, Parmesan and cream. Brown the chicken, finish the sauce and check doneness.
Joy’s kitchen note · My husband and our children have their own tastes, so I like a chicken dinner with a few choices at the finish. Keep extra basil and sauce beside the pan for anyone who wants more. Let the sauce simmer gently, and add freshly grated Parmesan over low heat after the chicken reaches 165°F. That helps it melt smoothly without turning a comforting dinner into a fussy job.