TimeAbout 20 min prep + 10 min chilling
Makes12 cookie pops
CategoryDessert
Tastefully Planned,
Joyfully Cooked.

Chocolate-coated sandwich cookies become cheerful skeleton-face pops with a few simple black icing details.

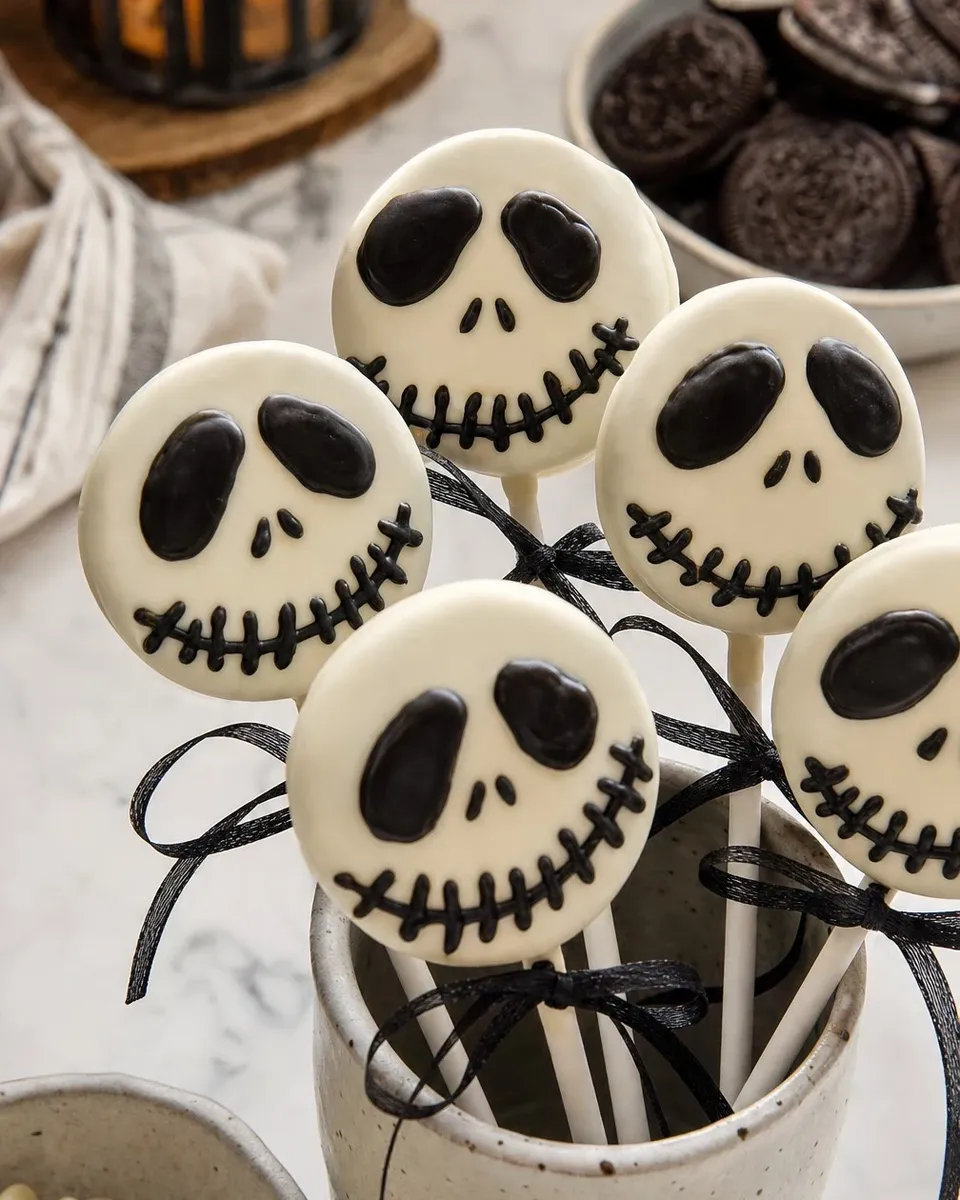
A familiar cookie with a festive finish
These pops begin with whole sandwich cookies, making them a simple assembly project with no cake to crumble or frosting mixture to roll. The sandwich cookie remains intact under a white coating, which gives each face a clean round shape. That keeps the shopping list small and makes the number of servings easy to plan. Count twelve cookies and twelve sticks before melting anything, then line a tray with parchment. A simple black-and-white design is enough to communicate the character; the dessert does not need a collection of extra candies or a complicated display to feel festive.
Choose a cookie that can hold a stick
The cream layer is where the lollipop stick sits, so insert it slowly and keep the cookie flat as you work. Pressing hard through a thin filling can crack the wafers or force the cookie apart. If the layers separate, a small dab of melted coating can help join them again, followed by a brief rest until secure. Choose food-safe sticks intended for treats, with a smooth shape suited to holding a sandwich cookie safely. The seasonal cookie version is optional for appearance inside the coating, but changing to a much smaller or softer cookie affects how well the stick can support it.
Step 1: Melt the white chocolate gently
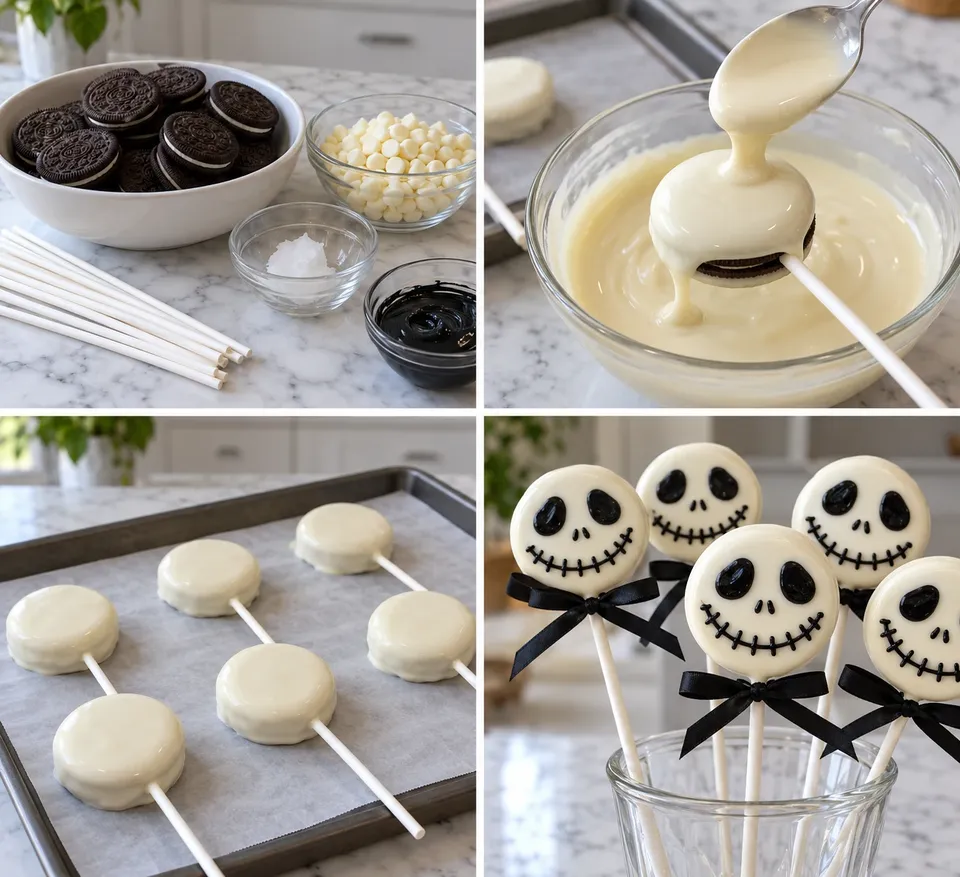
White chocolate chips can look almost unchanged even when warm enough to melt with stirring. Heat in short bursts, then stir thoroughly before deciding that another burst is necessary. A bowl with very hot spots can scorch the coating while other chips still appear solid. Coconut oil loosens the mixture, but it does not protect white chocolate from excessive heat or water. Keep the bowl and spoon dry. Stop once the coating is smooth and fluid enough to spoon, and give it a moment to lose its fiercest heat before it touches the cookie filling.
Step 2: Coat the cookie pops
A cookie pop is wider and more fragile at its center than it first appears. Pulling it through a thick coating can loosen the stick or split the wafers. Hold the cookie above the bowl and spoon the mixture across each side, turning gently to cover the edges. Let the excess fall back into the bowl rather than building a heavy shell. A thin, even layer sets more neatly and is easier to bite. Place the coated cookies on parchment without crowding them, and keep the sticks pointing in consistent directions so the tray is easy to move into the refrigerator.
Step 3: Let the coating set
Black icing travels across a warm, soft coating and can turn a small eye into a blurry patch. Chill the white-coated cookies until firm before drawing. Start with two eyes and a nose, then add the curved mouth and short stitch lines. A toothpick helps move a tiny amount of icing without a large piping tip. Let the face remain a little handmade rather than repeatedly scraping and redrawing it. If the cookie surface becomes wet with condensation, allow it to dry in a cool place before decorating so the icing has a better chance of staying defined.
Keep decoration separate from food
Black ribbon is a presentation detail, not an ingredient to eat. If used, tie it around the stick below the cookie after the coating has set and make it easy to remove. Food-safe treat bags are a more practical choice than elaborate loose decoration if the pops will travel. Avoid placing the edible portion into decorative sand, craft filler or anything that is not intended for food contact. A plain cup can hold a few wrapped pops, or the entire batch can lie flat on a serving tray. The face is already the focus, so a clean arrangement usually looks more finished.
A small-batch party plan
Twelve cookies make twelve defined portions, which is helpful when planning a dessert table with several sweets. Buy the quantity needed for the coating and save extra packaged cookies for another use rather than automatically doubling the recipe. Set out only a few pops at a time if the room is warm, because the coconut-oil coating can soften. These are sweet treats, so pairing them with fruit or a savory snack provides contrast without pretending the recipe itself is a balanced meal. A simpler face on every cookie often uses less icing and takes less time than an ambitious design on only the first few.
Storage and transport without smudges
Let the coating and icing firm completely before stacking or bagging the pops. Store them in a covered container in a cool environment suited to the coating and icing you used, following any package refrigeration requirements. If chilled, protect them from strong refrigerator odors and allow for condensation when moving them into a humid room. Transport in a single layer whenever possible so the face decoration is not rubbed away. Hold a pop by the stick gently and support the cookie when unwrapping it; the stick is a handle for serving, not a guarantee that the cookie can withstand rough movement.
If the coating becomes too thick
Pause and assess the bowl before adding more oil. White chocolate thickens as it cools, so a very brief gentle rewarming may be enough to restore its flow. Stir thoroughly after warming and keep water or steam away from the bowl. A seized, grainy mixture from water contamination is a different problem from a simply cool coating, and adding oil without a plan does not make the two situations identical. Use the recipe’s measured oil as the baseline. Work with a few cookies at a time and return the spoon to the bowl cleanly so crumbs do not build up in the coating and create a rough surface.
A drawing plan keeps the faces consistent
Before touching the icing to a cookie, decide where the eyes, nose and mouth will sit. Two larger dark eye shapes and a small nose leave room for the curved stitched smile below them. The toothpick can draw short lines with much less icing than a squeezed tube, which gives more control on the round surface. Let the first face set while decorating the next rather than repeatedly handling it. Small variations make the batch feel handmade, so there is no need to scrape away a sound coating just to match every angle. A clean, readable face from a short distance is more useful than tiny detail that smears during wrapping.
Flat service is an equally finished option
The pops do not have to stand upright in a centerpiece to look complete. A parchment-lined tray protects the faces and avoids putting stress on the sticks while the coating is still fragile. If you do use a holder, make sure the edible part cannot touch craft materials or a dirty surface. Food-safe packaging can keep individual portions separate for a party table or a small gift. Tie any ribbon to the stick rather than pressing it against the cookie. A flat arrangement is often easier to refrigerate, transport and portion, particularly when the destination has limited room for a tall decorative display.
A practical cleanup sequence
Let excess coating fall back into the bowl while each cookie is held above it, reducing puddles on the parchment. Keep a small plate nearby for the spoon so it does not leave chocolate trails across the counter. Unused melted coating can be handled according to its package guidance, but do not return crumb-filled leftovers to an untouched bag of chips. Wash tools once the mixture has cooled to a safe temperature. If this is a shared decorating activity, give each person a few cookies and a small amount of icing rather than letting every tool move through the main bowl. That makes the finished tray tidier and the ingredients easier to manage. Set the finished tray aside where the icing can firm without being touched.
Spoon the coating over the cookie instead of pushing the whole pop through a deep bowl. Less pressure on the stick helps keep the cookie layers together.
Joy.Chocolate-coated sandwich cookies become cheerful skeleton-face pops with a few simple black icing details.
Tap each ingredient as it goes into your basket or bowl.
Follow the steps in order to make this recipe.
Put the white chocolate chips and coconut oil in a microwave-safe bowl. Heat in 20-second bursts, stirring well after each, until just smooth.
Carefully slide one of the 12 food-safe lollipop sticks into each cookie’s cream layer. If a cookie separates, use a little melted coating to secure it and let that join set.
Hold each cookie over the bowl and spoon coating over both sides, letting excess drip away. Place on a parchment-lined tray and refrigerate 5–10 minutes, until firm.
Draw the eyes, nose and stitched smile with black icing, using a toothpick for fine detail. Let the decoration set. Tie optional black ribbon below each cookie and remove it before eating.
Chocolate-coated sandwich cookies become cheerful skeleton-face pops with a few simple black icing details.
Joy’s kitchen note · Spoon the coating over the cookie instead of pushing the whole pop through a deep bowl. Less pressure on the stick helps keep the cookie layers together.