Time20 min prep + 1 hr chilling + 12 min per batch
Makes48 cookies
CategoryBaking
Tastefully Planned,
Joyfully Cooked.

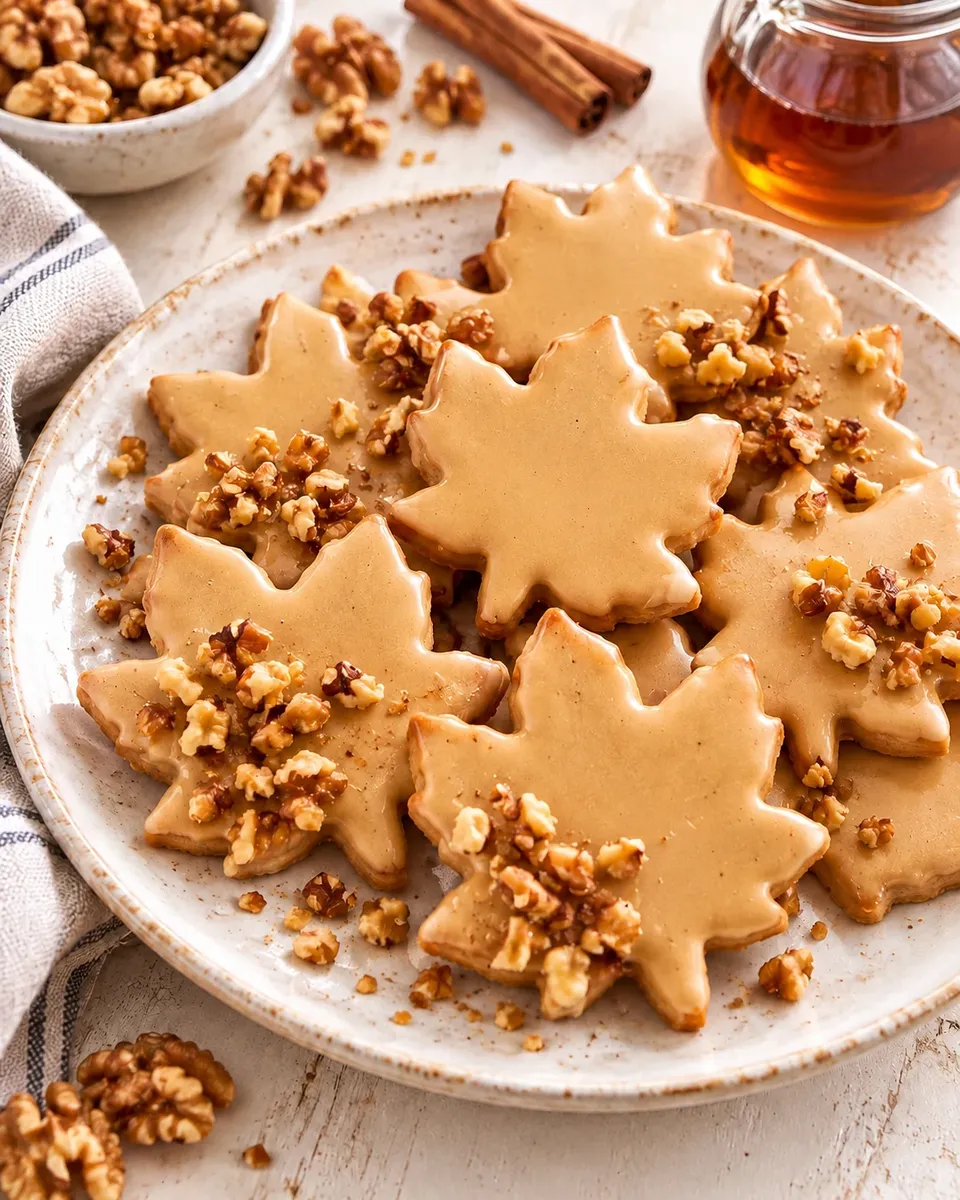
Buttery walnut cookies, cut into autumn leaves and finished with a soft brown-sugar maple glaze.

A little autumn, thoughtfully planned
A leaf-shaped cookie can make a simple plate feel seasonal without a cupboard full of decorating supplies. Here the walnut dough and warm brown-sugar glaze do most of the work; the cutter provides the finishing detail. The buttery walnut dough, gentle spice and brown-sugar glaze give each cookie a nutty flavor with maple in the background. I would plan these as a baking project with a pause in the middle: mix the dough when you have a few minutes, let the refrigerator do its part, and save rolling and glazing for a calmer stretch. Serve a small portion alongside a warm drink, where the cookie's walnut and maple flavors can be enjoyed at an easy pace.
Why the walnuts go in with the flour
Walnuts contain oil, so processing them alone for too long can turn them past finely chopped and toward a paste. Pulsing them together with flour helps separate the pieces and makes a fine, even mixture easier to achieve. Pulse briefly and stop to inspect the mixture, keeping an eye on how finely the nuts are chopped. The nuts should be small enough that the cutter does not drag large pieces through the dough. This is also a good place to use a bag of walnut pieces, which is often less expensive than perfect halves and works just as well once ground. Smell the nuts first; stale or bitter walnuts will not become fresh again in the oven or under glaze.
Step 1: Mix and chill the dough
The butter should yield to a fingertip but still hold its shape before mixing. That allows it to blend with sugar without leaving hard lumps or making the dough greasy. Once the egg and dry mixture are incorporated, the goal changes: chilling firms the fat so the dough rolls cleanly. Do not try to fix a warm, sticky dough with repeated handfuls of flour. Wrap it, flatten it into a manageable slab and give it time in the refrigerator. If the edges crack when rolling, let the slab sit briefly until pliable. Soft enough to bend and cool enough to lift is a more useful target than forcing dough straight from either extreme.
Step 2: Roll and cut an even sheet
An even 1/8-inch thickness matters more than a perfectly shaped first roll. A thick center can stay soft while thin leaf points become dark, so check the sheet from the side before cutting. Lightly flour the pin and work surface, then lift and rotate the dough between passes so it does not quietly stick underneath. Collect scraps gently and chill them again if they become soft; repeated kneading makes later cookies tougher. You do not need a special cutter to enjoy the flavor. A simple round cutter produces the same dough and glaze with fewer fragile edges, though the yield will vary with its size.
Step 3: Bake until the edges are lightly colored
These cookies are baked when the edges begin to turn light gold and the tops no longer look raw. Waiting for the entire surface to become brown can dry the centers and make the tips taste bitter. Give the shaped pieces their short freezer rest so their outlines have a better chance of holding. Space similar sizes together, and rotate trays if the back of your oven browns faster. Once removed, let the cookies settle before moving them; thin warm cutouts can bend or break. A rack allows the bottoms to release steam and become crisp enough to support the glaze without turning damp.
Step 4: Keep the glaze smooth and easy to control
The brown sugar and butter need gentle heat and steady stirring, especially around the edge of a small saucepan where sugar can scorch. Take the mixture off the heat before adding the remaining glaze ingredients. Sift or break up confectioners’ sugar lumps before whisking so you are not chasing dry pockets in a thick glaze. A warm glaze flows more freely; as it cools it will coat more thickly. Dip a plain scrap cookie first to judge the consistency. Let excess drip into the bowl rather than shaking the cookie hard, which can snap a leaf point and leave a much heavier coating than needed.
Make one batch serve more than one occasion
The dough can rest in the refrigerator for up to two days before rolling, making it useful for a planned weekend bake. Decide how many cookies you actually want to glaze at once; plain cookies are easier to store without the tops sticking together. Walnuts already appear in the dough, so optional toppings can stay modest, and maple sugar is not essential. The small amounts of maple syrup and extract have different roles: syrup contributes sweetness while extract supplies a concentrated aroma. Vanilla is the listed alternative to maple extract and gives a warmer vanilla-walnut cookie rather than an identical maple flavor.
If the dough tears around the cutter
A little sticking usually calls for a temperature adjustment before it calls for more flour. Slide a thin spatula under a test cutout and see whether the dough lifts cleanly. If it stretches, chill the sheet briefly. If it fractures into dry pieces, allow it a few minutes to become pliable and check that the work surface is not heavily floured. Dip the cutter in a little flour and tap off the excess between cuts, especially around narrow leaf points. A simple shape is easier to transfer than a very detailed one, and you can bake the small scraps as tasting pieces instead of repeatedly rerolling every last corner into a tougher cookie.
What to do when the glaze thickens
The glaze becomes firmer as it cools, so a coating that was flowing easily may begin leaving ridges partway through the batch. Warm it very gently and stir before deciding it needs extra liquid. If necessary, add milk only a few drops at a time rather than a full spoonful. A glaze that is too thin will run off the leaf tips and collect underneath; let it cool slightly before the next dip. Work over a rack set on parchment so drips do not glue the cookies to a flat plate. Wipe away any small pool under a finished cookie while the glaze is still soft, then let the surface settle without touching it.
Choose a baking tray that suits thin cutouts
A light-colored metal tray makes it easier to protect the delicate underside of these thin cookies. Very dark trays can brown the bases before the tops look ready, so check an early cookie rather than assuming every tray needs the full time. Parchment provides a clean release and can be reused for another batch if it is still intact and not heavily browned. Arrange the cutouts on a cool tray, with space between the widest parts. If you have only one suitable tray, use the waiting time to chill the remaining dough. Rushing a second batch onto hot metal can undo the careful freezer rest and blur the leaf shapes.
Maple aroma without a cupboard of extras
The small amount of maple syrup in the dough is not the only source of the final maple impression; the glaze and optional extract are much more noticeable at the surface. Choose the listed vanilla alternative if that is what you already have, understanding it gives a vanilla-brown-sugar finish instead. Do not substitute a large pour of syrup for a small measure of extract, as that changes the glaze liquid rather than simply its aroma. Optional maple sugar and chopped walnuts can be left off without making the recipe incomplete. A smooth, light coating lets the walnut dough remain recognizable and keeps the cookie easier to handle.
Let the finish set before sharing
Glazed cookies should cool and set in a single layer before going into a container. Separate layers with parchment so the tops do not print their leaf shapes onto one another. Because the glaze contains milk, keep glazed cookies refrigerated in a covered container and bring out only what you plan to serve. For a longer pause, freeze the unglazed baked cookies, tightly wrapped, then thaw before glazing. Label any shared box clearly for walnuts, wheat, egg and dairy. A homemade seasonal gift feels much more useful when its ingredients and storage needs are easy for the recipient to understand.
Keep the unrolled dough chilled while working with a small portion. Thin leaf tips brown before the center, so start checking the smallest shapes first.
Joy.Buttery walnut cookies, cut into autumn leaves and finished with a soft brown-sugar maple glaze.
Tap each ingredient as it goes into your basket or bowl.
Follow the steps in order to make this recipe.
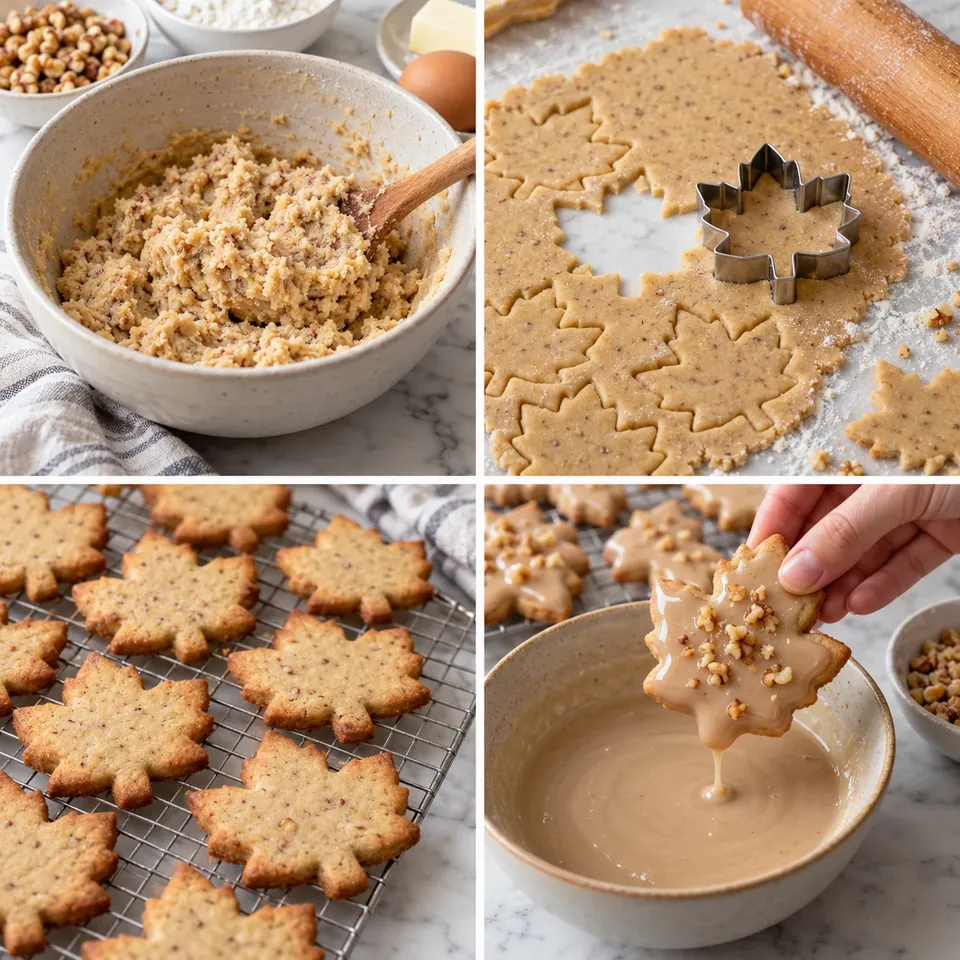
Pulse the flour and walnuts in a food processor until the nuts are finely ground. Add baking powder, cinnamon and salt; pulse briefly to distribute.
Beat the softened butter and granulated sugar until pale and fluffy, about 2 minutes. Beat in the egg, 1 tablespoon milk and 1 teaspoon maple syrup. Mix in the dry ingredients on low just until combined. Wrap and chill at least 1 hour, or up to 2 days.
Roll chilled dough on a lightly floured surface to 1/8 inch thick. Cut leaf shapes and arrange on parchment-lined trays. Reroll scraps gently. Freeze the shaped cookies 10 minutes.
Heat the oven to 350°F. Bake 10–12 minutes, rotating the trays halfway through, until the edges are lightly golden. Cool completely on a rack.
Over low heat, stir the brown sugar and 6 tablespoons butter until melted and smooth, 2–3 minutes. Transfer to a heatproof bowl; cool slightly. Whisk in extract and 1/2 teaspoon maple syrup, then confectioners’ sugar, a pinch each of salt and nutmeg, and 3 tablespoons milk.
Dip one side of each cool cookie into the glaze and let excess drip away. Add optional crushed walnuts or maple sugar while wet. Let the glaze set before packing.
Buttery walnut cookies, cut into autumn leaves and finished with a soft brown-sugar maple glaze.
Joy’s kitchen note · Keep the unrolled dough chilled while working with a small portion. Thin leaf tips brown before the center, so start checking the smallest shapes first.