Time20 min prep and shaping + about 3–5 min microwaving + cooling
Makes6 mochi
CategoryDessert
Tastefully Planned,
Joyfully Cooked.

Wrap sweet red bean paste in soft, chewy rice-flour dough, with optional cooked red peas folded through the shell.

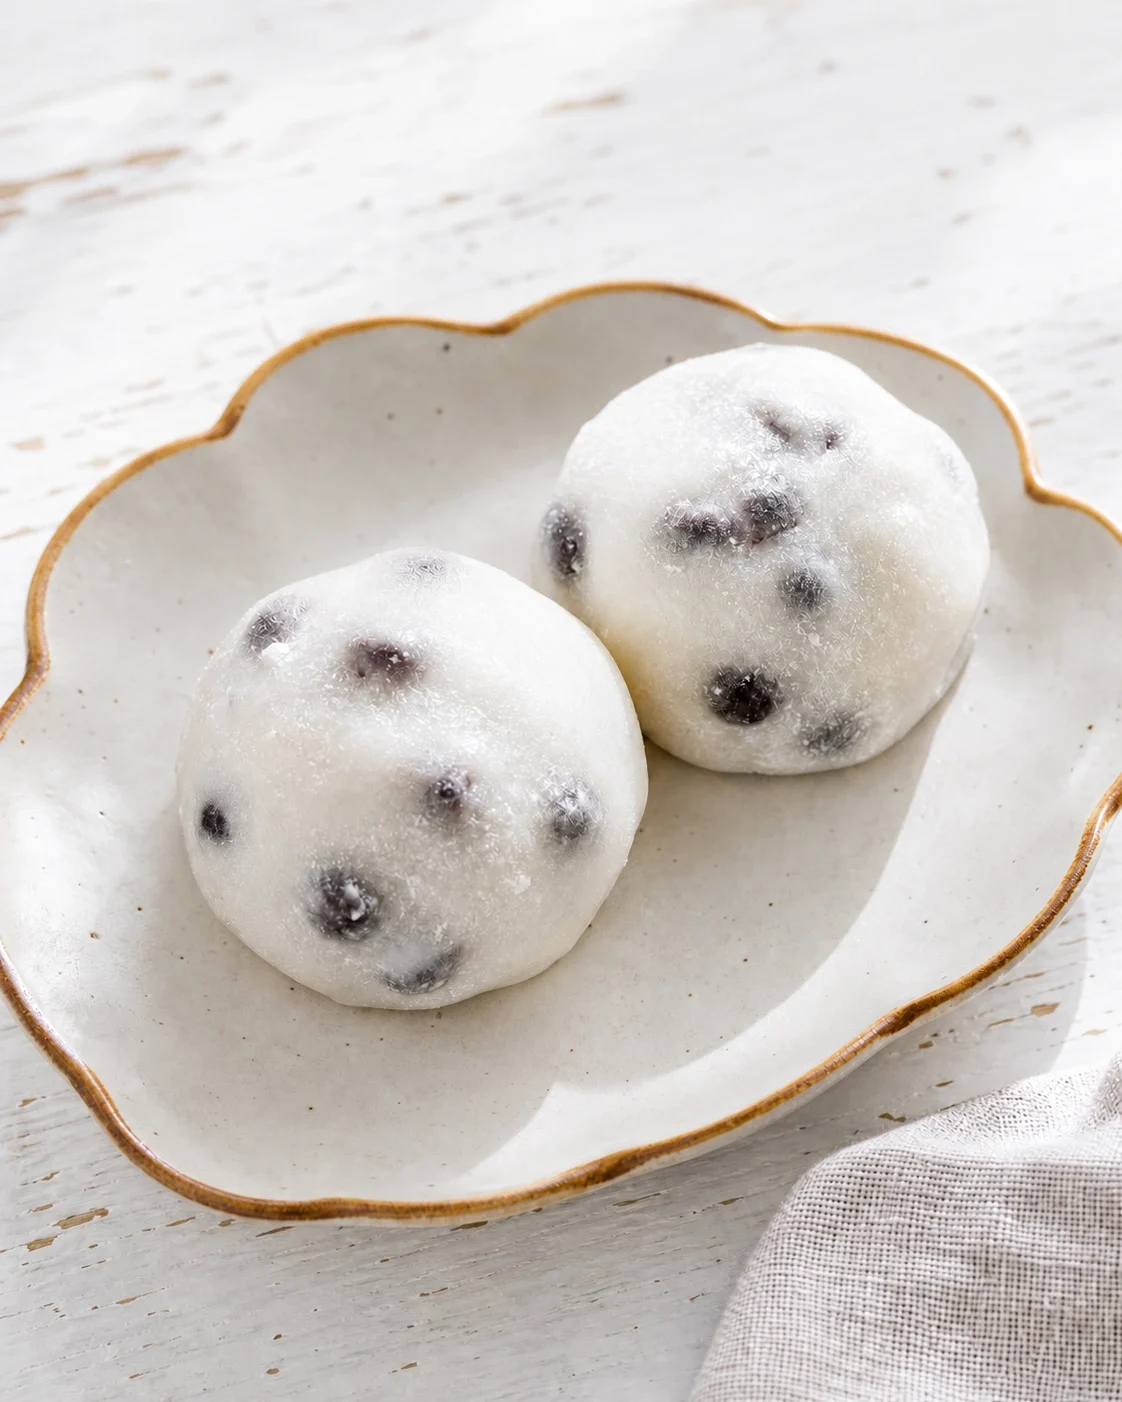
A small dessert with a soft center
Daifuku is a lovely reminder that a dessert can be small and still ask for your full attention. A tender rice-flour wrapper surrounds sweet red bean paste, with a little starch outside to make the sticky dough manageable. The ingredients are few, so their textures are easy to notice. I like the quiet contrast between the smooth filling and the stretchy wrapper, without needing a long list of toppings to make each piece feel complete.
This recipe makes six mochi, which keeps the shaping work contained. It is worth setting aside the counter space before you start, because hot dough doesn't wait politely while you search for a tray. The microwave method is approachable, but it still needs careful stirring and a little judgment. Reading the whole process first helps you understand where you can work ahead and where the dough needs your attention as soon as it is ready.
Start with the flour the recipe asks for
Shiratamako glutinous rice flour is the foundation of this wrapper. Glutinous refers to its sticky quality when cooked, not to ordinary wheat flour, and regular rice flour isn't a direct replacement for it. The recipe is built around the way shiratamako takes up water and becomes elastic with heat. Using the named flour gives you a more useful starting point than trying to correct an unfamiliar dough halfway through microwaving.
Sugar sweetens the wrapper, while the red bean paste supplies the main sweet filling. The mildly sweet rice wrapper gives the red bean center room to provide the main sweetness in each piece. Measure the flour, sugar and water carefully, ideally keeping the gram amounts for the flour and sugar. In a short ingredient list, a generous scoop or an unmeasured splash can change the dough noticeably, and extra potato starch later will not correct that difference inside it.
Step 1: Prepare the filling before the dough
Divide the anko into six equal balls before you turn on the microwave. Each portion is thirty grams, giving every wrapper a clear amount to surround. A ball of filling is easier to enclose than a loose spoonful spread across the work surface. Keep the filling nearby, along with a sturdy spatula and the generously dusted tray, so the cooked dough can move directly into shaping without a long delay.
The optional red peas or adzuki beans must be fully cooked and drained. They add small pieces to the wrapper, with the sweet paste still tucked into the center as the filling. Draining is important because the finished dough already has its measured water; a spoonful of bean liquid would make handling less predictable. If the extra beans don't fit your shopping plan, leave them out. The basic combination of rice wrapper and anko has a complete identity without an additional package opened for one small batch.
Step 2: Mix until the flour is evenly wet
Before cooking, stir the rice flour, sugar and water until no dry pockets remain. At this stage the mixture is not supposed to look like finished stretchy mochi. The purpose is even hydration, so the microwave starts with a consistent mixture instead of one corner full of powder. A large microwave-safe bowl gives you room to stir during later stages without chasing hot dough over the rim.
Use a microwave-safe cover with a vent as directed. It should help hold moisture while allowing steam to escape; a sealed container is not the intended setup. Have a place ready for the hot lid or cover when you remove it. This kind of preparation is easy to overlook in a recipe with a short cooking time. A clear landing place and a dry, protected grip make it much easier to focus on the changing dough instead of juggling hot equipment over a cluttered counter.
Step 3: Microwave until the dough is cooked
The listed intervals begin at 600 watts. Know your microwave's power setting before starting, because a machine on a different power level won't necessarily behave on the same schedule. Stir after the first heating and again after the next. That brings the hotter and cooler parts of the mixture together and makes it easier to see whether any pale, chalky patches remain. The dough thickens quickly, so a sturdy spatula is more useful than a delicate whisk here.
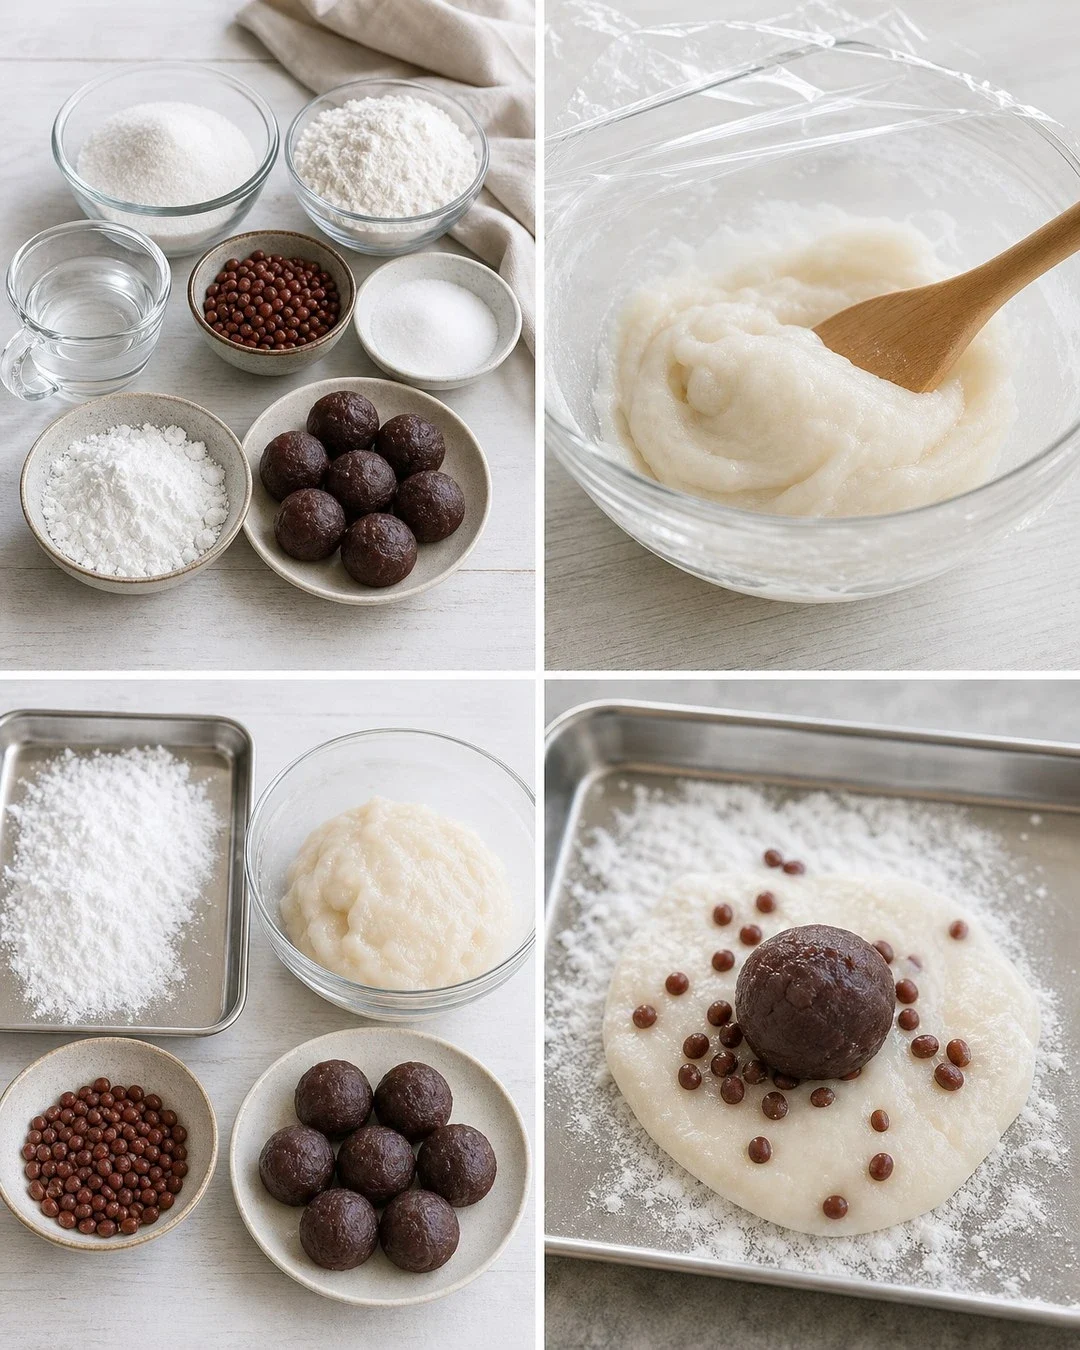
Continue in the short intervals specified until the mixture is glossy, stretchy and slightly translucent throughout. Those cues matter more than reaching exactly three or exactly five minutes. Stop and inspect between additions of heat rather than running one long final cycle out of impatience. A cooked-looking edge does not mean the center is ready. Conversely, a uniform elastic dough doesn't need extra heating just to match the longer end of the time estimate. Let the texture tell you which stage you have reached.
Step 4: Dust the work surface with starch
Potato starch coats the surface so the cooked rice dough can be handled. The recipe makes about a cup available for dusting, but most of it stays on the tray; it is not a cup to knead into the dough. Dust the landing area before the bowl comes out of the microwave. Then use the spatula to transfer the very hot mixture and dust the top so it has a surface you can approach safely once it has cooled enough.
Allow just enough cooling to handle the dough comfortably while it remains soft. There is no advantage in trying to touch it while it is painfully hot, and no need to leave it until it is cold and firm. Lightly dusted hands and a dusted tool can help divide it into six pieces. If you use the cooked beans, fold them in gently at the point directed. Keep most of the starch outside the dough, where it can do its job without making the wrapper dry and powdery.
Step 5: Wrap with a thicker center and thinner edges
A disc with a slightly thicker center supports the filling while its edges gather above it. If the entire disc is stretched very thin, the bottom may tear under the anko before the seam closes. If the edges stay too thick, they make a bulky knot. You don't need a perfect circle, but you do want enough dough around the perimeter to bring together without pulling hard against the filling.
Set one anko ball in the middle, gather the wrapper around it and pinch the edges closed. Keep excess starch away from the joining surfaces as much as practical, since a heavily dusted seam is harder to unite. Place the closed piece seam side down so the smooth side becomes the top. Work one piece at a time instead of flattening every disc and leaving the surfaces exposed. The goal is a continuous wrapper around the filling, not a decorative fold that is difficult to repeat.
Small problems have specific causes
If the dough clings immediately to the tray or your hands, check the dusting before assuming the whole mixture is wrong. Its natural stickiness is why the shaping starch is there. Add enough on the working surface to manage it, rather than burying the dough and kneading in handfuls. If a wrapper cracks or fights every attempt to stretch it, consider whether it has cooled too far or whether dry starch has been worked into the interior.
A patch of dry-looking flour inside the cooked mixture is a different issue from a dusted exterior. The recipe's microwave stage should remove chalky patches before shaping begins. A wrapper that is only partly cooked won't be repaired by enclosing the anko and hoping it rests into the right texture. Similarly, overfilling is a shaping problem: use the measured thirty-gram portions rather than making one generous center and asking the remaining wrappers to compensate. Consistent portions make each successive piece easier to judge.
Serve fresh and plan a modest batch
Brush away excess starch after shaping so the outside has a light coating rather than a powdery blanket. Let the pieces cool enough to eat, then serve them fresh when the wrapper is at its softest. I prefer to present them simply, with the filling described clearly. People should know they are getting sweet red bean paste, and the optional cooked beans should be visible in the description if you include them.
Wrap individual pieces to limit drying, and refrigerate filled leftovers promptly as the recipe directs. The dough firms in the cold, so storage is a compromise in texture rather than a way to keep the mochi exactly as it was at shaping. That is one reason six pieces is a sensible batch. A planned small dessert can feel generous without creating a large leftover project. Use the remaining anko according to its package guidance, and make a note of what is left before shopping for another sweet filling.
I get the filling balls and starch-dusted tray ready first. Once the dough is hot, a clear work space matters more than perfect shapes. Keep the center of each disc a little thicker, close the seam securely, and brush away loose starch. Six filling portions should meet six pieces of dough.
Joy.Wrap sweet red bean paste in soft, chewy rice-flour dough, with optional cooked red peas folded through the shell.
Tap each ingredient as it goes into your basket or bowl.
Follow the steps in order to make this recipe.
Divide the red bean paste into 6 portions of 30 g and roll into balls. Generously dust a tray with potato starch. If using peas or beans, use fully cooked, drained ones.
Stir the rice flour, sugar and water in a large microwave-safe bowl until evenly combined and the flour is hydrated. Cover with a microwave-safe cover, leaving a vent.
Microwave at 600 watts for 90 seconds. Carefully uncover and stir with a sturdy spatula. Cover and microwave for 60 seconds more.
Stir again and continue in 30-second intervals as needed, until the dough is glossy, stretchy and slightly translucent throughout, with no chalky flour patches. Total time varies, often 3–5 minutes. The bowl and dough will be very hot.
Transfer with a spatula to the starch-dusted tray. Dust the surface. Let cool just until safe to handle while still soft. Gently fold in the cooked peas or beans if using. Divide into 6 equal pieces.
With lightly dusted hands, flatten one dough piece into a disc, keeping its center a little thicker. Add one paste ball, gather the edges around it and pinch closed. Place seam side down. Repeat with the remaining 5 portions.
Brush off excess starch. Serve fresh once cool enough to eat. Wrap individual pieces to limit drying; refrigerate filled leftovers promptly and enjoy soon, knowing the dough firms as it chills.
Wrap sweet red bean paste in soft, chewy rice-flour dough, with optional cooked red peas folded through the shell.
Joy’s kitchen note · I get the filling balls and starch-dusted tray ready first. Once the dough is hot, a clear work space matters more than perfect shapes. Keep the center of each disc a little thicker, close the seam securely, and brush away loose starch. Six filling portions should meet six pieces of dough.