Time45 min active + 1 hr brine cooling + 8–24 hr brining + 2–2½ hr roasting + 30–45 min rest
Makes12 servings
CategoryDinner
Tastefully Planned,
Joyfully Cooked.

Prepare a brined pork crown roast with apples, shallots and a cider-mustard sauce. Includes refrigerated brining, roasting and resting steps.

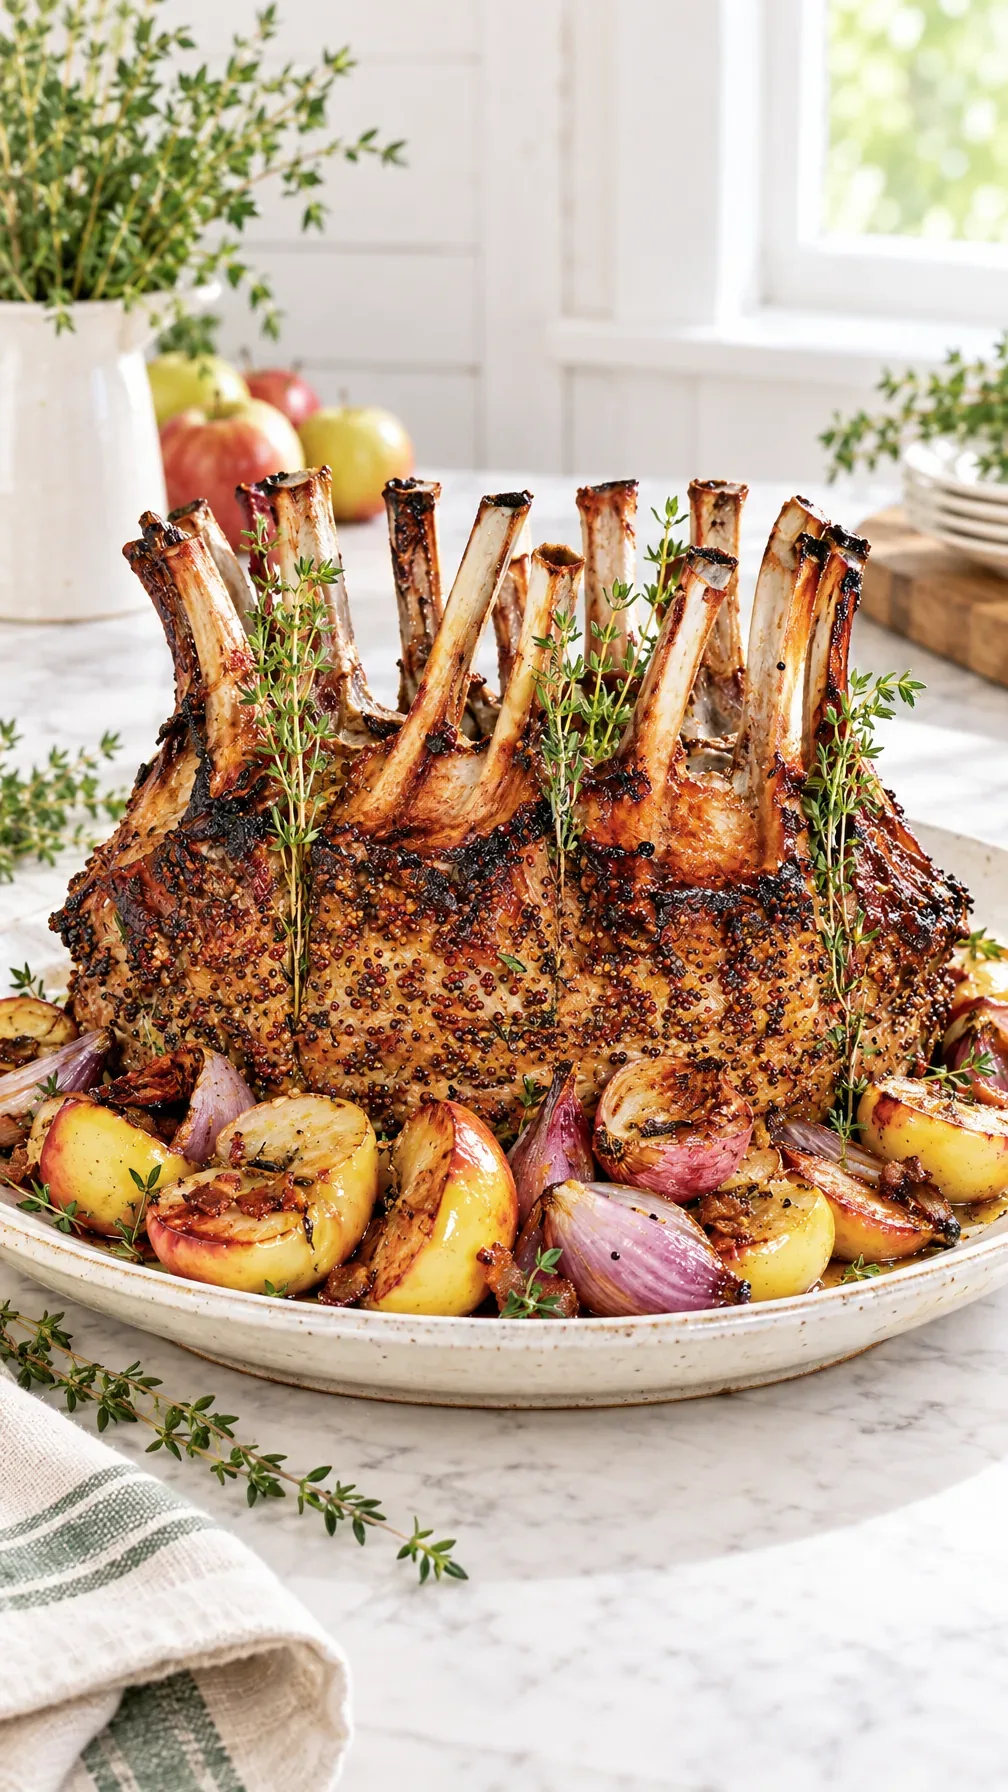
A centerpiece with a practical plan
A crown roast brings plenty of ceremony to the table, but the useful way to approach it is as two pork racks that need good preparation and careful temperature checks. Apples, shallots, mustard and cider give the platter a coherent flavor, so the side dishes can stay straightforward. I like that balance for a large meal: one special main dish, supported by food that does not demand every burner at the same moment.
The crown shape takes some attention, and the brine needs an early start. Neither is a reason to hurry the cooking later. Read the whole card before shopping, include the resting period in your schedule, and leave enough space in the refrigerator for the pork. Those decisions do more for a relaxed dinner than an extra decorative flourish on the platter.
Start with the right racks and salt
The specified racks have their chine bones removed, rib bones frenched and fat trimmed to a thin layer. Those details matter when you try to curve, tie and eventually carve the roast. Ask the butcher to confirm that preparation ahead of cooking day so the racks will be ready to shape and easy to carve between the ribs. The salt measurement deserves the same care.
Different kosher salts pack differently into a cup, which is why the recipe gives a weight and separate volume amounts for Diamond Crystal and Morton. Use the appropriate measurement instead of assuming the brands are interchangeable by volume. An expensive centerpiece is a good place to check the details that do not show in a photograph. The brine is meant to be controlled seasoning, not a guess made over an open salt box.
Step 1: Brine the pork in the refrigerator
Warm water helps dissolve the brown sugar and salt, but the pork does not go into that warm mixture. The vinegar and ice water come next, followed by refrigeration until the brine is fully cold. Build that cooling time into the day before you need the roast. Put the sealed pork bags in a tray or another container that can catch a leak, and keep them refrigerated for the card's brining window.
Pressing out excess air helps the liquid contact the meat without needing a much larger vessel. This is not a step to leave on the counter while you finish something else. Once the brining is complete, drain and pat the meat dry, and keep the pork chilled while the other preparation continues. A dry surface also makes it easier for the herb coating to stay where you put it.
Step 2: Shape the crown without rushing the meat
The cuts between ribs help the racks bend into their circular shape, and they also give the garlic-herb mixture places to settle. Make the cuts to the depth described, keeping the loin intact so the racks can hold their shape when tied. Once coated, the racks stand bones up with the slits facing outward. Having another person steady the shape while you tie can make this much less awkward.
The kitchen string should secure both the rib area and the thickest part of the loin so the crown holds as it cooks. Check that it sits steadily in the pan before moving on. Foil around the bone tips protects the most exposed parts. The shape is handsome, but its purpose should not distract from the meat: keep the pork cold during preparation and give yourself a stable, workable arrangement.
Step 3: Add the mustard and herbs
Whole grain Dijon, mustard seeds, garlic, thyme and pepper make a savory coating with texture. The chopped thyme spreads through the mixture while sprigs tuck into the cuts, so the herb is present in more than one way. Rub the coating evenly over the meat and into the prepared spaces instead of leaving a thick mound in one place. Some mustard is held back for the pan sauce later; set that portion aside before the raw pork work begins.
This is a useful habit for any recipe with ingredients divided across stages. You do not want to realize at the end that everything went into the coating. The apples and cider will bring fruit flavor around this savory center, while the shallots soften the transition. The result should feel connected without making every part taste identical.
Step 4: Brown the apples and shallots in batches
Bacon begins the skillet work, releasing fat and adding a savory foundation to the vegetables and fruit that follow. Lift it into the roasting pan as instructed, leaving the skillet ready for browning. The apples need their cut surfaces against the hot pan, with enough space to color rather than steam in a crowded pile. Shallots benefit from the same patience.
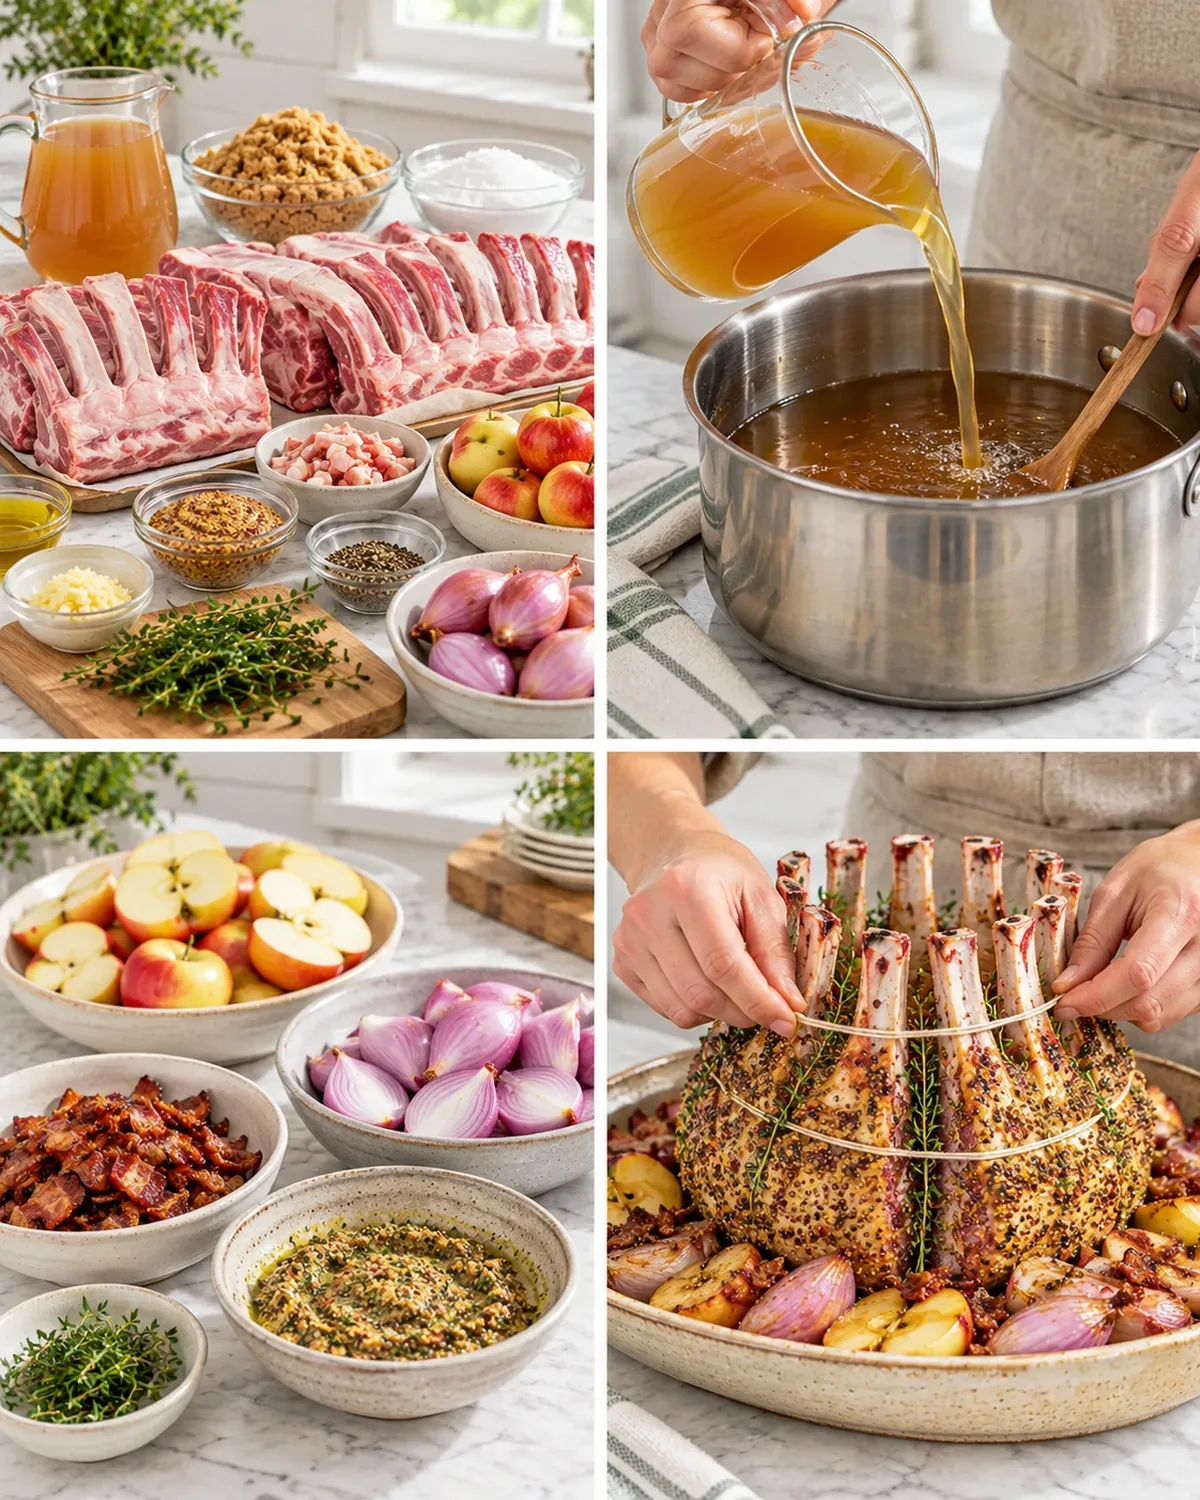
Leave them undisturbed for the first browning stage, then turn them for the next side. Working in batches may feel slower than adding everything at once, but it keeps the skillet doing the job you want. Aim for browned surfaces that still have structure. The apples and shallots continue alongside the pork in the oven, so the skillet stage is about building flavor rather than cooking them until they fall apart before roasting even begins.
Step 5: Add cider to the skillet juices
Take the skillet off the heat before carefully adding the hard cider, as the method directs. It loosens the browned bits that would otherwise stay attached to the pan, carrying that flavor into the roasting dish. Scrape gently and give the liquid room rather than pouring it hurriedly into a crowded, very hot pan.
Once the pork is in the center with apples and shallots around it, the lower-temperature roast gives the loin time to cook while the surrounding ingredients share the pan juices. The listed timing is useful for planning, but a roast's size, shape and starting temperature affect its progress. Check the actual meat with a thermometer. Place the probe in the thickest loin area, away from a bone, and consider more than one thick section when the crown is made from two racks.
Step 6: Roast and check the pork temperature
The intermediate reading in the lower-temperature stage is followed by a hotter browning stage. It is not the temperature for serving the pork. Follow the complete sequence: move the apples and shallots out, save the pan juices, return the pork to the pan and give it the final high heat. Check that the thickest loin reaches at least 145°F, continuing the cooking if needed.
The card then calls for a substantial rest, which also exceeds the minimum three-minute rest after that temperature is reached. A browned exterior, an impressive crown shape or the clock alone cannot replace the thermometer. Keep the foil and string arrangement safe when transferring the roast, and use a sturdy board with room around it. This is a moment to move deliberately, especially with a heavy, hot centerpiece.
Step 7: Use the rest to finish the sauce and table
The resting window gives you time to turn the saved pan juices into a smaller, more concentrated sauce. Whisk in the reserved mustard and simmer as directed, watching both the texture and the approximate reduced volume. Taste before adding anything else, since brine, bacon and mustard have already brought salt to the meal. A sauce that clings lightly is easier to spoon over the chops than a large quantity of thin liquid.
The apples and shallots wait loosely covered rather than being returned to the hottest oven stage, where they could lose their shape. Use the remaining pause to warm straightforward sides and bring serving plates into place. I would rather give this roast an orderly finish than fill its resting time with several new recipes that all need attention just as carving begins.
Step 8: Carve generously and plan the remainder
Remove all the kitchen string before carving between the ribs. Arrange the chops with apples and shallots, and spoon the sauce so people can see the browned meat as well as the fruit. The recipe serves twelve, but appetites and chop sizes will vary, so plan the sides around the whole meal rather than expecting identical plates. A fresh vegetable and a simple starch can support this substantial main without competing for attention.
After serving, divide the remaining meat into manageable portions and refrigerate promptly in covered containers, keeping sauce where it can be reheated gently. Do not leave the full roast out through a long evening simply because it looks attractive. Smaller portions are easier to cool and use again. Warm only what you need, with enough moisture to protect the loin from drying out during a second meal.
Give this roast enough physical room
Before beginning, check that the tied crown will fit comfortably in the roasting pan and beneath the oven rack above it. The exposed bones make the roast taller than a flat rack, and discovering that after the oven is hot is an avoidable difficulty. Have sturdy lifting tools ready for the transfers during the final stage, along with a board that can hold the roast and any juices.
The reserved skillet needs a clear place on the stove because it returns to service for the sauce after the roasting juices are poured off. Keep a second serving platter available for the apples and shallots, so they can leave the pan without being squeezed around the meat. None of this adds another recipe to the menu. It simply gives the large, expensive centerpiece a clear route through the kitchen, leaving you free to focus on the temperature and carving rather than searching for a surface big enough to hold it.
A special roast still needs a practical plan in my busy kitchen. Leave enough time for checking the meat and letting it rest, and keep the sides straightforward. Taste the pan sauce before finishing; a small splash of apple cider vinegar can brighten its richness. I care more about a meal people can enjoy than about making every dish elaborate at the same time.
Joy.Prepare a brined pork crown roast with apples, shallots and a cider-mustard sauce. Includes refrigerated brining, roasting and resting steps.
Tap each ingredient as it goes into your basket or bowl.
Follow the steps in order to make this recipe.
Place each pork rack meat-side down with the inner rib curve facing up. Between every second rib, cut 3 vertical slits along the loin, each about 3 inches long and 1 inch deep. Place each rack in a gallon-size resealable bag and refrigerate.
Warm brown sugar, salt and 4 cups water in a saucepan over medium for about 5 minutes, stirring until dissolved. Remove from heat, add vinegar and 4 cups ice water, and refrigerate about 1 hour until fully cold.
Divide the cold brine between the pork bags. Press out excess air, seal and refrigerate 8–24 hours.
Drain the pork and pat dry. Keep it refrigerated while preparing the pan and vegetables rather than leaving raw meat out to warm for a long time.
Heat the oven to 300°F. Mix garlic, chopped thyme, mustard seeds, pepper, ¼ cup mustard and 2 tablespoons oil. Rub over the pork and into the slits, adding thyme sprigs to the cuts. Stand the racks bones-up with the slits outward and curve them together into a crown. An extra pair of hands helps. Tie securely around the ribs and thickest loin with kitchen string; foil can protect the bone tips.
Heat the other 2 tablespoons oil in a skillet over medium. Cook bacon about 5 minutes, stirring, until it releases fat and the edges crisp. Lift with a slotted spoon into the roasting pan.
In 2–3 batches, brown the apples cut-side down and the shallots in the same skillet over medium-high, leaving them undisturbed about 5 minutes. Move the apples to the roasting pan. Turn the shallots, brown another 3 minutes and add them too.
Take the skillet off the heat before carefully adding cider. Scrape up the browned juices and pour into the roasting pan. Set pork in the center with apples and shallots around it, reserving the skillet. Roast about 1¾–2¼ hours until the loin center reaches 135°F; this is an intermediate reading, not the serving temperature.
Move apples and shallots to a platter and cover loosely with foil. Increase the oven to 500°F. Transfer pork to a board, pour the roasting juices into the reserved skillet and return pork to the pan. Brown for 5–10 minutes, then check the thickest loin reaches at least 145°F; continue cooking if needed. Rest on the board 30–45 minutes before carving, always allowing at least 3 minutes after reaching the safe temperature.
Before serving, whisk the remaining 2 tablespoons mustard into the saved pan juices. Simmer over medium 7–10 minutes, whisking often, until reduced to about 1 cup.
Remove the string, carve between the ribs and arrange chops with the apples and shallots. Spoon the mustard sauce over the platter.
Prepare a brined pork crown roast with apples, shallots and a cider-mustard sauce. Includes refrigerated brining, roasting and resting steps.
Joy’s kitchen note · A special roast still needs a practical plan in my busy kitchen. Leave enough time for checking the meat and letting it rest, and keep the sides straightforward. Taste the pan sauce before finishing; a small splash of apple cider vinegar can brighten its richness. I care more about a meal people can enjoy than about making every dish elaborate at the same time.