TimeAbout 25 min prep + 3 hr chilling + 15 min baking, plus cooling
Makes24 cookies
CategoryBaking
Tastefully Planned,
Joyfully Cooked.

Buttery slice-and-bake cookies with dried cranberries, fresh orange zest and a simple orange glaze.

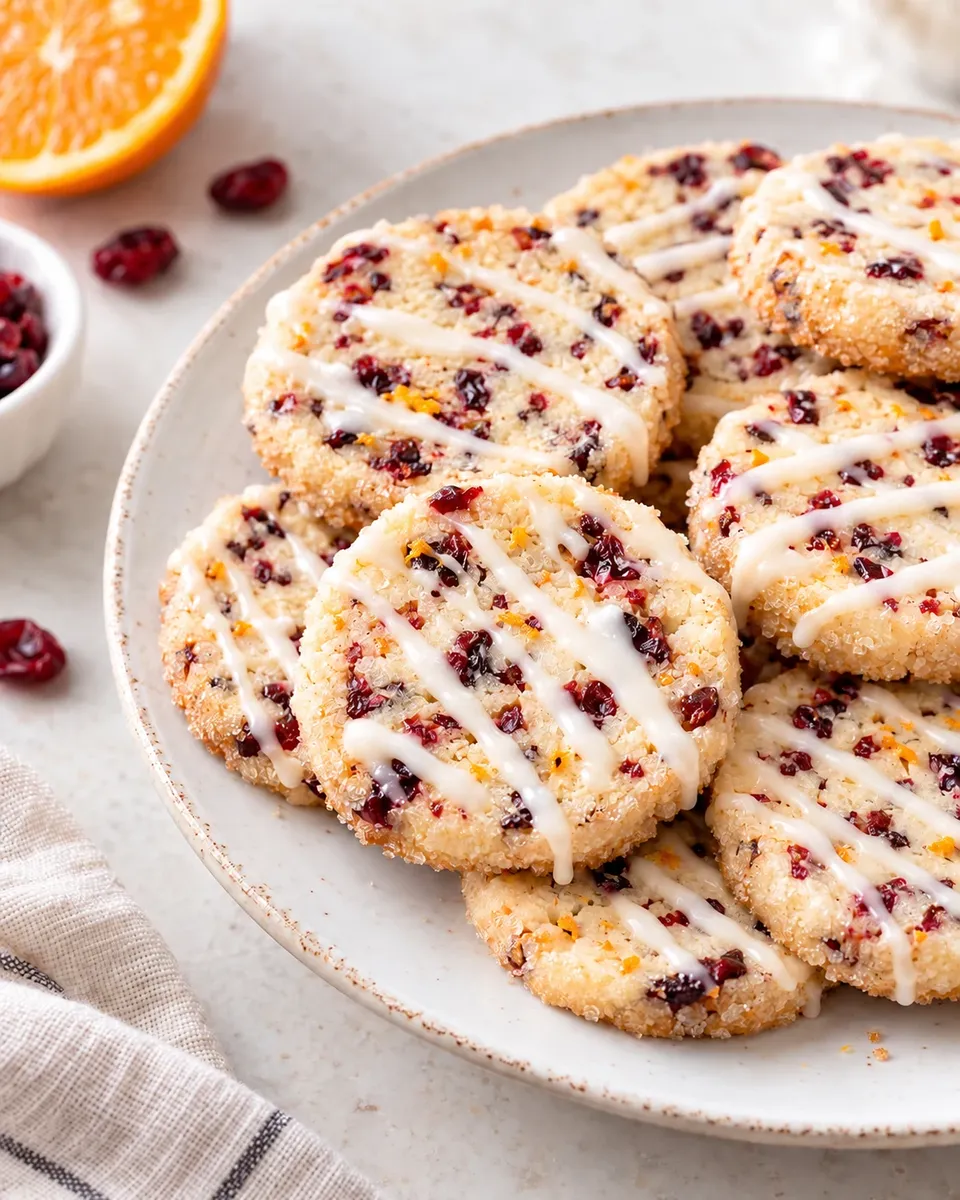
A dough log makes the baking day easier
Icebox cookies separate mixing from baking in a useful way. The dough is shaped into logs, chilled until firm and sliced when the oven is ready. That makes these cranberry-orange cookies convenient for a planned treat without a long decorating session. The orange comes through zest, juice and a thin glaze, while dried cranberries bring little chewy pieces to the buttery base. Set aside the full chilling time at the start. The recipe becomes much less demanding when that rest is treated as part of the plan rather than an optional delay before baking.
Use zest for aroma and juice for moisture
Orange zest carries fragrant oils, while the measured juice adds liquid and acidity. Wash and dry the orange, then grate the colored surface lightly, stopping before you reach the bitter white pith. Zest before juicing, because a whole firm orange is easier to hold against a grater. Keep the dough’s juice separate from the glaze’s juice: each uses two tablespoons, and accidentally pouring the entire amount into the dough changes its consistency. A fresh orange can cover both tasks with little waste. Save any extra juice for another use so the dough keeps its measured balance of liquid.
Step 1: Chop the fruit for a cleaner edge
Dried cranberries need to be chopped quite finely so they distribute through the dough and do not interfere with slicing. A large sticky piece can pull through a cold log and leave a ragged gap at the cut edge. Use a sharp knife and take a moment to separate pieces that cling together. The cranberries contribute sweetness as well as chew, so there is no need to add another dried fruit simply for color. Check that the fruit is pliable rather than very hard and dried out. A consistent small chop helps each cookie carry the same balance of citrus, butter and cranberry.
Step 2: Cream the butter without turning it oily
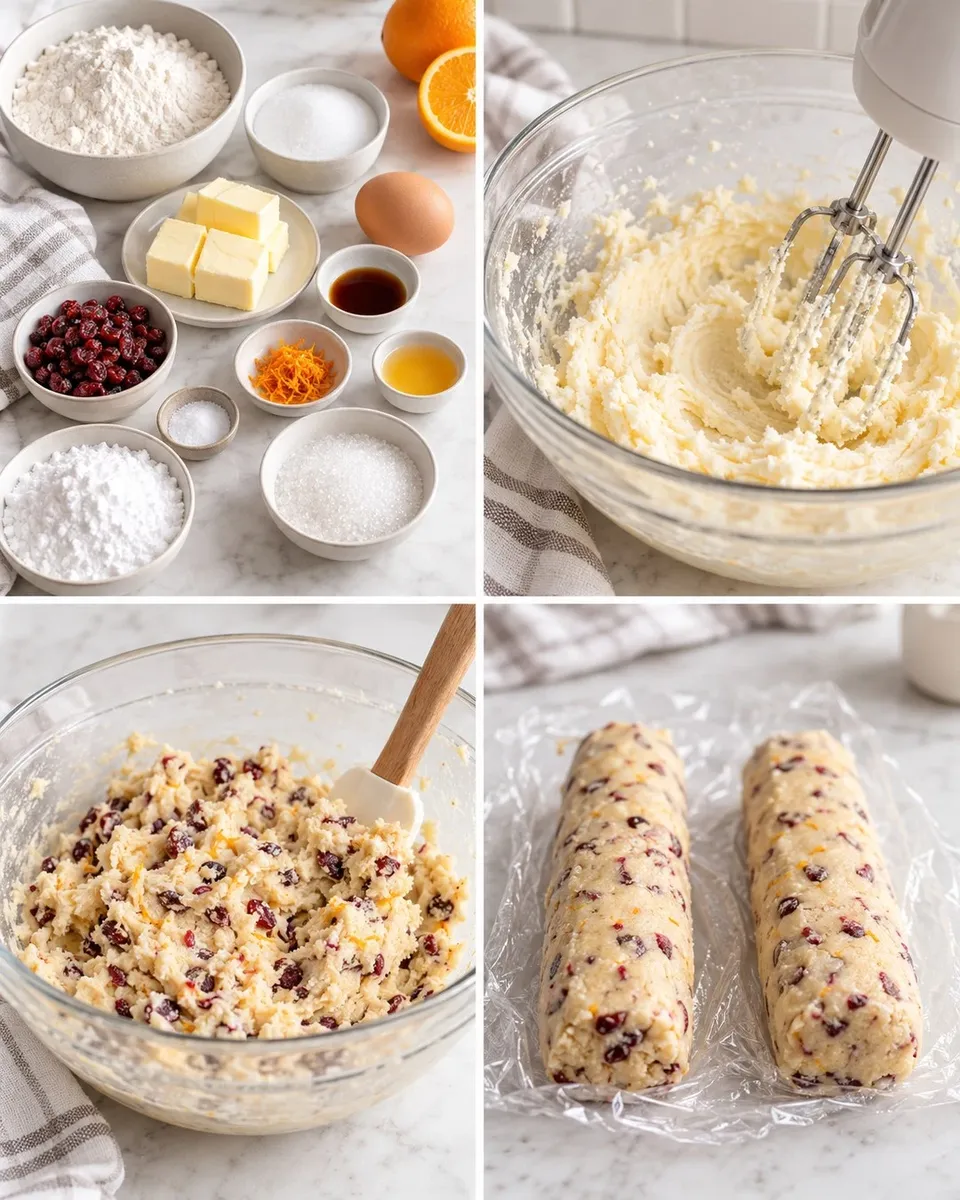
Softened butter should give under light pressure but still hold its shape. If it is partially melted, the dough can be harder to handle and the cookies may spread more than intended. Beat it with the sugar until evenly creamy, then add the egg and vanilla and scrape the bowl. The flour goes in on low speed to avoid overworking the dough and coating the kitchen in a flour cloud. Stop when the dry streaks disappear and the fruit is evenly distributed. A thick, slightly tacky dough is expected before chilling; adding extra flour immediately can make the finished cookies dry.
Step 3: Shape with the final slice in mind
Divide the dough into two similar portions so the logs chill and bake consistently. Roll them into smooth cylinders, then wrap firmly enough to support the shape without squeezing the centers into narrow waists. The stated length and diameter are guides, while twelve even slices from each log establish the intended count. Turn the wrapped logs occasionally during the early chill if you want to reduce a flat side. Do not chase a mathematically perfect circle at the expense of warming the dough repeatedly. A slightly oval homemade cookie is preferable to an overhandled, greasy log that is difficult to cut.
Step 4: Chill the dough logs
The refrigerator rest firms the butter, hydrates the flour and makes clean slices possible. Three hours is the minimum given for this dough; an overnight rest can fit neatly into a two-day schedule. Keep the logs wrapped so their surfaces do not dry out or absorb refrigerator odors. If a log has become too hard to slice without cracking, let it sit briefly, just until the knife can pass through cleanly. If it bends and squashes beneath the blade, it needs more chilling. Work with one log at a time and keep the second refrigerated until its tray is ready.
Step 5: Bake for pale centers and lightly colored edges
Arrange the slices with space between them even though they begin as firm pieces of dough. The oven melts the butter before the cookie structure is fully set, so they still spread. Start checking near the early end of the baking range. A lightly golden rim is a better guide than waiting for the entire top to turn brown. The cookies continue to firm on the warm baking sheet during their short rest. Moving them immediately can break the soft centers, while leaving them on the hot sheet indefinitely encourages more browning underneath. Transfer gently to a rack after about five minutes.
Step 6: Glaze the cooled cookies
Whisk the confectioners’ sugar and orange juice until smooth, then drizzle rather than burying the cookies under a thick layer. The cookie itself already contains sugar and dried fruit, so the glaze can remain an accent. Cool the cookies completely first or the icing will spread and soak in unevenly. Give it time to set before stacking, and separate layers with parchment when transporting. Store the cookies covered according to the finished texture you prefer; the glaze and fruit can soften a crisp edge over time. Freeze extra unglazed cookies or a securely wrapped dough log if a full batch is more than you need.
Keep the knife clean between slices
A sharp straight-edged knife should pass through the chilled log with a steady downward cut. If sticky fruit or butter begins collecting on the blade, wipe it clean before continuing so the next slice keeps its shape. Rotate the log slightly after a few cuts if a flat side is developing. Compare the first few slices and adjust the thickness early rather than discovering at the end that the final cookies are much smaller. The recipe’s count comes from twelve slices per log, not from a rigid thickness chosen without checking the log length. Similar pieces bake more evenly and make the tray look naturally consistent.
A crumbly cut is a useful signal
If a very cold log fractures into pieces as the knife enters, it may need a short rest to soften just enough for slicing. That is different from dough that is dry because too much flour was added during mixing. Let one end warm slightly and test a slice before changing the whole batch. Press a small edge crack back into shape gently rather than kneading the log again. If the slices squash flat, return the dough to the refrigerator. This middle ground—firm enough to hold a cylinder but not brittle—makes slice-and-bake cookies much easier, and the exact waiting time depends on your refrigerator and room temperature.
Coarse sugar is a finishing choice
Rolling the log in coarse sugar gives a sparkling edge and a little extra crunch, but it is optional. If it does not adhere, press the cold log gently into the sugar to help it catch on the surface. A very wet exterior makes the sugar dissolve and can complicate slicing. The glaze already adds a sweet finish, so an uncoated edge is a perfectly complete version. Use coarse sugar already in the pantry if you have it, or leave the edge plain and enjoy the glaze as the sweet finish. Keep the dough’s measured granulated sugar separate from any extra sugar used for the outside.
Freeze with a future baking plan
A tightly wrapped dough log is convenient only if it is labeled with what it is and how it should be baked. Add the name, date and oven temperature to the wrapper, then protect it from freezer air with a suitable outer bag. Thaw enough in the refrigerator to slice cleanly rather than trying to force a knife through a solid frozen cylinder. If freezing baked cookies, leave them unglazed when practical and glaze after thawing so the finish stays neater. Freeze in useful portions rather than one large stack that has to be thawed all at once. That turns a prepared batch into planned treats instead of extra food to use in a hurry.
Finely chop the dried cranberries before they enter the dough. Smaller pieces make chilled logs easier to slice cleanly without dragging large fruit pieces through the edges.
Joy.Buttery slice-and-bake cookies with dried cranberries, fresh orange zest and a simple orange glaze.
Tap each ingredient as it goes into your basket or bowl.
Follow the steps in order to make this recipe.
Beat the softened butter and granulated sugar until creamy, about 3 minutes. Beat in the egg and vanilla, scraping the bowl. Mix in flour and salt on low speed, then add 2 tablespoons orange juice, orange zest and finely chopped cranberries just until evenly combined.
Divide the dough in half and shape each piece into a 7–8-inch log about 2 1/2 inches wide. Wrap tightly and refrigerate at least 3 hours or up to 5 days.
Heat the oven to 350°F. Line two baking sheets. Roll the chilled logs in coarse sugar if using, then cut each log into 12 equal slices. Arrange about 2 inches apart.
Bake 13–15 minutes, until the edges are lightly golden. Let the cookies rest on the sheet for 5 minutes, then transfer to a rack and cool completely.
Whisk confectioners’ sugar with the remaining 2 tablespoons orange juice. Drizzle over cold cookies and add optional zest. Let the glaze set for 30–60 minutes before stacking.
Buttery slice-and-bake cookies with dried cranberries, fresh orange zest and a simple orange glaze.
Joy’s kitchen note · Finely chop the dried cranberries before they enter the dough. Smaller pieces make chilled logs easier to slice cleanly without dragging large fruit pieces through the edges.