Time30 min prep + 30–35 min baking + cooling and 30 min chilling
Makes24 brownies
CategoryDessert
Tastefully Planned,
Joyfully Cooked.

Layer brownies with Oreo buttercream and a chocolate topping. Includes cooling and assembly steps to keep each cookies-and-cream layer distinct.

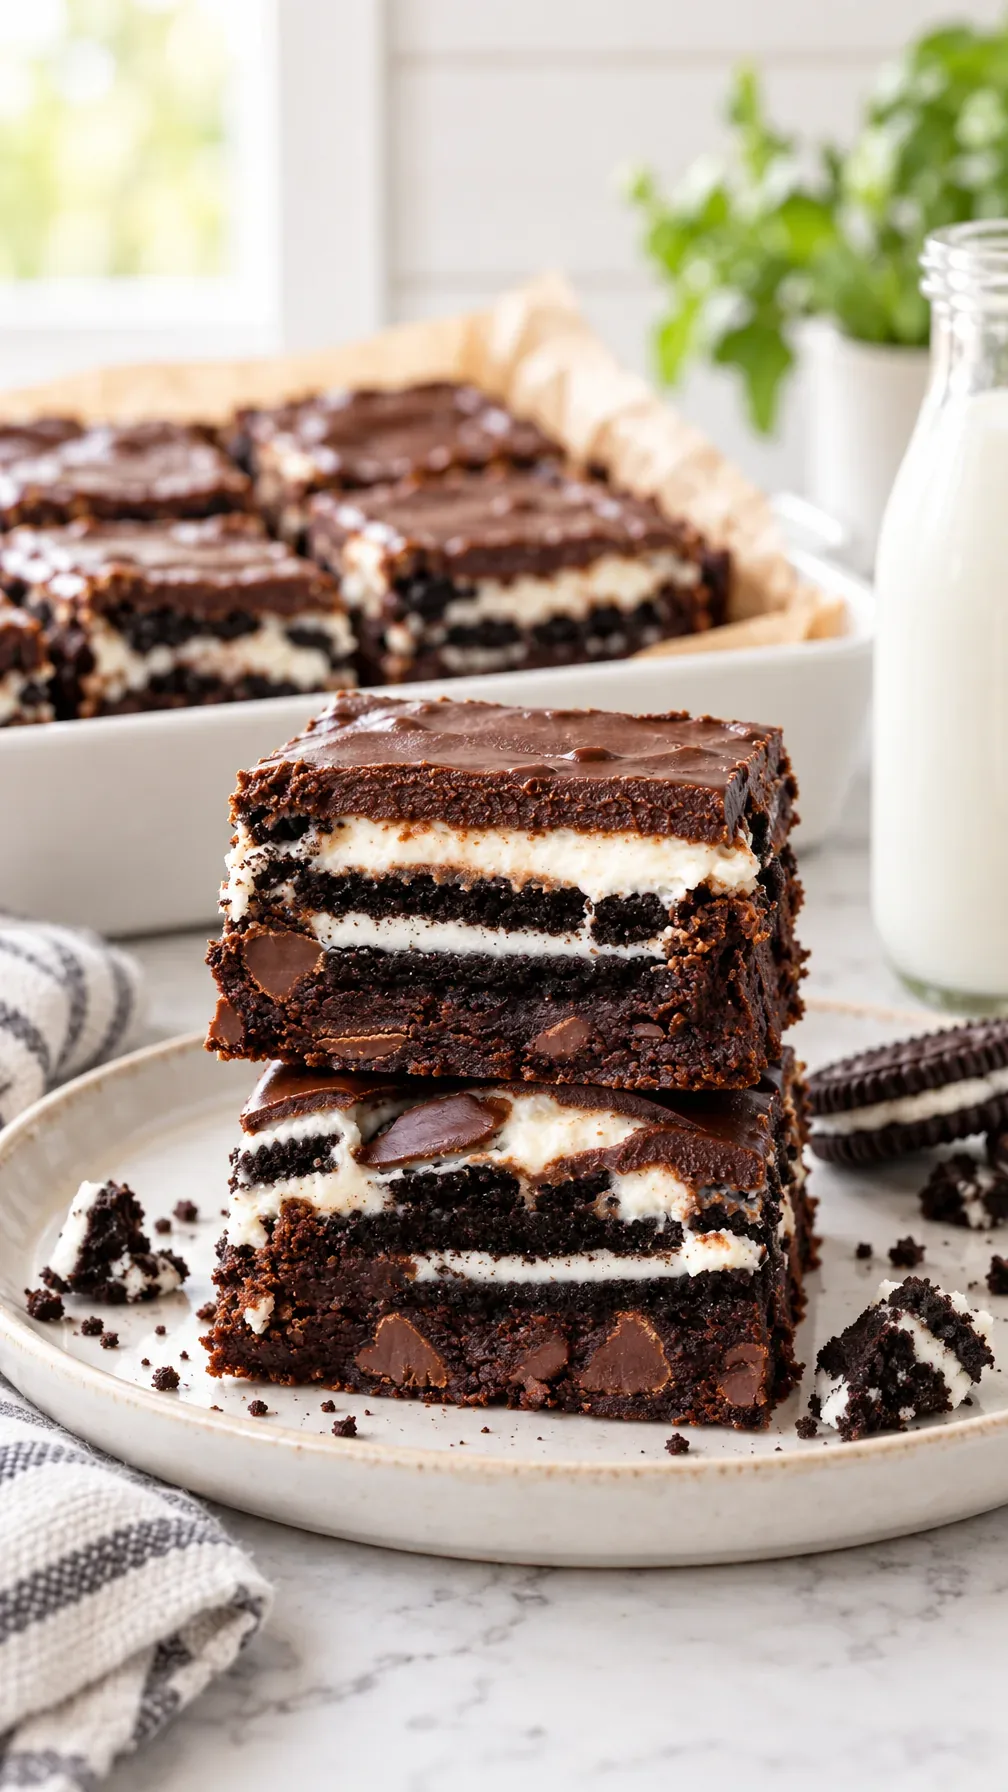
Three layers, three different jobs
These brownies have a chewy chocolate base, a cookie-filled buttercream, and a smooth chocolate cap. The whole Oreos pressed into the batter give another layer of cookies-and-cream flavor before the frosting goes on. I like thinking of the dessert as a slab that needs support and cooling at each stage. That makes the work feel much simpler than trying to decorate twenty-four individual pieces from the beginning.
The hands-on time is only one part of the plan. Cooling, chilling the buttercream, and letting the chocolate set are what make the layers distinct and the slices easier to handle. Allow time for each layer to cool or set before the next goes on, so the brownie and frosting are ready for assembly well before serving. Patience here has a practical result: the layers stay where you put them.
Choose a brownie base that fits the pan
The recipe allows homemade or boxed brownie batter, but it needs to be suited to a nine-by-thirteen-inch pan. A smaller recipe stretched across that area won't give the same support beneath the cookies and frosting. A larger amount changes the baking depth and time. Read your chosen batter's instructions before beginning and keep its preparation separate from the frosting and chocolate topping ingredients.
This flexibility can be useful for grocery planning. If you already have a reliable batter recipe and its ingredients, there is no need to buy a mix solely for this dessert. If you use a mix, include whatever it requires in your plan. The finished brownie will take some of its texture from that base, so avoid promising an identical chew from every possible batter. The topping layers are consistent; the foundation is your chosen recipe.
Step 1: Prepare the pan
Line the pan with parchment and leave enough overhang to lift the cooled slab. Flatten the paper into the corners as well as you can so the batter spreads evenly instead of collecting beside a large fold. Find a tray that will hold the lifted brownie and fit in the refrigerator. Checking that space while the pan is empty is much easier than rearranging shelves with a fragile slab in your hands.
Keep the brownie whole through baking, cooling, frosting, and topping. Cutting early creates many loose edges for frosting to pull against and gives the melted chocolate places to run between pieces. The parchment and tray make one stable unit that you can move through the stages. I prefer doing that small amount of setup to trying to carry a large brownie by its edges after it has already become heavy with buttercream.
Step 2: Place the whole cookies with a little care
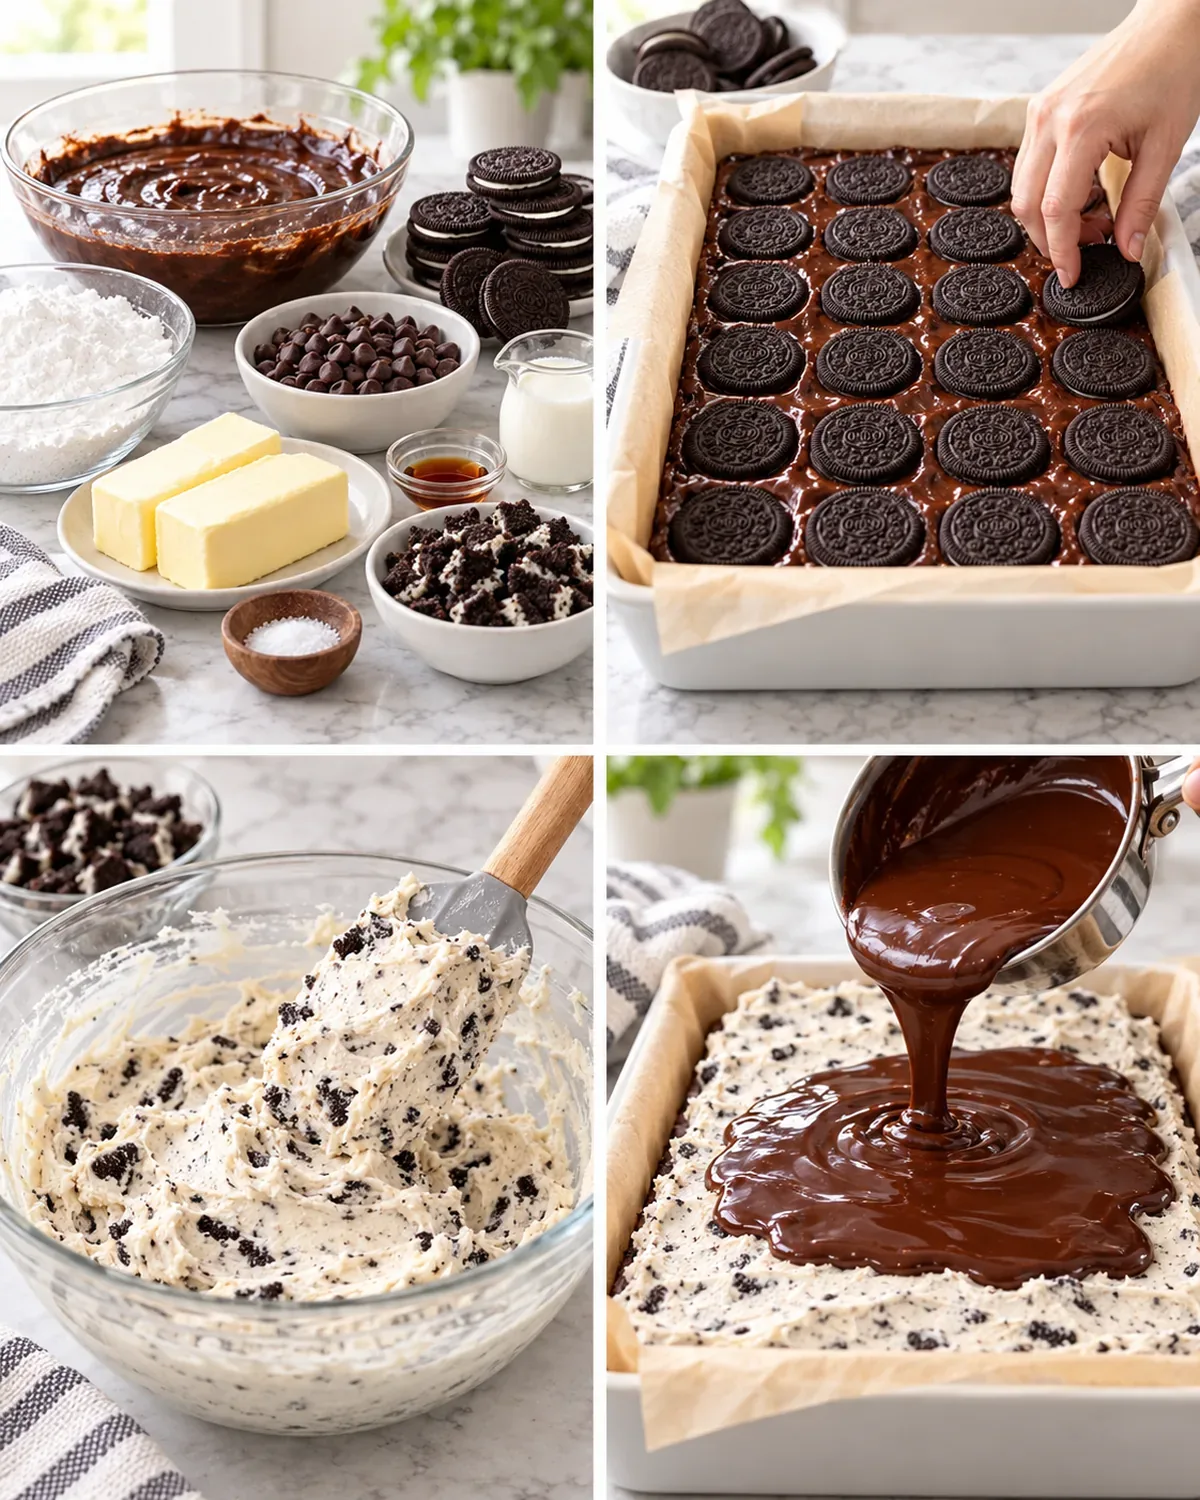
Spread the prepared batter evenly, then press in the twenty-four cookies in the rows described. Keep batter underneath them so the cookies aren't sitting directly against the parchment. The arrangement helps distribute a substantial cookie bite throughout the slab. It also gives you a useful mental guide for portions later, without needing to mark or cut the warm brownie.
Use the listed cookies deliberately: twenty-four stay whole for the base and six are chopped for the buttercream. Counting them first avoids discovering that too many went into the pan and the frosting portion has disappeared. Broken cookies can serve perfectly well in the chopped portion. A simple division at the start reduces waste and keeps you from opening another package just to repair a counting mistake.
Step 3: Bake and test the brownie batter
Begin checking within the method's baking window, then test a brownie area near the center. A toothpick that passes only through an Oreo isn't telling you whether the surrounding batter is baked. Wet batter needs more time; moist crumbs are different from a liquid coating. The final timing depends on the base you chose. Use the condition of the central batter to decide when your particular batch is ready.
Recheck in the short intervals given if it needs longer. The topping layers are rich, but that isn't a reason to bake the base until completely dry. Carry the pan to a rack and let the brownie cool fully before lifting it. A hot slab is softer and easier to break, and warm chocolate underneath would melt the buttercream you are about to spend time beating.
Step 4: Give the buttercream a smooth starting point
Room-temperature butter should be soft enough to beat smoothly without being melted or oily. Start by beating it on its own as directed, which helps avoid firm lumps hidden among the powdered sugar. Measure the confectioners' sugar and have the milk and vanilla ready. Begin the sugar addition on low speed so it joins the butter instead of rising in a cloud over the mixer bowl and counter.
The later beating gives the frosting a spreadable texture. Scrape the bowl as needed so the mixture is consistent from top to bottom. If the room is very warm, keep an eye on the butter rather than assuming more beating always improves it. The aim is a smooth frosting that can hold the chopped cookies and spread across the cold brownie, not a loose layer that slides as soon as it meets chocolate.
Step 5: Fold cookies in without losing all the pieces
Chop the six whole Oreos into pieces small enough to spread through the buttercream. Keep some texture rather than reducing everything to fine dust, then fold them in by hand. A mixer can break them down far more than needed and turn the frosting into one uniform cookie paste. The small bits should be distributed well enough that a square from the middle and one from the edge both get some.
Taste before adding the optional small pinch of salt, staying within the amount in the method. Spread the frosting over the completely cooled brownie with gentle strokes so the surface doesn't tear. Work from a few placed spoonfuls rather than dropping all the frosting in one tight mound that requires force to move. An even layer makes the final chocolate cap easier to spread and keeps the finished pieces balanced.
Step 6: Chill before adding the chocolate cap
The buttercream needs its uncovered refrigerator time before the warm topping arrives. That rest firms the surface so the chocolate can move across it without pulling up frosting and cookie pieces. Keep the slab on its supporting tray, and protect it from anything above that might touch the top. If making this stage ahead, follow the recipe's stated limit rather than treating the exposed layer as an indefinite holding place.
Melt the topping butter and chocolate chips together gently, stirring until smooth. Low stovetop heat or the short microwave bursts both give you control. Stop heating once the mixture is ready instead of continuing because a few seconds remain on the timer. Chocolate holds heat, and an unnecessarily hot topping asks more of the chilled frosting beneath it. Have your spreading tool ready before bringing the slab out.
Step 7: Chill until the layers are ready to slice
Spread the chocolate evenly over the chilled frosting, guiding it toward the edges with a light hand. Don't keep scraping back through an area once the chocolate begins to settle. A little texture on top is fine; the useful goal is coverage with distinct layers underneath. Keep the slab level so the topping doesn't collect at one end while it sets.
Allow the full setting period in the method before cutting. The chocolate and frosting need time to become firm enough to travel with each square. Use a sharp knife and clean it between cuts when buildup makes the edges messy. For a very firm refrigerated slab, give it a brief moment at a comfortable working temperature if necessary rather than forcing a blade through with enough pressure to crush the base.
Portion a rich dessert and save it well
Twenty-four brownies make this a generous batch, and a modest square gives plenty of the three-layer experience. Decide how many pieces you need for the first serving before arranging everything on a plate. The rest can stay protected in the refrigerator within the recipe's three-to-four-day storage window. Separate layers of cut brownies with parchment if stacking is necessary, so the chocolate surface doesn't stick to the brownie above it.
Keep the container covered to protect the frosting and the cut edges. Lift pieces from underneath instead of pinching the top layer, which can separate from the brownie when cold. If the batch is for more than one meal, label the day it was finished and give the remaining portions a definite plan. This dessert already has cookies, frosting, and a chocolate cap; a simple drink or a little fresh fruit alongside is plenty without another elaborate sweet to prepare.
When my husband shares food with coworkers, I think about tidy portions as well as a generous pan. Wait until these layers are set before slicing, and wipe the knife between cuts. Double-Stuf Oreos are an option for an extra-creamy cookie bite. Small squares leave room for people to taste something sweet without needing to commit to a large dessert serving.
Joy.Layer brownies with Oreo buttercream and a chocolate topping. Includes cooling and assembly steps to keep each cookies-and-cream layer distinct.
Tap each ingredient as it goes into your basket or bowl.
Follow the steps in order to make this recipe.
Heat the oven to 350°F (177°C). Line a 9 × 13-inch pan with parchment, leaving enough overhang to lift the cooled slab out.
Make brownie batter suited to a 9 × 13-inch pan, following its recipe or package. Spread in the pan and press 24 Oreos across the top in 6 rows of 4. Leave batter beneath the cookies.
Begin checking at 30 minutes. Test the brownie portion in the center with a toothpick: wet batter needs more baking, while a few moist crumbs indicate it is ready. If necessary, check again every 2 minutes; the chosen batter determines the final timing.
Cool completely in the pan on a rack. Lift out using the parchment handles, keeping the slab whole. Set it, still on the parchment, on a tray that fits in the refrigerator so you can move it without breaking it.
Beat butter on medium with a paddle attachment for about 2 minutes. Add powdered sugar, milk and vanilla; mix on low 30 seconds, then high for 2 minutes. Fold in chopped Oreos by hand. Taste the frosting and add a small pinch of salt if needed, up to about ⅛ teaspoon. Spread over the cold brownies and chill uncovered at least 30 minutes, or up to 1 day.
Melt the chocolate chips and cut-up butter together in a saucepan over low heat, stirring until smooth. Alternatively, microwave in 20-second bursts, stirring between each.
Spread the melted chocolate evenly over the chilled frosting. Let the topping set for a few hours at room temperature or about 1 hour in the refrigerator before cutting. Give the layers time to firm up for cleaner squares.
Cover any remaining brownies and refrigerate for 3–4 days.
Layer brownies with Oreo buttercream and a chocolate topping. Includes cooling and assembly steps to keep each cookies-and-cream layer distinct.
Joy’s kitchen note · When my husband shares food with coworkers, I think about tidy portions as well as a generous pan. Wait until these layers are set before slicing, and wipe the knife between cuts. Double-Stuf Oreos are an option for an extra-creamy cookie bite. Small squares leave room for people to taste something sweet without needing to commit to a large dessert serving.