Time45 min prep + 10–12 hr chilling
Makes12 servings
CategoryDessert
Tastefully Planned,
Joyfully Cooked.

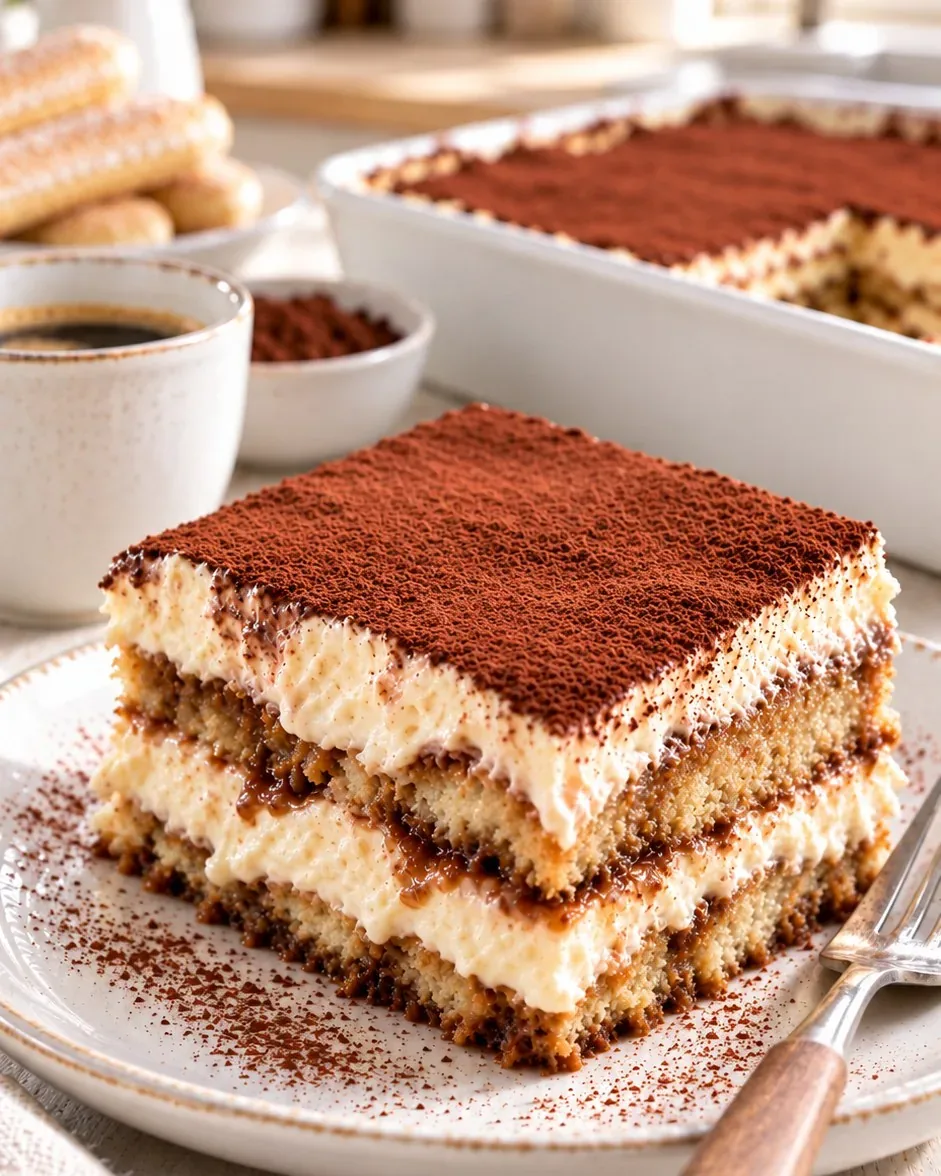
Layer espresso-dipped ladyfingers with mascarpone cream for classic tiramisu. Follow the pasteurized-egg method and allow time to chill.

Let the refrigerator have its time
Tiramisu looks like a soft, simple dessert, but its structure comes from a series of small decisions. The coffee dip is brief, the mascarpone is mixed gently, and the cream and whites are folded without knocking out all the air. Then the refrigerator gets a long, uninterrupted turn. I like a dessert that can be finished well before serving. Give its full resting time a place in the plan so the layers have time to settle in the refrigerator.
This version makes twelve servings in a generously sized dish. Espresso stays noticeable through the rich cream, while unsweetened cocoa gives the top a different kind of bitterness. The goal isn't a wet coffee cake under a thick blanket of filling; it is softened biscuit layers that support a light, creamy mixture. Small slices can be satisfying, and people can choose more. A few berries alongside are a simple option from the kitchen note, without making another dessert part of the day's work.
Step 1: Prepare the serving dish
A 9-by-13-inch footprint alone doesn't tell you everything about capacity. The dish needs to hold at least twelve to fourteen cups for two biscuit layers and two generous cream layers. Check the capacity before starting so there will be room for both biscuit layers and all of the cream. A dish with adequate depth also makes it easier to cover the dessert after the first chilling stage without pressing the cover directly into the cream.
Clear a level place in the refrigerator while the dish is still empty. Carrying a filled pan around a crowded shelf is a poor time to rearrange jars. Have enough room above it for the initial uncovered chill and later covering. A stable, level surface helps the layers remain even while they settle. This preparation takes only a little attention, but it affects the finished dessert more than decorative serving plates or an especially elaborate cocoa pattern.
Buy the exact dairy and eggs you need
Mascarpone supplies the rich base and is used cold in this method. It isn't ordinary cream cheese, and substituting another spread changes flavor and texture. Heavy cream or heavy whipping cream is the listed choice for the whipped component. Check the carton and measure rather than assuming every creamy dairy product can form the same peaks. With a recipe this generous, comparing package sizes and actual quantities helps avoid both an unnecessary extra purchase and a shortage halfway through assembly.
Pasteurized eggs are required by the recipe, including the whites that are folded into the filling without a separate cooking stage. Keep that requirement when shopping; the gentle yolk step isn't a reason to replace them with ordinary eggs. Separate carefully, using a clean bowl for the whites so stray yolk doesn't complicate whipping. Follow the egg product's handling guidance. The card's specific egg method is part of the recipe, not an optional detail to skip because the dessert will eventually be cold.
Coffee and biscuits need restraint
Prepare very strong espresso and let it be warm or room temperature as directed for dipping. Its flavor has to stand up to the mascarpone and whipped components. A weak cup made extra large doesn't do the same job as the measured strong coffee. The optional Grand Marnier adds orange character to that dipping liquid. If you omit it, follow the recipe's optional choice rather than automatically adding a new sweet syrup that changes what the biscuits absorb.
The dark rum in the mascarpone mixture is a separate listed ingredient. The dessert as written therefore contains alcohol even if the optional Grand Marnier is left out. Keep that clear when planning who will eat it. Ladyfingers vary in size, so the range in the card allows the two layers to cover the dish. Use the firm biscuits intended for layering, and make a rough plan for arranging them before the first one is wet. A little trimming fills gaps more neatly than forcing a soaked biscuit into an awkward space.
A fast dip leaves room for chilling
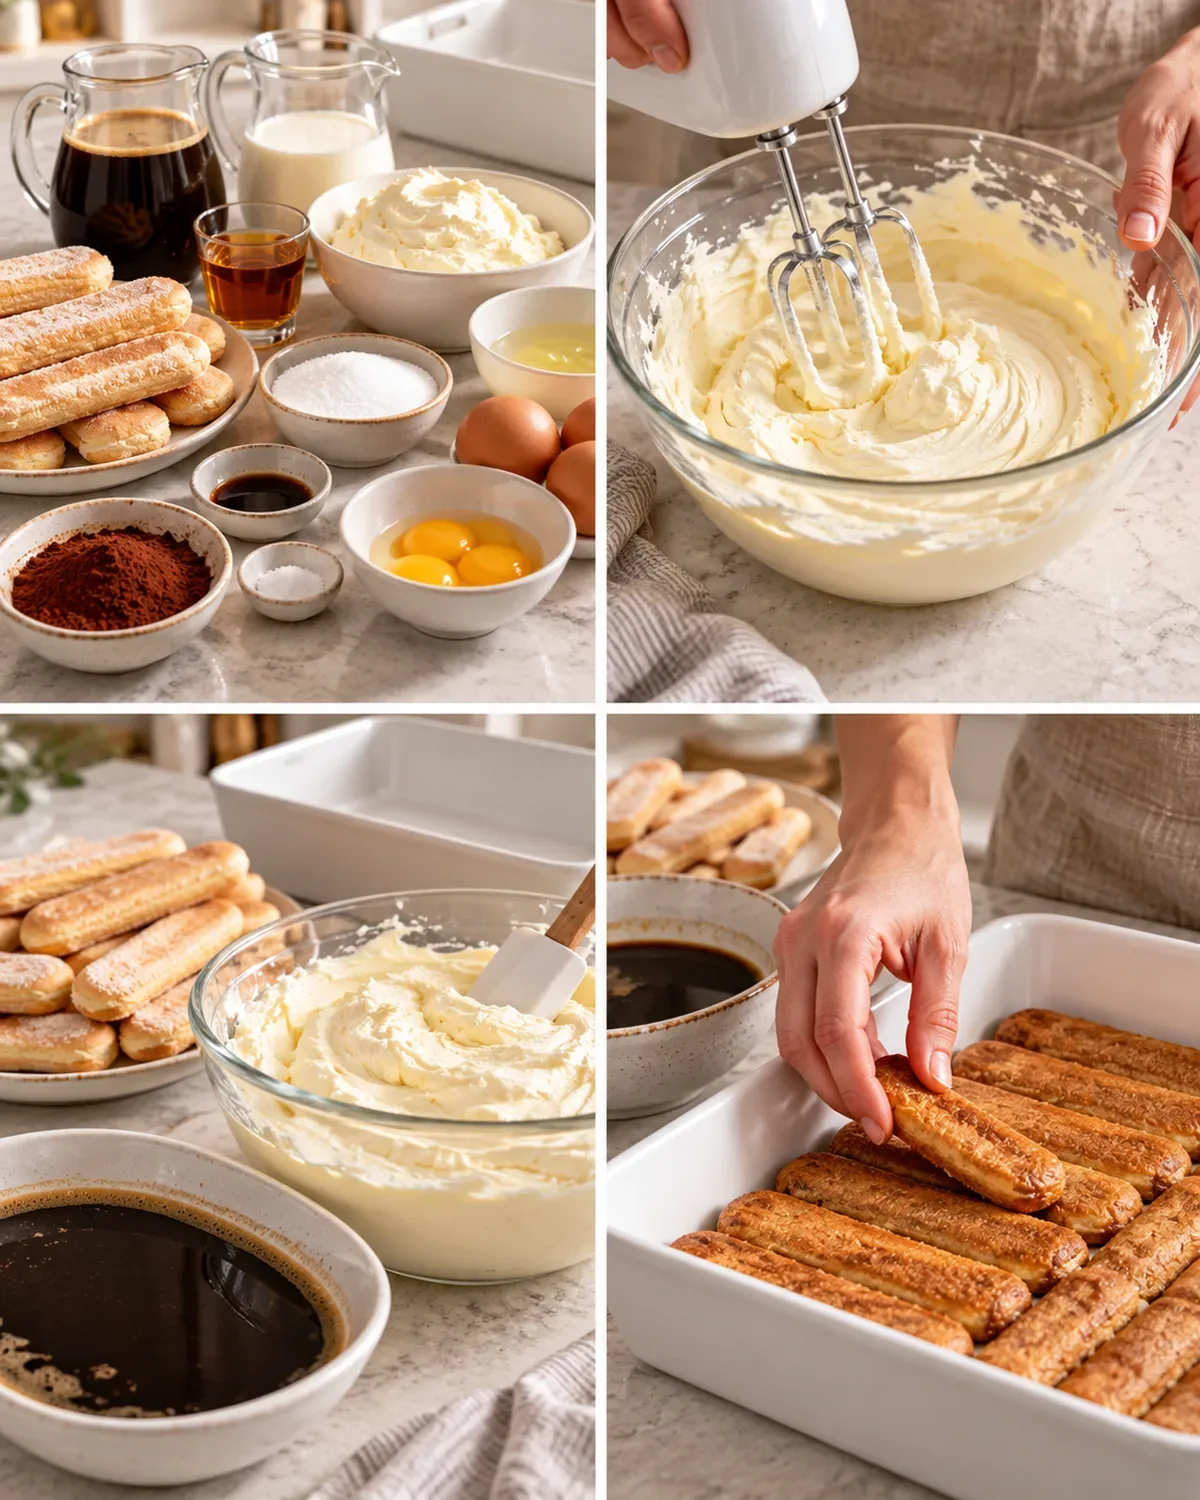
Dip one ladyfinger quickly on both sides and place it straight into the dish. Don't let a group wait in the coffee while you arrange another row. The biscuits will take up more moisture from the filling during the long rest, so they don't need to be completely saturated at the start. Their job is to become tender while remaining a layer, not to dissolve into the coffee bowl before they reach the pan.
Use half the biscuits for the first layer and reserve both the remaining biscuits and dipping mixture for the second. Fill small gaps with trimmed pieces, remembering that the cream will spread over the surface. A perfectly tiled base isn't worth mashing the biscuits flat. If one breaks, use a suitable piece in a gap rather than repeatedly handling a wet biscuit. The short, calm sequence of dip, place and continue does more for the structure than a heavy hand or a longer soak.
Step 2: Mix the mascarpone gently
Briefly combine the cold mascarpone and rum, stopping once they come together. A mixer makes the work easy to overdo because the mixture can change before you notice. Scrape the bowl as needed and use the recipe's medium setting rather than running it hard in pursuit of extra volume. Volume will come from the whipped cream and whites later. The mascarpone stage is about combining, not beating this rich cheese until it behaves like a whipped topping.
For the yolks and their portion of sugar, keep the heatproof bowl above gently simmering water rather than touching it. Whisk continuously through the warming stage so the mixture becomes pale and foamy instead of setting in little pieces around the edge. Keep the water gentle. The recipe then has you mix the yolk mixture into the mascarpone immediately; read that sequence before starting so the cheese bowl and mixer are ready. Avoid turning a short transition into a long unattended wait while searching for equipment.
Step 3: Whip and fold the cream components
Whip the cream with vanilla to peaks that hold but still bend at the tips. Watch texture as well as the approximate time. Different mixers and cream temperatures change how quickly that point arrives. Dry, overly stiff cream is harder to combine smoothly and can leave a heavier filling. Fold into the mascarpone with broad strokes, moving down through the mixture and up from the bottom, rotating the bowl rather than stirring rapidly in small circles.
Use a clean bowl and whisk for the pasteurized whites and salt, adding the remaining sugar gradually after the foamy stage as directed. Firm peaks should still look cohesive rather than dry and clumpy. Fold the whites into the filling gently until distributed, checking the bottom of the bowl for hidden streaks. Stop when the mixture is combined. Leaving obvious pockets isn't the goal of gentle handling, but continuing long after they disappear works against the air you just spent time building.
Step 4: Layer and chill the tiramisu
Spoon half the filling over the first biscuit layer in several places instead of dropping one heavy mound in the center. Ease it outward with an offset spatula so the biscuits remain where you arranged them. Aim for an even layer, then briefly dip and place the remaining ladyfingers. Press only lightly to settle that second layer. A forceful push can squeeze filling into corners and create different thicknesses across the pan.
Spread the remaining cream and give the dessert its initial two-to-three-hour uncovered refrigeration. Only then sift on the cocoa, wipe the rim, cover and refrigerate for the additional eight to nine hours described in the card. The full ten-to-twelve-hour plan matters. A quick chill that makes the surface feel cold doesn't mean the layers have settled sufficiently for slicing. Keep the dessert in the refrigerator while the rest of the meal is prepared instead of taking it out early simply to admire the finished top.
Step 5: Slice with realistic expectations
Use a sharp knife and wipe it between portions. A small serving spatula helps lift under the biscuit base instead of scooping only the soft cream from above. The first slice may be less tidy because there isn't an open space beside it yet. That doesn't mean the entire dessert has failed. Work patiently, make room to lift, and let the chilled structure help you rather than repeatedly digging into the same corner.
A watery layer can point to long biscuit dipping or a cream mixture that didn't hold its structure. Extra cocoa may cover the surface, but it won't correct moisture beneath it. If the filling is softer than you expected, respect the full chilling time before judging it. After that, serve carefully and note which earlier stage needs attention next time. Avoid beating an assembled dessert in an attempt to rescue it. The useful checks happen before layering: gentle mascarpone, correctly whipped components and quickly dipped biscuits.
Make the generous pan count
Plan the twelve servings with the actual gathering in mind. A shared dish doesn't need every slice pre-plated at once; cut what is needed and keep the remaining dessert cold. A small slice with optional fresh fruit offers a pleasant range of textures without turning the plate into another large project. The dessert already contains coffee, cocoa, dairy and the listed alcohol, so describe it clearly when offering it. People can make their own portion choices with those ingredients understood.
Cover leftovers and refrigerate for up to three days as the recipe specifies, returning the dish promptly after serving. Use a clean utensil for the portion you plan to save, and avoid leaving the whole pan on the table through a long meal. The cocoa may look darker as it absorbs moisture; a freshly sifted appearance isn't a reason to keep adding thick layers over the remainder. This is a dessert to plan, prepare gently and enjoy within its stated storage window, with the long chill doing the work it was meant to do.
An overnight dessert appeals to me because the refrigerator can do its work while I'm busy with the family. Give this tiramisu its full two-stage chill before slicing; a rushed middle won't hold neatly. Fresh berries are a lovely side for a shared meal. Small slices let people choose how much they want, which suits a table with different appetites like ours.
Joy.Layer espresso-dipped ladyfingers with mascarpone cream for classic tiramisu. Follow the pasteurized-egg method and allow time to chill.
Tap each ingredient as it goes into your basket or bowl.
Follow the steps in order to make this recipe.
Set out a 9 × 13-inch dish that holds at least 12–14 cups. This dessert needs space for two biscuit layers and two cream layers, so check the capacity before you start.
Stir espresso and Grand Marnier in a shallow dish. Give each ladyfinger a fast dip on both sides, then arrange half of them across the base. Trim a few to fill gaps. Keep the remaining biscuits and coffee mixture for the second layer; soaking the biscuits longer will make the dessert soggy.
Briefly mix the cold mascarpone and rum on medium speed with a paddle or whisk attachment. Stop as soon as they come together, and set the bowl aside. Mascarpone needs a gentle hand here.
Set a heatproof bowl over gently simmering water, keeping its base above the water, or use a double boiler. Whisk the yolks with ¼ cup (50 g) sugar for about 5 minutes, until pale and foamy. Remove from the heat and immediately mix into the mascarpone on medium speed.
Whip the cream and vanilla on medium-high for about 3 minutes. Stop when the peaks hold their shape but the tips still bend; firm, dry cream is harder to fold. Fold the cream into the mascarpone with slow, broad strokes.
Using a clean bowl and whisk attachment, beat the pasteurized egg whites and salt on medium-high for about 1 minute. Once foamy, increase to high and gradually add the remaining ¼ cup (50 g) sugar. Beat about 4–5 minutes to firm peaks, stopping before the whites look dry. Gently fold into the cream mixture.
Spoon half the cream over the first biscuit layer and ease it into an even layer with an offset spatula. Keep the biscuits in place as you spread.
Briefly dip the remaining ladyfingers in the reserved coffee mixture and arrange them over the cream. Press lightly to settle the layer, then spread the rest of the cream over it. Refrigerate uncovered for 2–3 hours; the generous filling should fit the dish selected in step 1.
Once the cream has chilled, sift a generous covering of cocoa over the surface. Wipe the dish rim, cover with wrap or foil, and refrigerate another 8–9 hours, or up to 1 day. Leave this chilling time in your plans—it helps the layers hold together.
Cut the chilled dessert with a sharp knife, wiping the blade between portions. Slide a small serving spatula under each slice to lift it out neatly.
Cover the remaining tiramisu and refrigerate for up to 3 days. Return it to the refrigerator promptly after serving.
Layer espresso-dipped ladyfingers with mascarpone cream for classic tiramisu. Follow the pasteurized-egg method and allow time to chill.
Joy’s kitchen note · An overnight dessert appeals to me because the refrigerator can do its work while I'm busy with the family. Give this tiramisu its full two-stage chill before slicing; a rushed middle won't hold neatly. Fresh berries are a lovely side for a shared meal. Small slices let people choose how much they want, which suits a table with different appetites like ours.