Time30 min active preparation + 1–2 hr jelly chilling
Makes6 dessert bowls
CategoryDessert
Tastefully Planned,
Joyfully Cooked.

Build chilled Japanese dessert bowls with kanten jelly, freshly cooked mochi balls, fruit, sweet red beans and green tea ice cream.

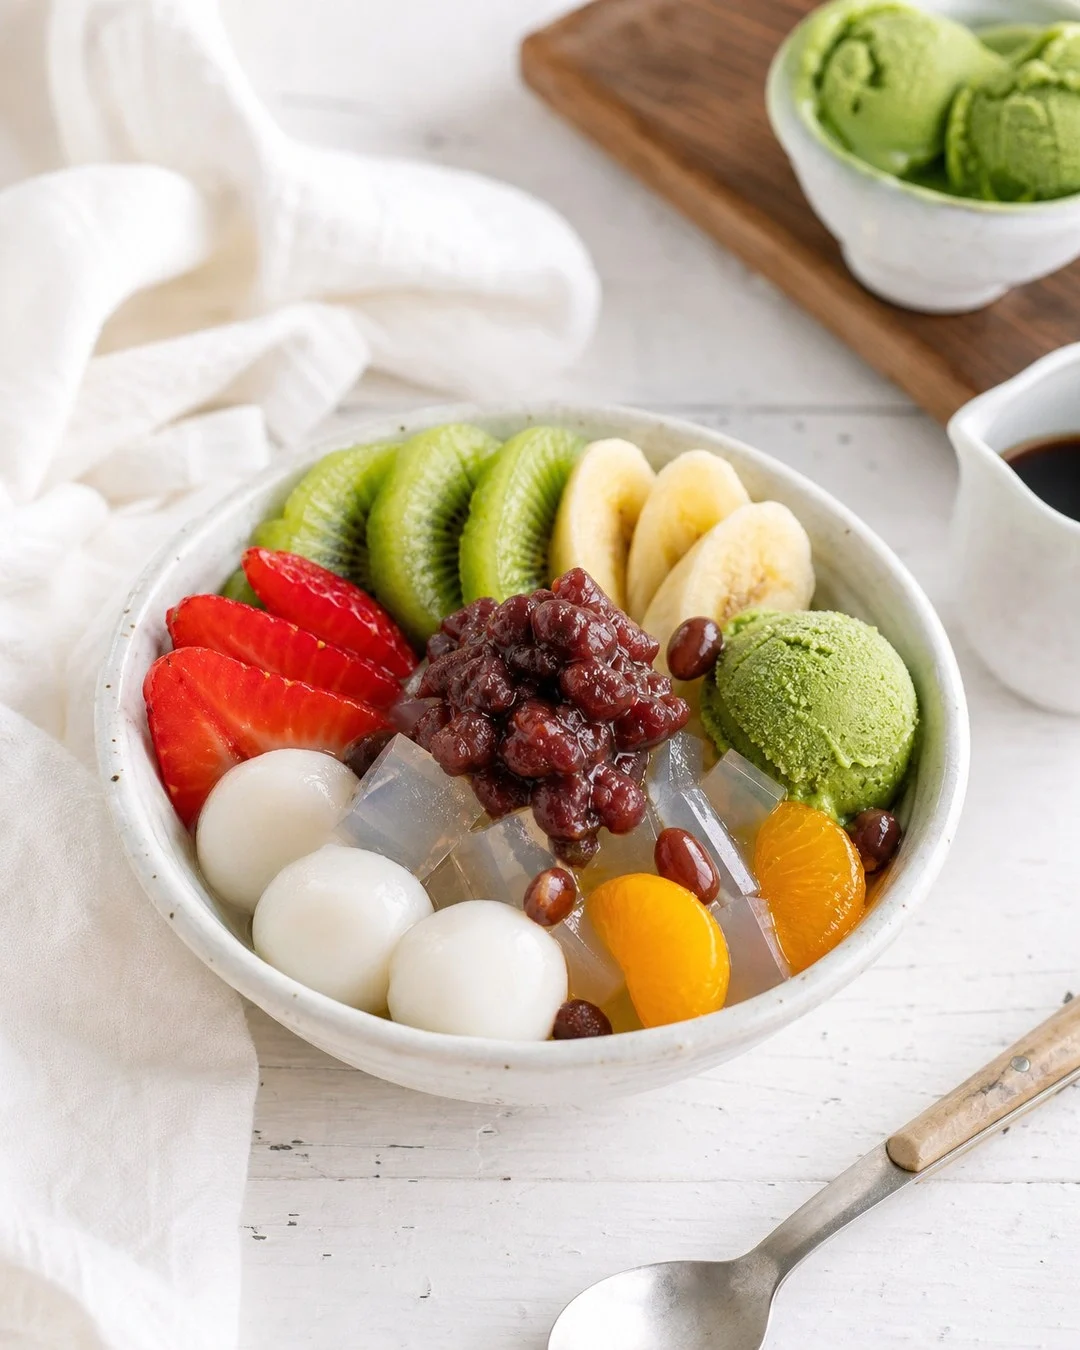
A bowl built from small contrasts
Anmitsu gives you a reason to pay attention to the space between ingredients. A cool cube of kanten, a tender mochi ball and a spoonful of sweet red bean paste each feel different. The fruit adds juice, while green tea ice cream slowly softens into the bowl. I like a dessert that lets those individual qualities stay visible. There is no need to stir everything into one uniform sweetness before taking the first bite.
This version makes six dessert bowls, so it helps to think of the work as preparing a few separate components. The jelly needs its quiet time in the refrigerator. The mochi deserves attention closer to serving. Fruit can be arranged while the jelly chills, with the banana left until the end. With the components ready in stages, the active work stays manageable and the ice cream can go into each fresh bowl just before serving.
What the kanten brings
Kanten is the structure beneath the softer toppings. Here it is made with water and a small amount of sugar, so the cubes provide a clean, lightly sweet contrast to anko and syrup. The powder must be heated as the recipe directs; stirring it into cool water and waiting will not give the same result. Its modest flavor is useful, because a strongly flavored jelly could compete with the green tea, beans and fruit.
Read the amount and preparation directions on your package before starting. The recipe allows the package amount for 500 milliliters of liquid because powdered agar products can differ. Plain powdered kanten is the intended ingredient, not a flavored dessert mix. I wouldn't treat gelatin as a direct substitute here: it changes both the handling and the texture. Keeping the jelly simple also means you can use the optional toppings selectively without changing its basic job.
Step 1: Set and chill the kanten jelly
A shallow heatproof container helps the jelly set in a layer that is easy to cut into bite-size cubes. Choose the container before heating the saucepan, and make room for it in the refrigerator. Once the steam has subsided, the jelly can chill until it is fully cold and firm. The one to two hours in the recipe are part of the plan, not idle time that can always be squeezed out at the end.
Wait until the jelly has a set surface and holds a clean cut, then lift out the cubes gently. Cubes that are reasonably similar in size distribute more evenly among the six bowls, though they don't need to be measured like pastry. Keep them in their own container until assembly. A bowl full of jelly and fruit can look finished, but adding the mochi and ice cream later is what preserves the different textures that make the dessert interesting.
Step 2: Mix the shiratamako dough
Shiratamako glutinous rice flour makes the mochi balls tender and pleasantly chewy. Glutinous describes the sticky quality of the cooked rice; ordinary rice flour does not behave the same way. Water is added gradually because the feel of the dough matters more than using every last drop in the measuring cup. You want a soft, smooth dough that holds together, with neither dry cracks nor a wet coating on your hands.
Start with less than the full amount of water and work it through the flour before deciding what the dough needs. A floury, crumbling edge points toward dryness, while a sagging, sticky mass suggests too much water. Small adjustments are easier than rescuing a mixture that has been flooded. This is a useful moment to slow down: a dough that is comfortable to shape will also make it easier to portion eighteen balls with consistent centers.
Why the mochi balls have a hollow
The slight hollow pressed into each ball is a practical detail, not just decoration. It reduces the thickness at the center so the outside and inside have a better chance of cooking together. Keep the balls small and similar, and use gently boiling water rather than a pot that throws them around. Floating is the cue to begin the additional cooking time in the recipe; it is not the signal to remove them immediately.
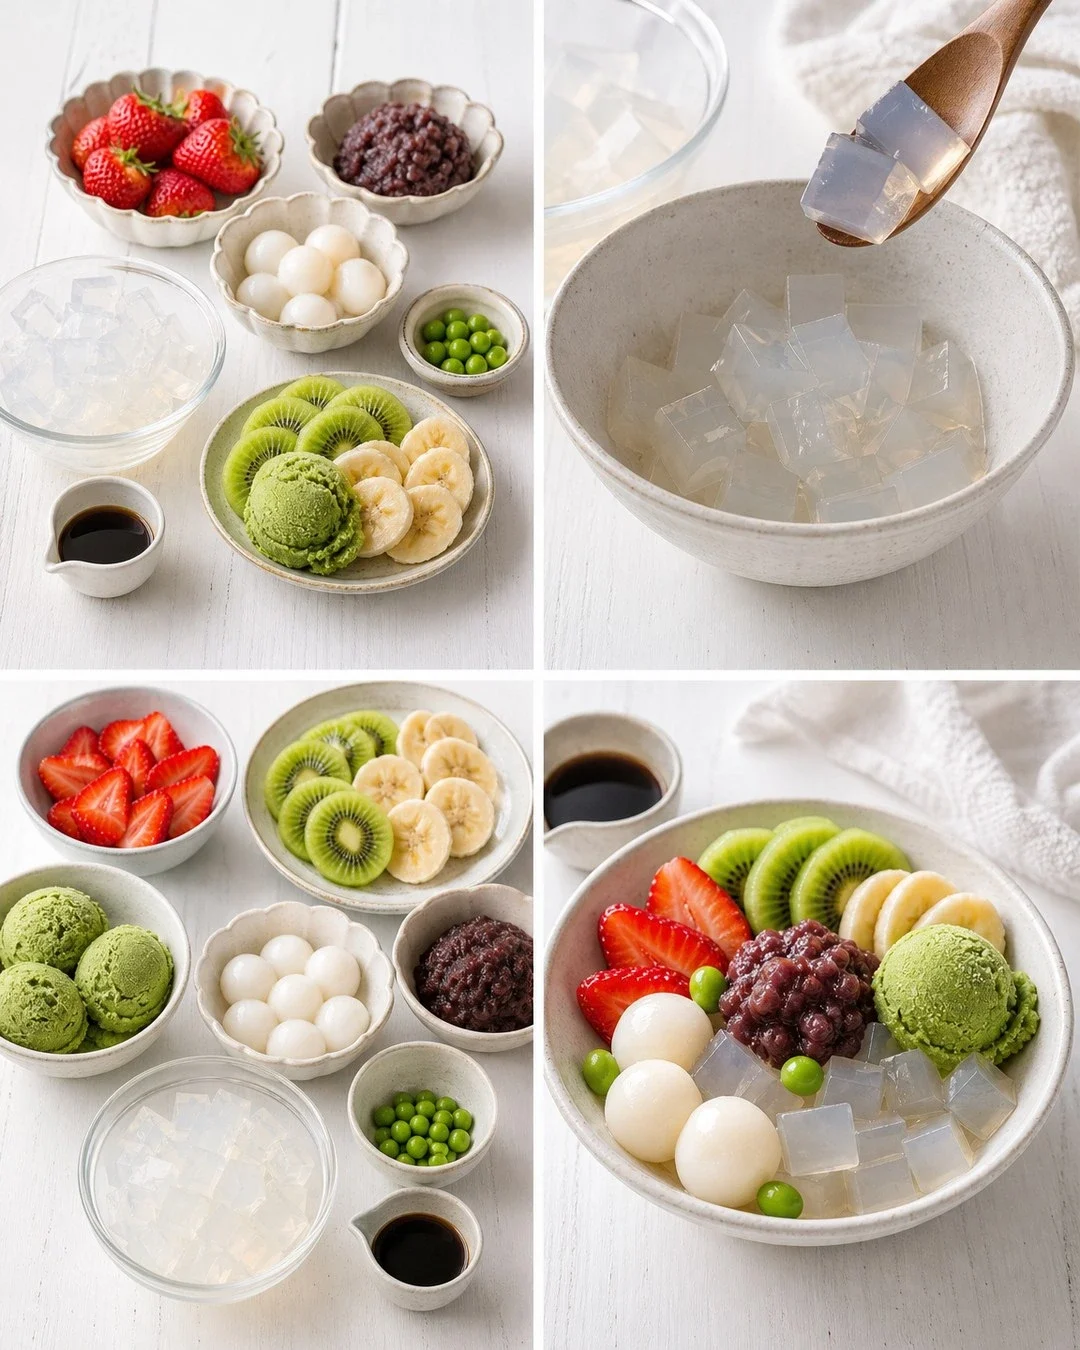
The cold-water transfer stops the cooking and helps the surface settle before draining. Set that water nearby before the first ball goes into the pot, along with a utensil that can lift the mochi without crushing it. Once drained, the balls belong in the serving plan rather than in a long holding period. Freshly cooked mochi gives this bowl its best contrast with cold jelly, and making it near serving avoids asking refrigeration to preserve the same soft texture.
Step 3: Prepare the fruit
Strawberries, kiwi and banana give this dessert more than color. Strawberries bring small juicy bites, kiwi adds a brighter edge, and banana offers a softer, mellow piece beside the firmer jelly. Slice them into pieces that can be picked up with a spoon along with another topping. A very large slice can make the bowl awkward to eat, even if it looks attractive in an arrangement.
Drain the optional mandarin segments so their liquid doesn't collect underneath the ice cream. Slice the banana close to serving as the recipe directs, and keep the rest of the prepared fruit covered and cold while you finish the mochi. I like to consider what remains after preparing fruit: unused strawberries or kiwi can join another snack or breakfast, rather than cutting every piece in the package simply because it is on the counter. The recipe needs a measured assortment, not an overflowing fruit platter.
Anko, beans and syrup play different parts
Sweet red bean paste gives the dessert a concentrated, creamy sweetness. A tablespoon in each bowl is enough to make its presence clear without covering the jelly. The optional red peas or adzuki beans provide a separate bite, so they are not interchangeable with a spoonful of paste in how they feel. If you use them, they must already be fully cooked. Raw dried beans have no place in the assembly stage of this recipe.
Kuromitsu brings a deeper brown-sugar flavor that can run between the other components. Offering it separately is especially useful because the fruit, anko and ice cream are already sweet. Each person can begin with a little and decide whether more is welcome. I prefer that small choice to drowning the bowl in syrup before it reaches the table. It also leaves the pale jelly and colorful fruit easy to see, which is part of the pleasure of this dessert.
Step 4: Assemble the dessert bowls
Set out the bowls, serving spoons and prepared components before scooping the ice cream. Distributing the jelly first makes it easier to divide the base fairly, then fruit and three mochi balls can find their place in each bowl. The anko can sit in one distinct mound. Leave a small clear area for the ice cream so it doesn't immediately roll off a pile of fruit or disappear beneath the syrup.
The small green tea scoop brings a creamy, slightly bitter note that balances the other sweet elements. Add it when everyone is nearly ready to eat. Anmitsu doesn't need a long decorative pause after this point; the shifting texture of ice cream is part of the dessert. For a relaxed gathering, the ingredients can be ready in separate dishes while the final bowls are assembled close to serving. Keep the syrup within reach and let the first spoonful guide the amount.
Planning what to keep separate
This recipe is an opportunity to plan a dessert without buying a second large centerpiece. Six bowls give a clear shopping target, and the optional mandarins and cooked beans can stay optional. If another use for them isn't already in mind, the main combination has plenty of variety on its own. Higher grocery prices make those small decisions feel worthwhile to me: a well-chosen assortment is more useful than an extra container opened for a single spoonful.
Store unused components separately, following their package directions where relevant. An assembled bowl changes quickly as fruit releases juice and ice cream melts, so it is a poor candidate for saving intact. The mochi also firms as it chills, which is another reason to cook only what you plan to serve. Before assembling fewer bowls, divide the prepared components deliberately and keep the remainder cold. A little forethought protects the distinct textures instead of asking leftovers to behave like a freshly built dessert.
I arrange the jelly, fruit and red beans before taking out the ice cream. Put the syrup on the table separately and let everyone finish their own bowl. The fresh mochi belongs close to serving time; keeping the other components ready makes that last step feel easy.
Joy.Build chilled Japanese dessert bowls with kanten jelly, freshly cooked mochi balls, fruit, sweet red beans and green tea ice cream.
Tap each ingredient as it goes into your basket or bowl.
Follow the steps in order to make this recipe.
Whisk the kanten into the water in a saucepan. Bring to a boil while stirring, then simmer gently for about 2 minutes or follow the package directions. Stir in the sugar until dissolved.
Pour into a shallow heatproof container, let the steam subside and refrigerate until fully set and cold, about 1–2 hours. Cut into bite-size cubes.
Add the water gradually to the rice flour, kneading until a soft, smooth dough forms. You may not need every drop. It should hold together without cracking or feeling wet.
Divide into 18 small balls and press a slight hollow in each center. Lower into gently boiling water. Once they rise to the surface, cook about 2 minutes more, until cooked through. Transfer to cold water, then drain.
Trim and slice the strawberries and kiwis. Slice the banana close to serving. Drain mandarin segments if using.
Divide the cold jelly, fruit and freshly cooked mochi balls between 6 bowls. Add 1 tablespoon red bean paste and a small scoop of ice cream to each. Add optional fully cooked peas or beans.
Offer the syrup separately so each person can choose the amount. Serve while the ice cream is cold and the mochi is tender. Store unused components separately rather than saving fully assembled bowls.
Build chilled Japanese dessert bowls with kanten jelly, freshly cooked mochi balls, fruit, sweet red beans and green tea ice cream.
Joy’s kitchen note · I arrange the jelly, fruit and red beans before taking out the ice cream. Put the syrup on the table separately and let everyone finish their own bowl. The fresh mochi belongs close to serving time; keeping the other components ready makes that last step feel easy.