Time20 min prep + 15 min marinating + 30 min batch frying and assembly (coating prep overlaps)
Makes4 servings · 8 bao
CategoryAsian Fusion
Tastefully Planned,
Joyfully Cooked.

Fill steamed bao buns with crispy chicken, gochujang glaze and quick pickles. Prepare the cold toppings first and assemble close to serving.

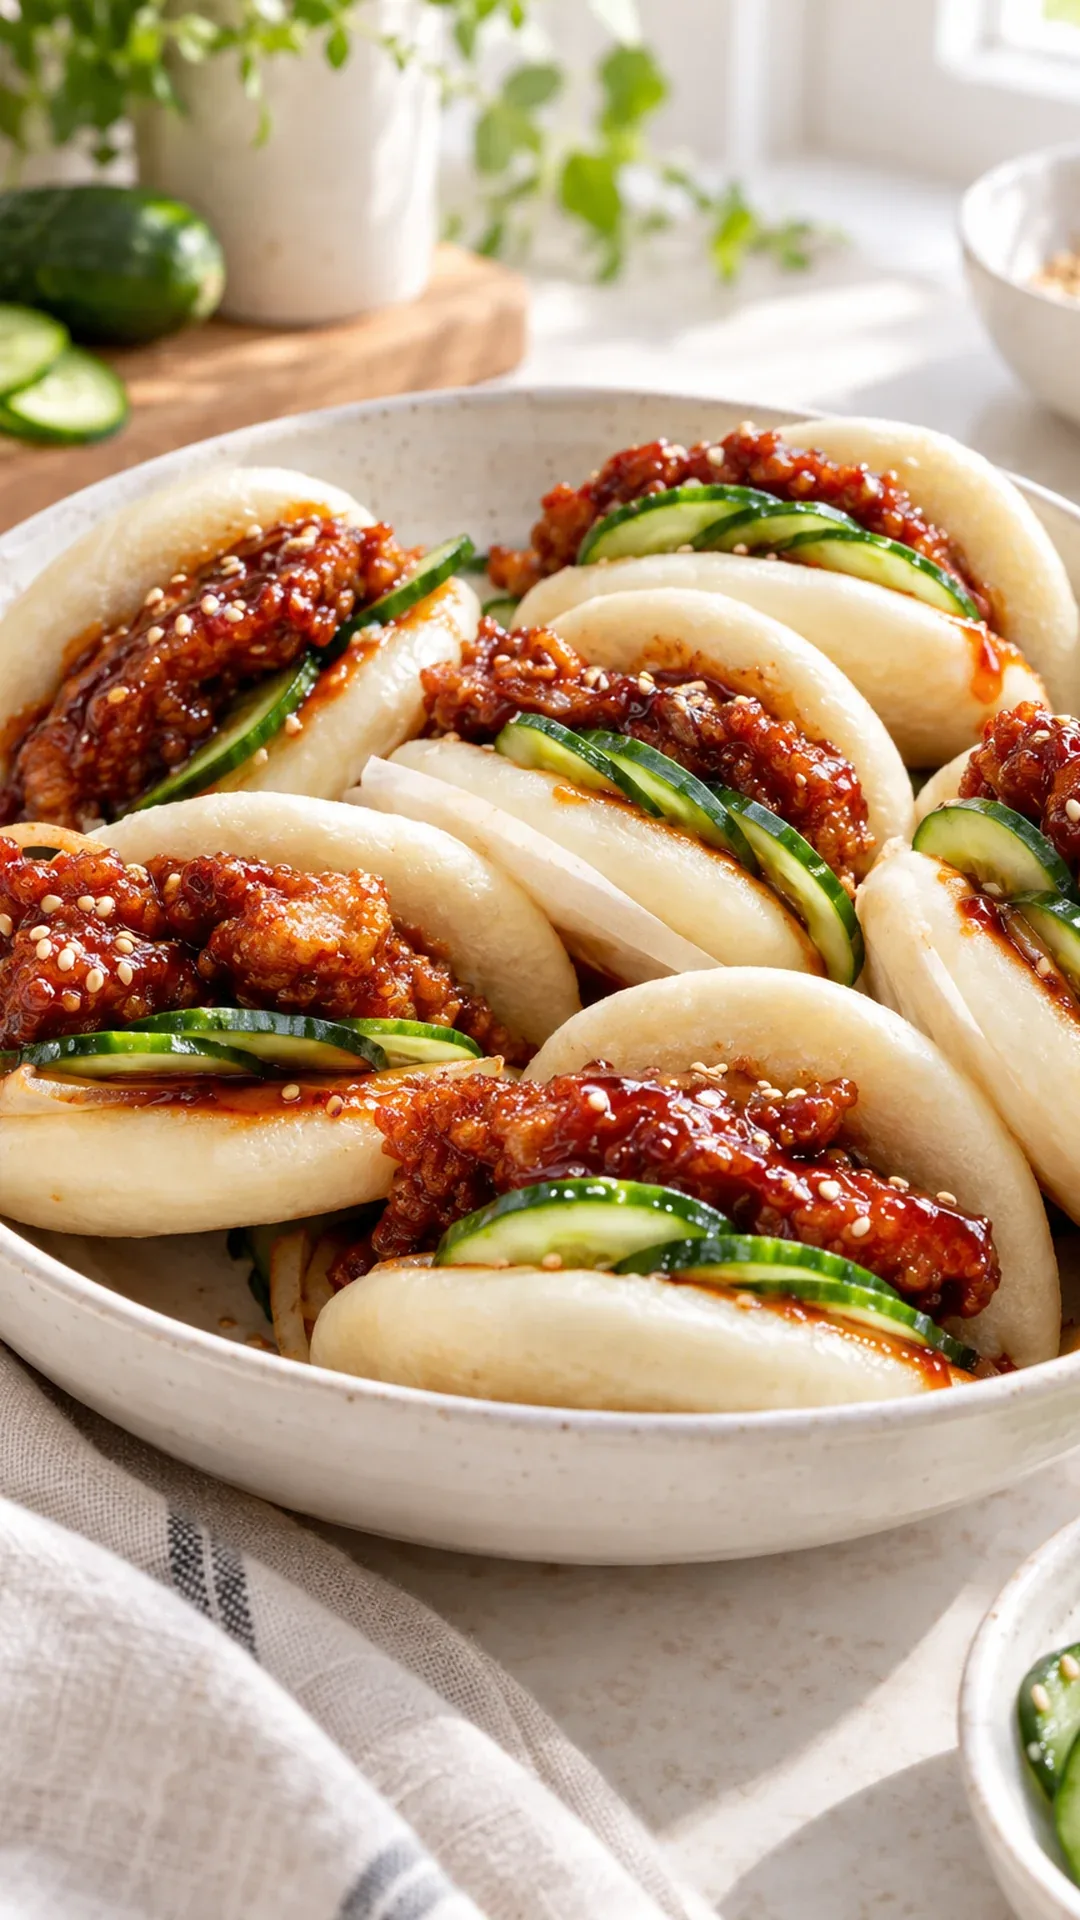
Crisp chicken and a soft bun
A bao filled with Korean-style glazed chicken brings together two very different textures. The bun is soft and yielding; the chicken has a crisp coating underneath its sticky glaze. Quick pickles and scallions interrupt the richness with acidity and a fresh onion bite. The result is playful, but it still benefits from practical organization. Frying, warming buns and glazing chicken are easier when you decide their order before the oil is hot.
This recipe makes eight bao for four servings. Two buns per person give you a useful starting point; appetites and bao sizes will shape the final portions. A simple vegetable side can complete the meal without creating another last-minute cooking job. I like this kind of cross-cultural cooking when the flavors remain clear. The chicken keeps its gochujang character, and the soft bun gives those familiar flavors a different setting.
Step 1: Start with the buns and toppings
The ingredient list calls for steamed bao buns, so check how yours need to be prepared or reheated. Frozen buns, refrigerated buns and freshly made buns may require different handling. Read the package before you begin the chicken, and make sure the steamer or warming setup is ready. A beautiful batch of fried chicken can lose its advantage while you search for a lid or discover that the buns need longer than expected.
Have the quick pickles drained and the scallions sliced before frying. Wet toppings can quickly soften both the coating and the inside of the bun, so let excess pickle liquid stay behind. The pickles are there for brightness and crunch, not to provide a second sauce. Keep the toppings in separate small dishes if people want different amounts. That also gives you a neater assembly area and makes it easier to build only the bao you are about to serve.
Step 2: Keep the chicken pieces even
Boneless chicken thighs suit bite-size frying because they offer a flavorful center that fits comfortably in a bun. Trim as needed and cut pieces to a reasonably similar size. A mixture of tiny scraps and large chunks is harder to fry: the small pieces can become dark while the larger ones still need cooking. Think about the size of your bao as well as the size of the chicken package.
The buttermilk mixture gives seasoning a place to cling and provides moisture for the flour-cornstarch coating. Keep the chicken refrigerated during the stated marinating time. This is a short preparation step, so you can use that interval to organize the coating, check the buns and mix the glaze ingredients. Keep raw-chicken tools in a defined area and set out a separate clean utensil and plate for the cooked pieces before frying begins.
Understand the flour and cornstarch coating
Flour forms the main body of the crust, while cornstarch helps create a lighter, crisp finish. Mix them thoroughly before adding chicken so each piece receives a similar coating. Lift the chicken from the buttermilk mixture, allowing excess liquid to fall away, then coat the surface completely. Shake off any loose powder before frying. This keeps excess coating out of the oil, where it can fall away and darken between batches.
The coating should cling to the chicken without becoming a thick shell of wet flour. Work in manageable portions so you can see what you are doing. Avoid pressing a large pile of coated pieces together while you prepare the pan; touching wet surfaces can stick and pull the coating away. Any flour mixture that has contacted raw chicken belongs with the raw preparation materials. It is not a clean ingredient to save for an unrelated later meal.
Step 3: Fry the chicken in manageable batches
Use the stated oil temperature as your target and check it with an appropriate thermometer. Oil that is too cool can give the coating a heavy feel, while excessive heat can darken the outside before the center is ready. The temperature changes when chicken enters the oil, so leave enough room to manage the pieces and allow the oil to recover between batches. The batch schedule is part of the cooking time, not an inconvenience to solve by crowding.
Lower pieces carefully and keep the work area free of unnecessary water. A pan with suitable depth and room above the oil helps contain bubbling, but it still requires attention. Have a clean draining area ready before the first batch finishes. The outside should become deeply golden, yet color is only one cue. Check the thickest piece as directed in the recipe, using the stated chicken temperature before calling the batch done.
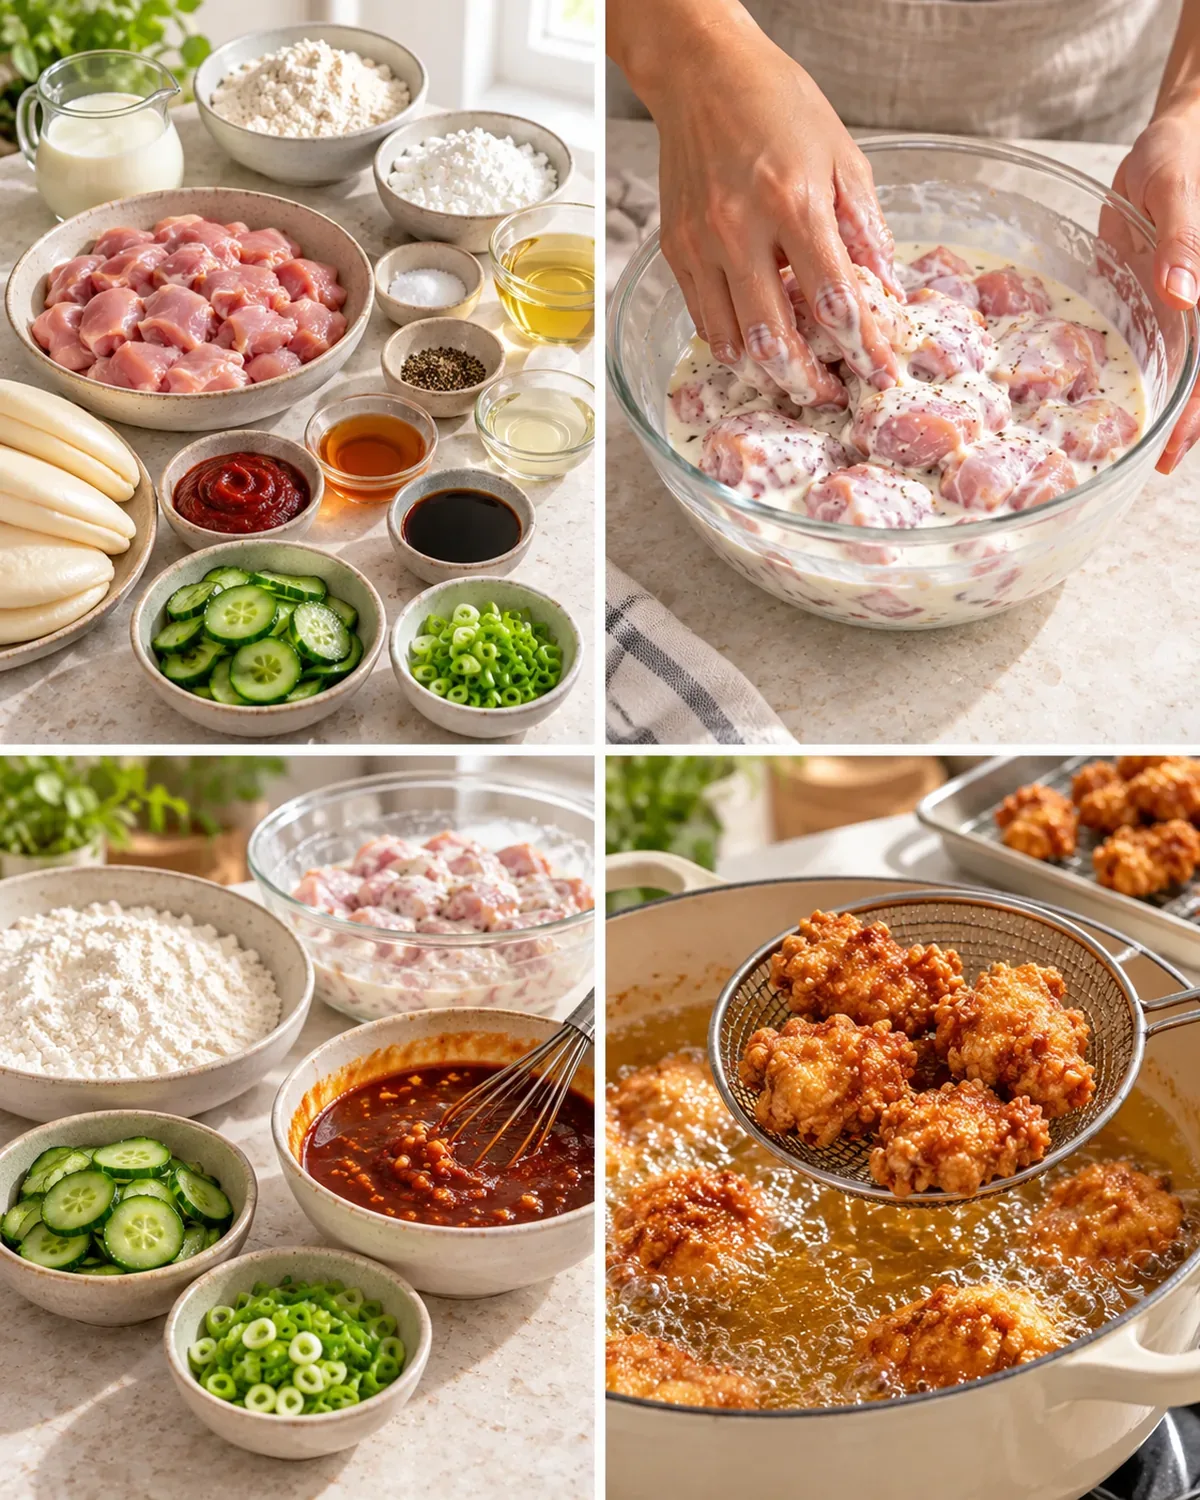
Step 4: Drain the cooked chicken without trapping steam
Set cooked chicken where steam can escape rather than piling it into a deep bowl immediately. A crowded mound traps moisture against the coating you have just worked to crisp. Let excess surface oil drain while the next batch cooks. Keep cooked pieces and clean utensils separate from the buttermilk bowl and raw chicken preparation area, even when the counter starts to feel busy.
The chicken will eventually meet a sticky glaze, so its crispness has a limited window. That is a reason to organize assembly well, not to make an unrealistic promise that the coating will stay crunchy indefinitely. Finish the batches, have warm buns ready and move toward serving. If your pan is small, allow the full batch-cooking time in the schedule. A relaxed start gives you more control than trying to compress the frying into the last few minutes before dinner.
Step 5: Warm the glaze gently
Gochujang, honey, soy sauce, rice vinegar and garlic make a concentrated glaze. Warm it until it combines smoothly and the garlic aroma joins the sauce. It does not need prolonged hard boiling. The honey and chile paste can become increasingly sticky and catch on the pan if the heat stays high after the mixture is ready. A small pan and a watchful eye are more useful here than an aggressive burner setting.
Hold the glaze warm off the heat as described in the kitchen note, then toss it with the cooked chicken near assembly. The goal is a thin glossy layer around the pieces, with enough texture still visible beneath it. Scrape and fold gently instead of crushing the coating with vigorous stirring. If you want people to choose their sauce level, set aside clean glaze before it touches any raw preparation materials and offer it with the finished bao.
Step 6: Build bao that are comfortable to eat
Open each warm bun gently and fit in a manageable amount of chicken. A bun overflowing with large pieces can look generous but be difficult to pick up, and squeezing it closed presses sauce and steam into the bread. Add the pickles and scallions where they can share a bite with the chicken. Their sharper flavors work best when distributed through the filling rather than sitting entirely at one end.
Assemble in a short round for immediate serving instead of filling every bun far in advance. That protects the bun from moisture and gives each portion a better temperature contrast. Put any extra toppings beside the platter. A simple fresh side adds variety to the meal without competing with the fried chicken. Since the glaze already supplies strong seasoning, the rest of the plate can be gentle and straightforward.
Shop and prepare with the whole meal in view
Bao are often sold in a package that contains more than eight buns. Check the count and storage directions before buying so the remainder has a clear plan. Frozen buns can be convenient when their package allows you to take out only what you need. The same idea applies to chicken and buttermilk: match package size to planned meals rather than assuming unused ingredients will find a purpose on their own.
This is a dinner where an organized counter can save more effort than an extra convenience ingredient. Put buns, glaze and toppings in their final work areas before frying, then clear the raw-chicken area once it is no longer needed. You can prepare the toppings and sauce ingredients ahead of the hot cooking stage without claiming the finished bao are a make-ahead crisp food. That distinction makes the cooking plan more honest and much easier to follow.
Save components rather than assembled buns
Fried, glazed chicken changes texture as it cools, and a filled bao absorbs moisture from everything inside it. If you expect extra portions, keep unused buns and toppings separate and assemble only what will be eaten. Refrigerate cooked chicken promptly in a suitable container, follow bun-package storage guidance, and keep track of preparation time. Reheat the chicken thoroughly before building another warm serving.
Do not expect a reheated glazed piece to have the exact crust of a freshly fried one. Gentle planning of quantities gives a better result than trying to preserve a fully assembled platter for later. Use clean utensils for toppings that will be saved, and avoid returning food from used plates to their containers. The recipe is at its most enjoyable when soft bun, bright pickle and freshly glazed chicken meet shortly before the first bite.
I like the playful meeting of Korean chicken and a soft bun, with room for my family's different tastes. Keep cucumber and extra glaze beside the bao instead of putting the same amount in every one. Hold the sauce warm but off the heat so it stays glossy, then coat the chicken near assembly. A little planning keeps the final job from becoming a rushed pile of wet buns.
Joy.Fill steamed bao buns with crispy chicken, gochujang glaze and quick pickles. Prepare the cold toppings first and assemble close to serving.
Tap each ingredient as it goes into your basket or bowl.
Follow the steps in order to make this recipe.
Toss chicken with buttermilk, salt and pepper. Refrigerate for 15 minutes.
Combine flour and cornstarch. Lift chicken from buttermilk, coat thoroughly and shake off excess.
Heat oil to 350°F. Fry chicken in batches until deeply golden and cooked through, about 5–7 minutes. Check the thickest piece reaches 165°F.
Warm gochujang, honey, soy, vinegar and garlic in a small pan. Toss with chicken and tuck into steamed bao with pickles and scallions.
Fill steamed bao buns with crispy chicken, gochujang glaze and quick pickles. Prepare the cold toppings first and assemble close to serving.
Joy’s kitchen note · I like the playful meeting of Korean chicken and a soft bun, with room for my family's different tastes. Keep cucumber and extra glaze beside the bao instead of putting the same amount in every one. Hold the sauce warm but off the heat so it stays glossy, then coat the chicken near assembly. A little planning keeps the final job from becoming a rushed pile of wet buns.